Long time, no post! I’m restarting my blog with a full process breakdown of a side project that I’ve been working for the last few… years!? It’ll touch on modeling for 3D printing, painting prints, making manuals, building boxes, and the joys of finishing a project despite the momentum – let’s dig in!

First, a reintroduction. Hi, I’m Ben. Last time I wrote here I was just breaking into the games industry. It’s been a while. I am now a Senior Technical Artist II with a decade under my belt – this story picks up three years ago, not long after I started at Uncapped Games working on the project that would become Battle Aces.
Project Origins
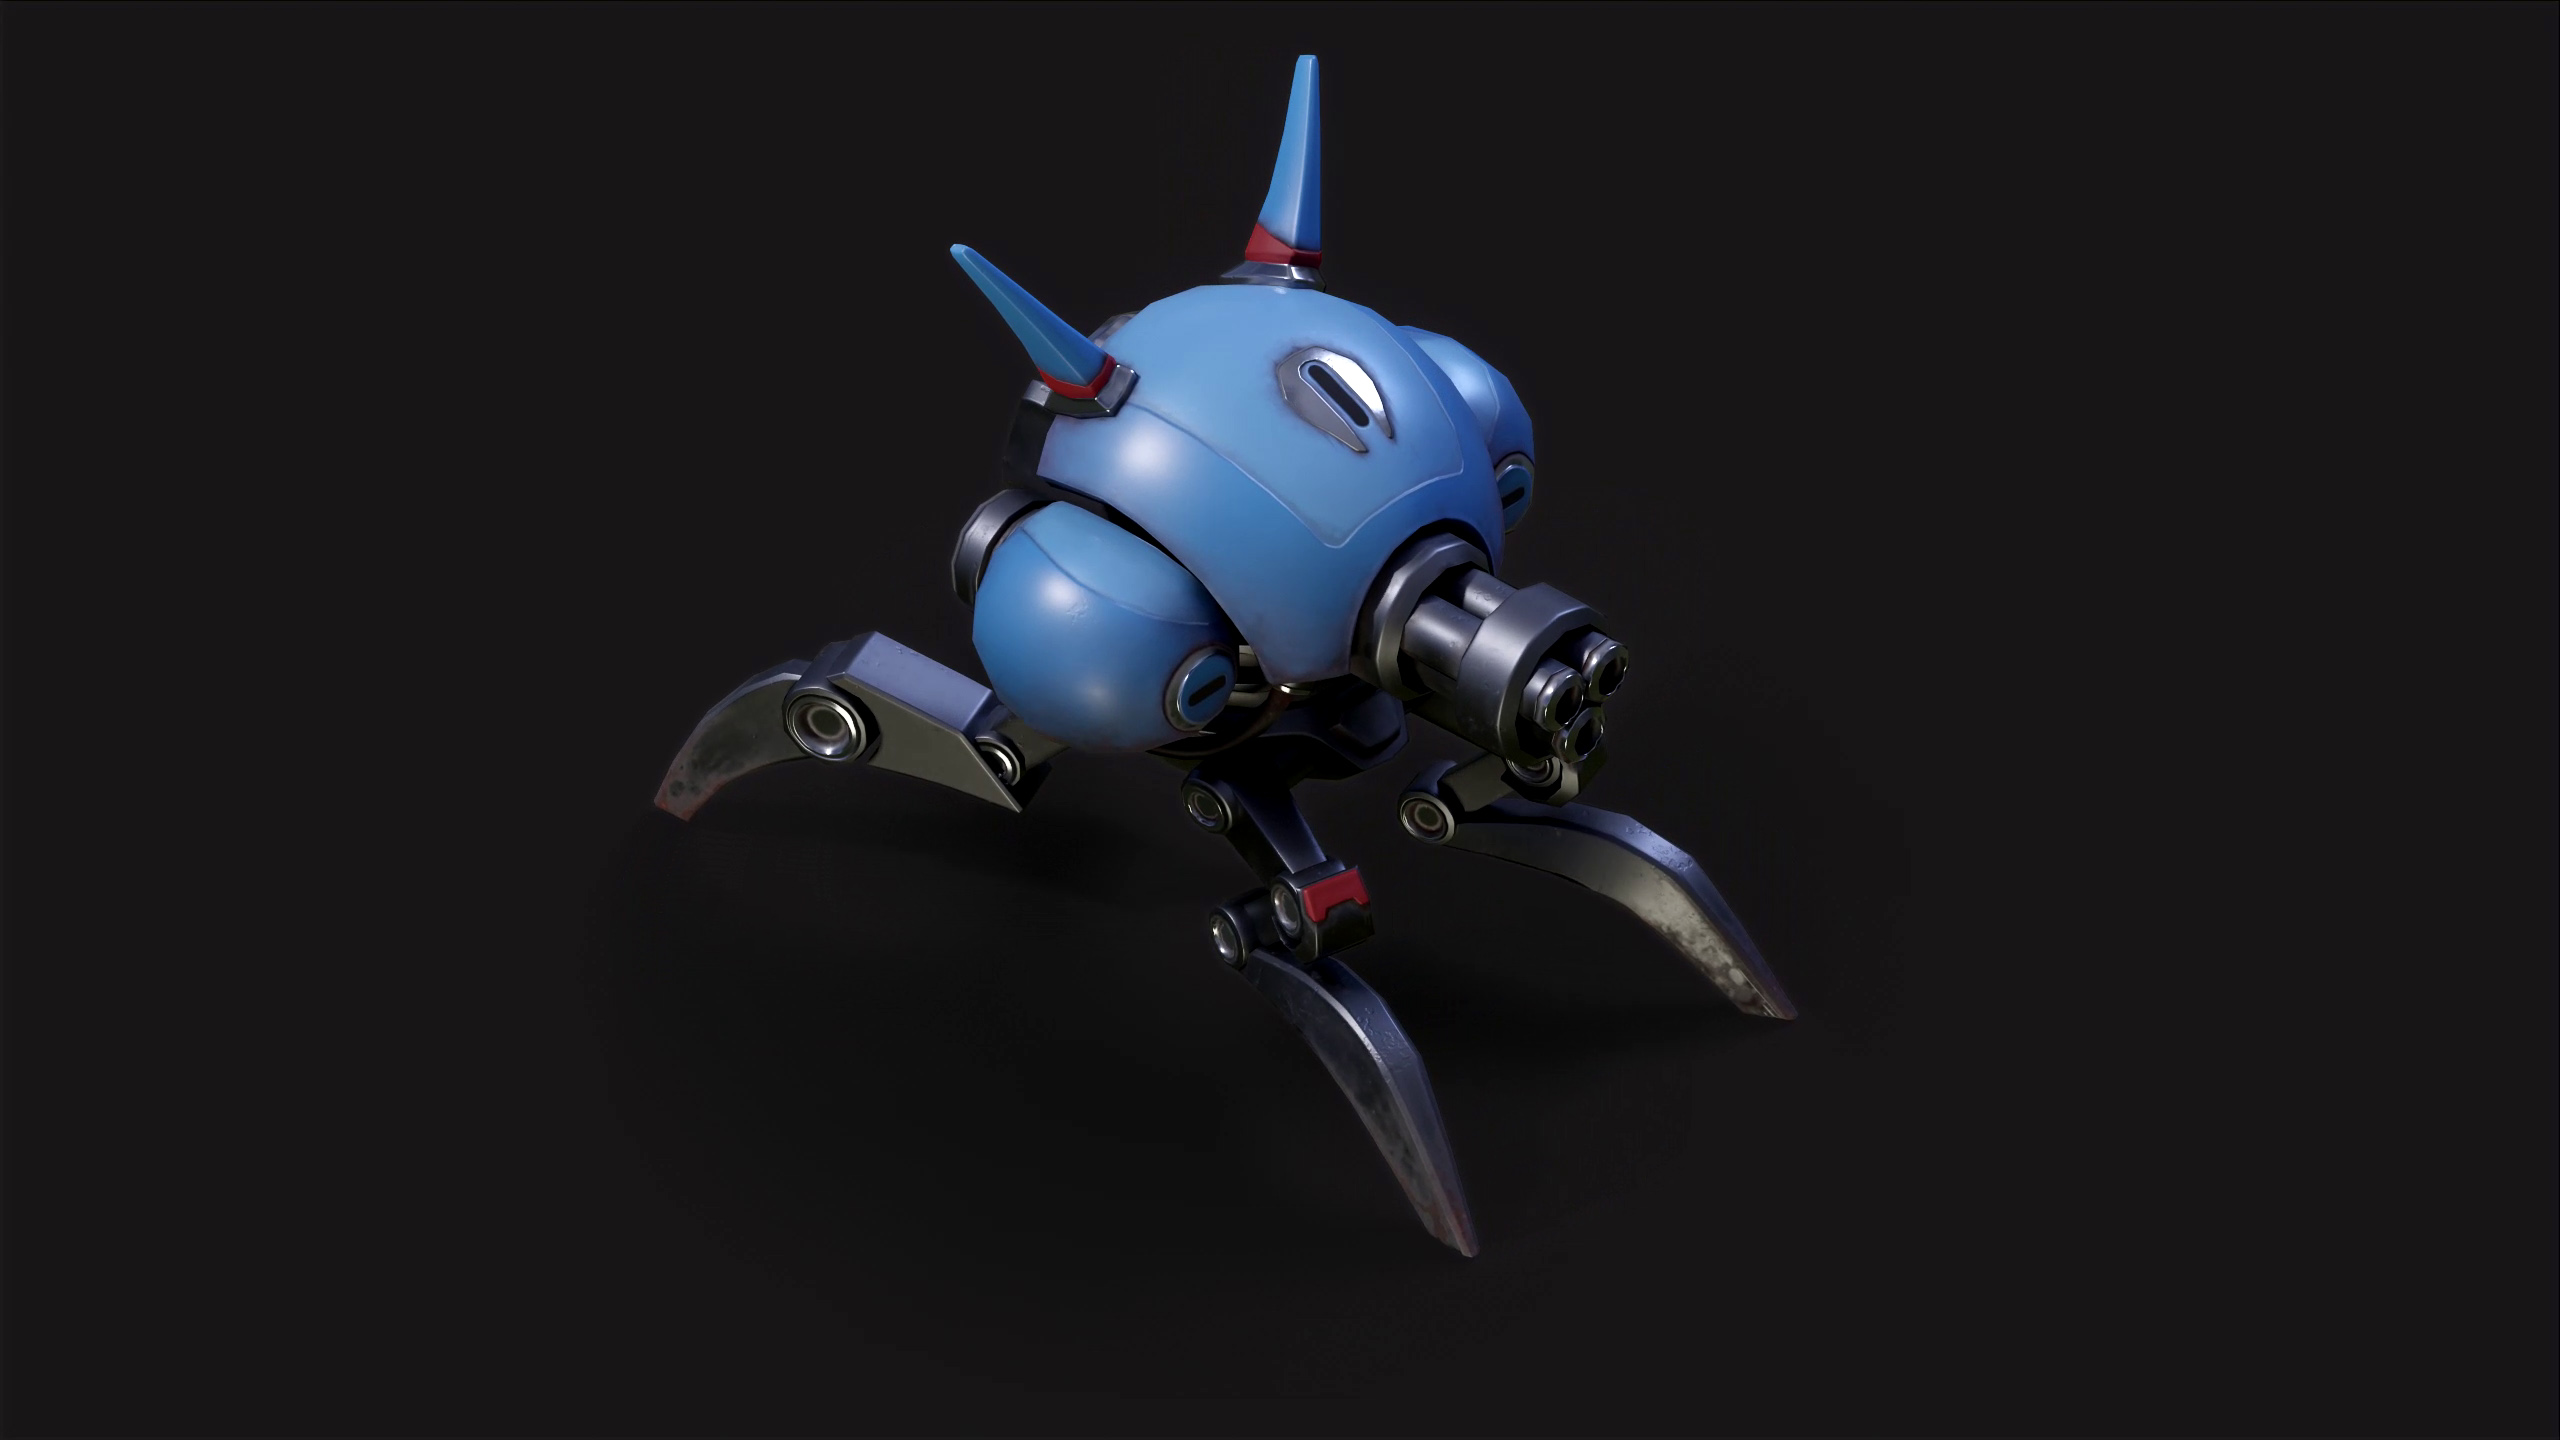
I was asked by one of my coworkers, also Ben, if I would be willing to help prep our mascot unit, the Gunbot, from the internal alpha for 3D printing. I have always been interested in modeling for 3d printing in concept, but I make 3d for games. It’s a different field with different requirements, you generally make a lot of decisions when making a model for games that directly conflict with the requirements of printable models.
In the spirit of self improvement, I decided to take on the challenge. I didn’t think this would turn into a bit of an obsession that’d outlive the project, but we’re getting ahead of ourselves.
With the greenlight from Ted, artist who made the original model (and art director), I took the source files and did what I thought would do the trick.

Printing blind
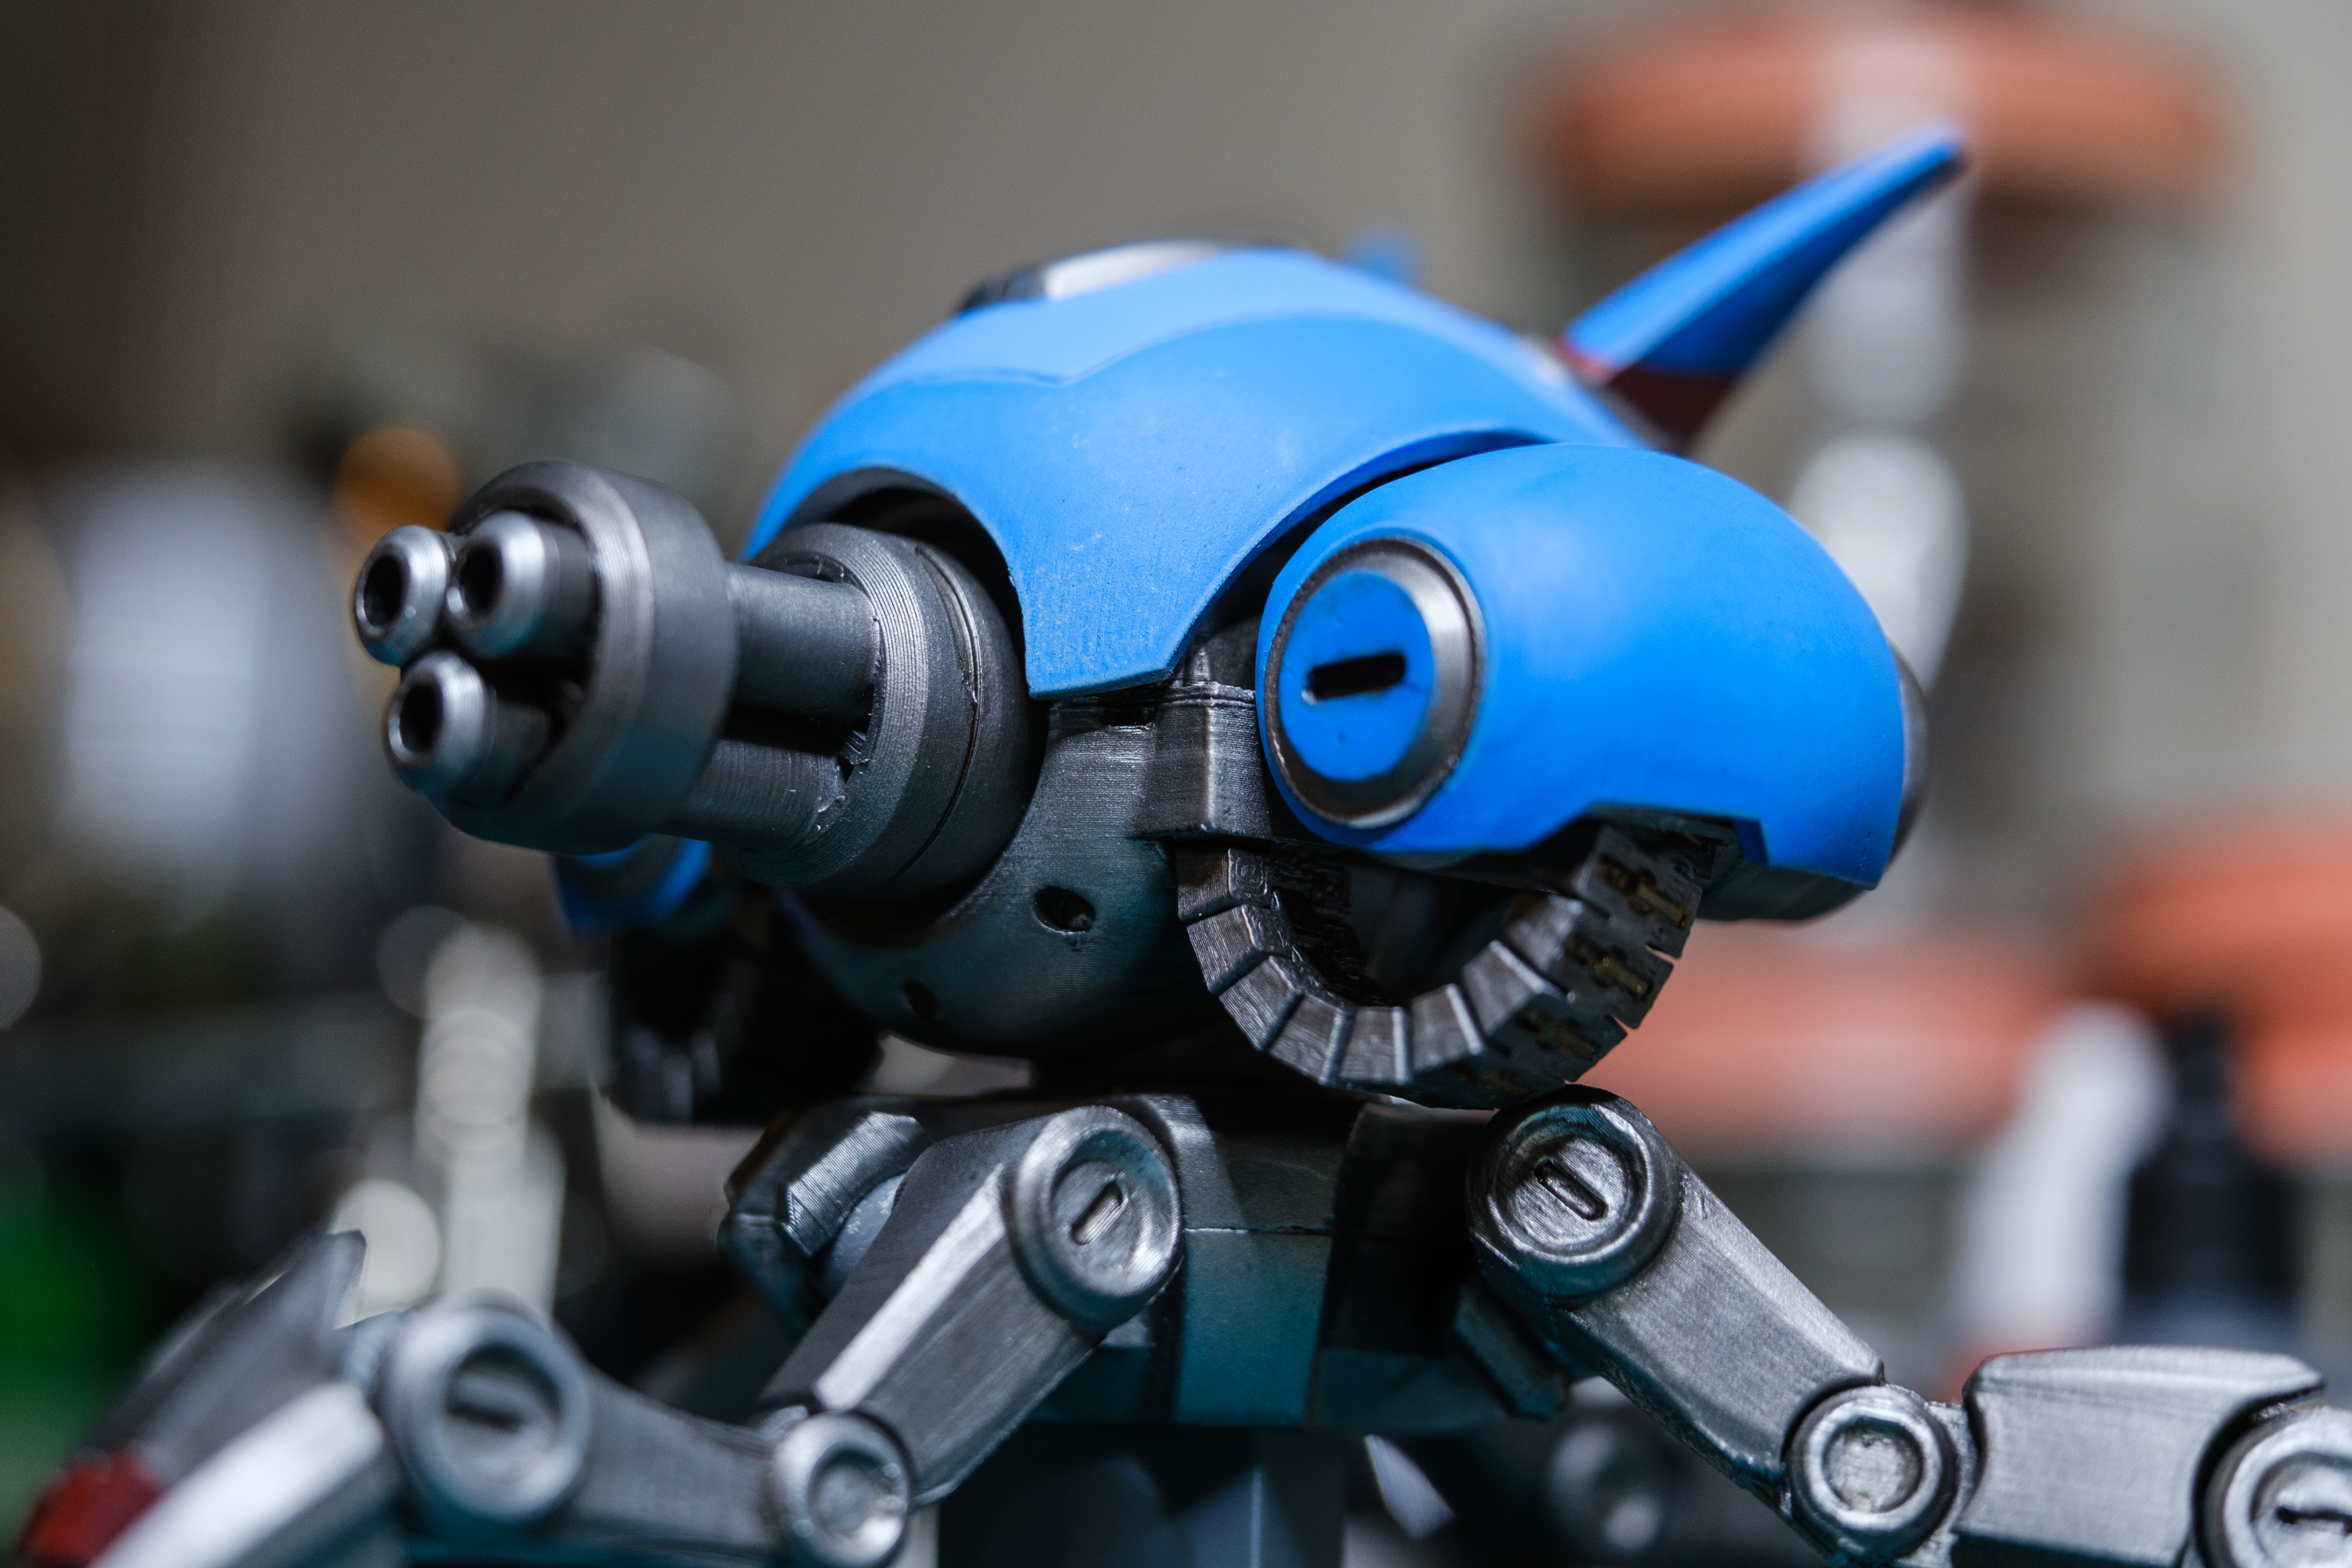
If you’ve looked at the pictures and take a minute to think about the shape of the model, it’s not an easy design to print. The top heavy nature, spindly legs, curved surfaces, and many long, thin elements work well for the unit’s design in the game, but as a functional thing that needs to be able to be printed and support its own weight… that’s that’s another story.

I won’t go too deep into this iteration of this the model, but some of it I got right, and some of it I got very wrong.


Lessons Learned
I personally learned a lot about modeling for printing, in the ‘thousand ways not to make a light bulb’ sense. Here’s a few big ones for this model specifically:
- Design lessons
- Being able to rotate the body was cool
- Removing the shell to reveal a mechanical components underneath was cool and a really nice interaction for anyone that got to handle it in person
- Printing lessons
- There’s always a sacrificial surface when printing. This can be mitigated, but also leaned into.
- Subdiv smooth edges don’t matter as much for prints, the act of printing, post processing (sanding), and priming tend to smooth out hard edges you would generally soften in a high poly for games.
- You gotta model everything. No textured details here! Just like in games, though, if a detail is too small, it won’t come through. It’s best to know your scale and resolution and model for that.
- Even what I assumed would be simple mechanical connections turned out to be a challenge to get to work without the ability to test them. Turns out, you need some clearances to make things fit!
I wasn’t the only person that this modeling process left an impression on. While not my intent, both Luke and Ted took the alternate interpretation and physicality into consideration as a source of feedback when doing the already planned redesign of the Gunbot.
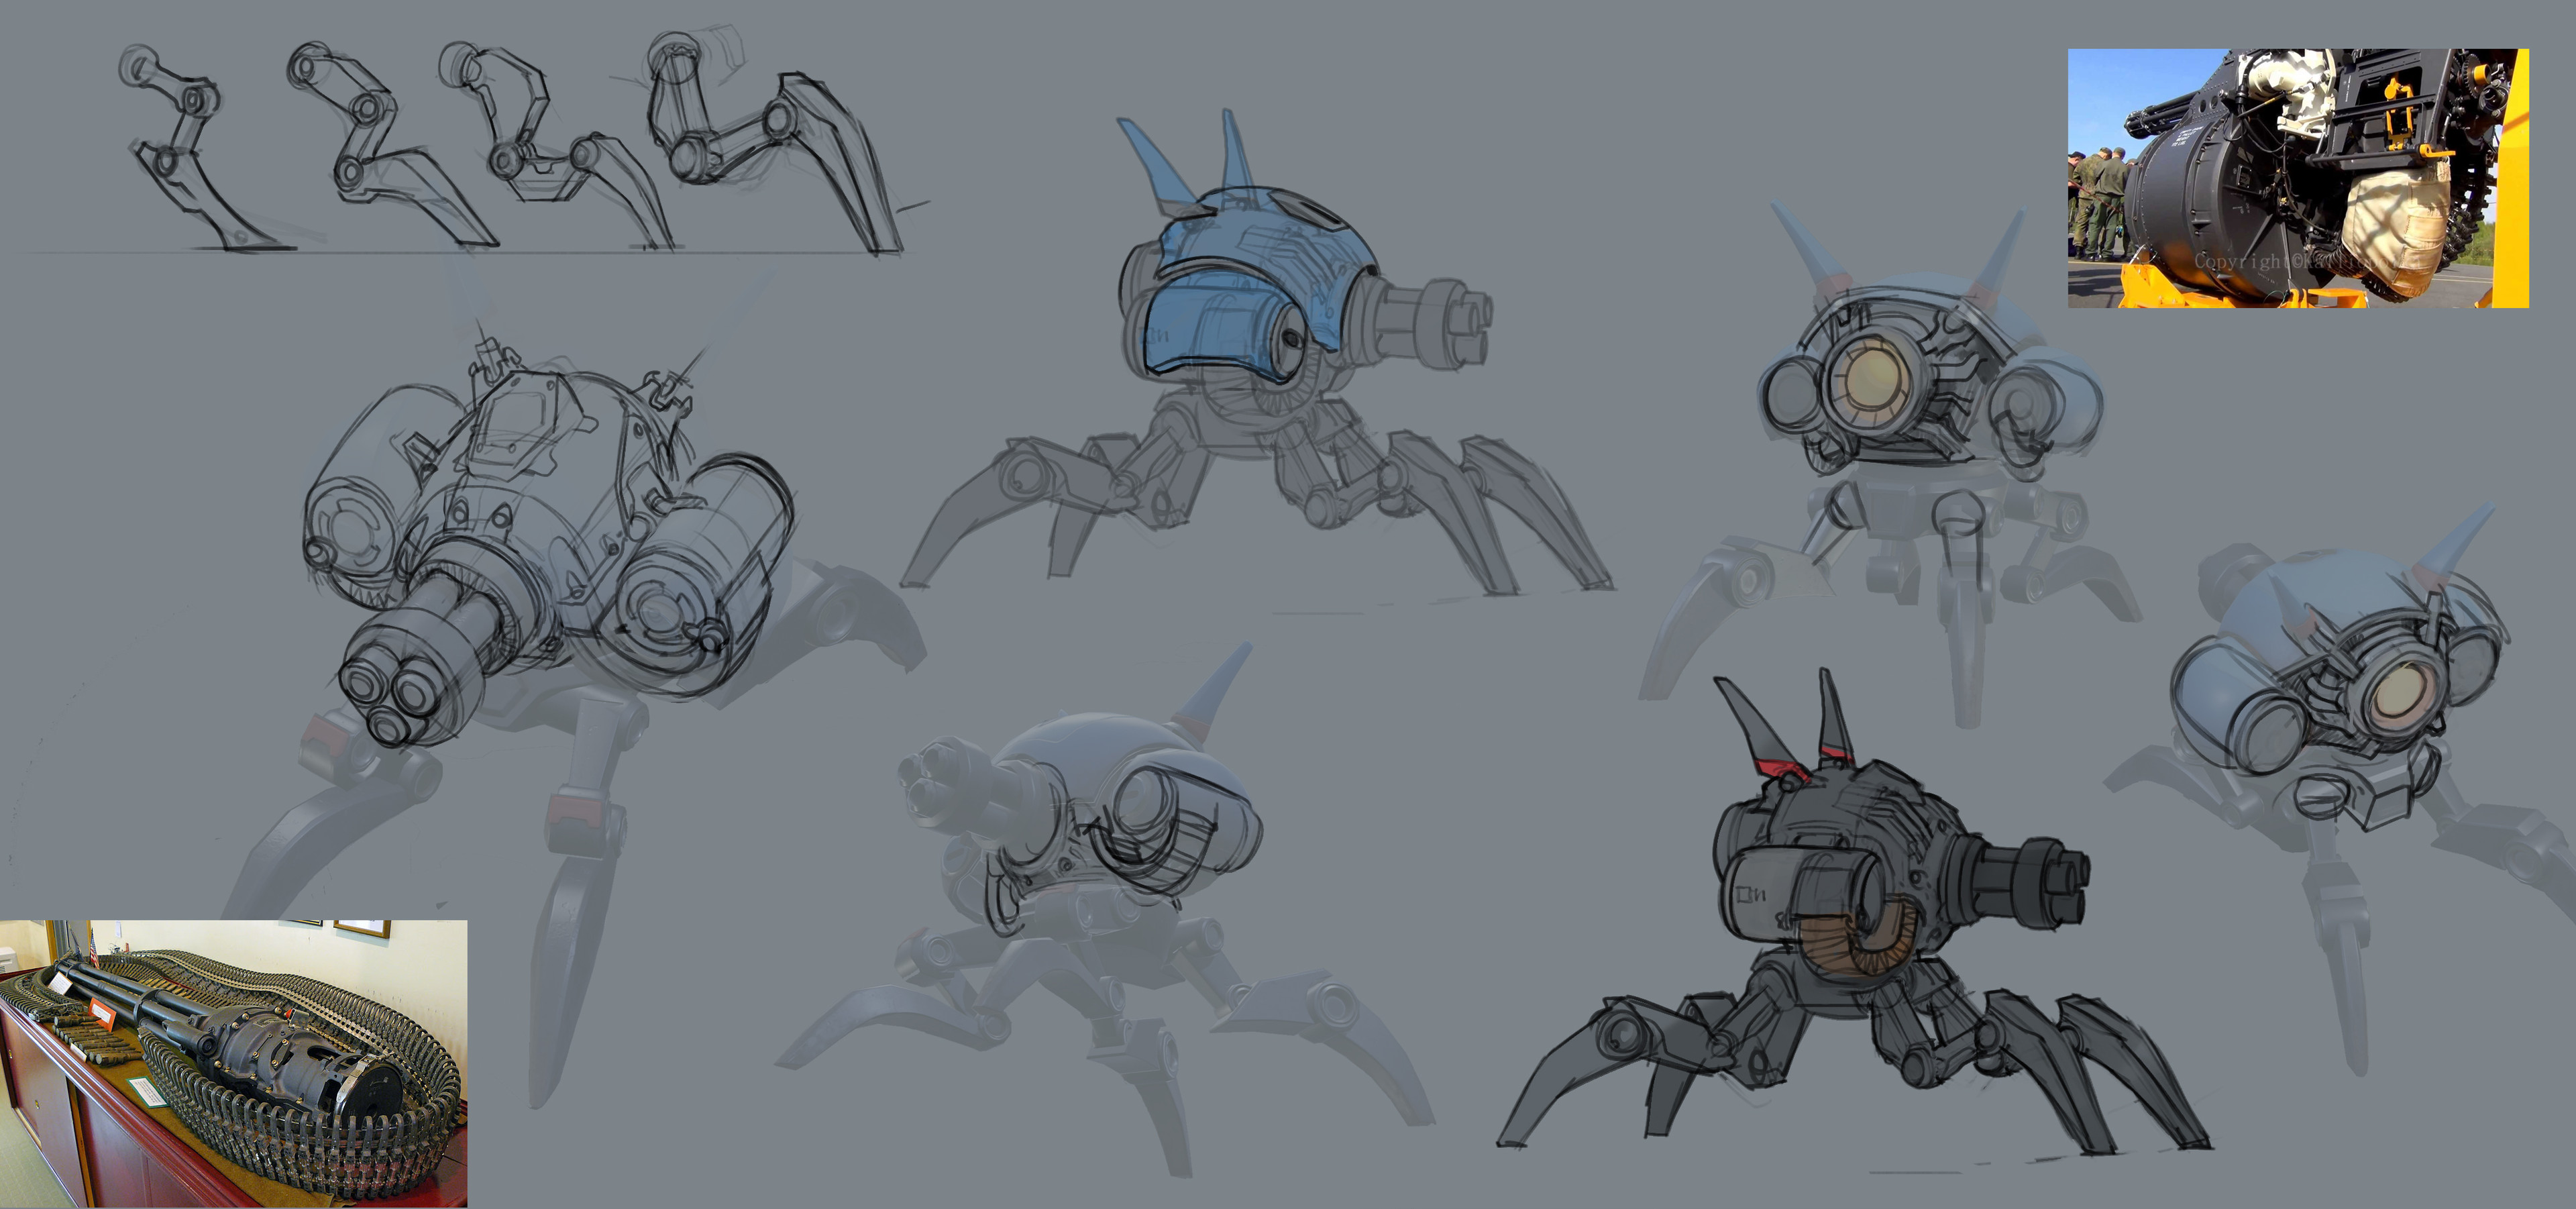
On top of that, the highly talented artists at The Line did another design variation for Battle Aces’ reveal cinematic. Below is the trailer, in case you haven’t seen it in a while, but I’d also check out their site as it has some amazing visuals as well.
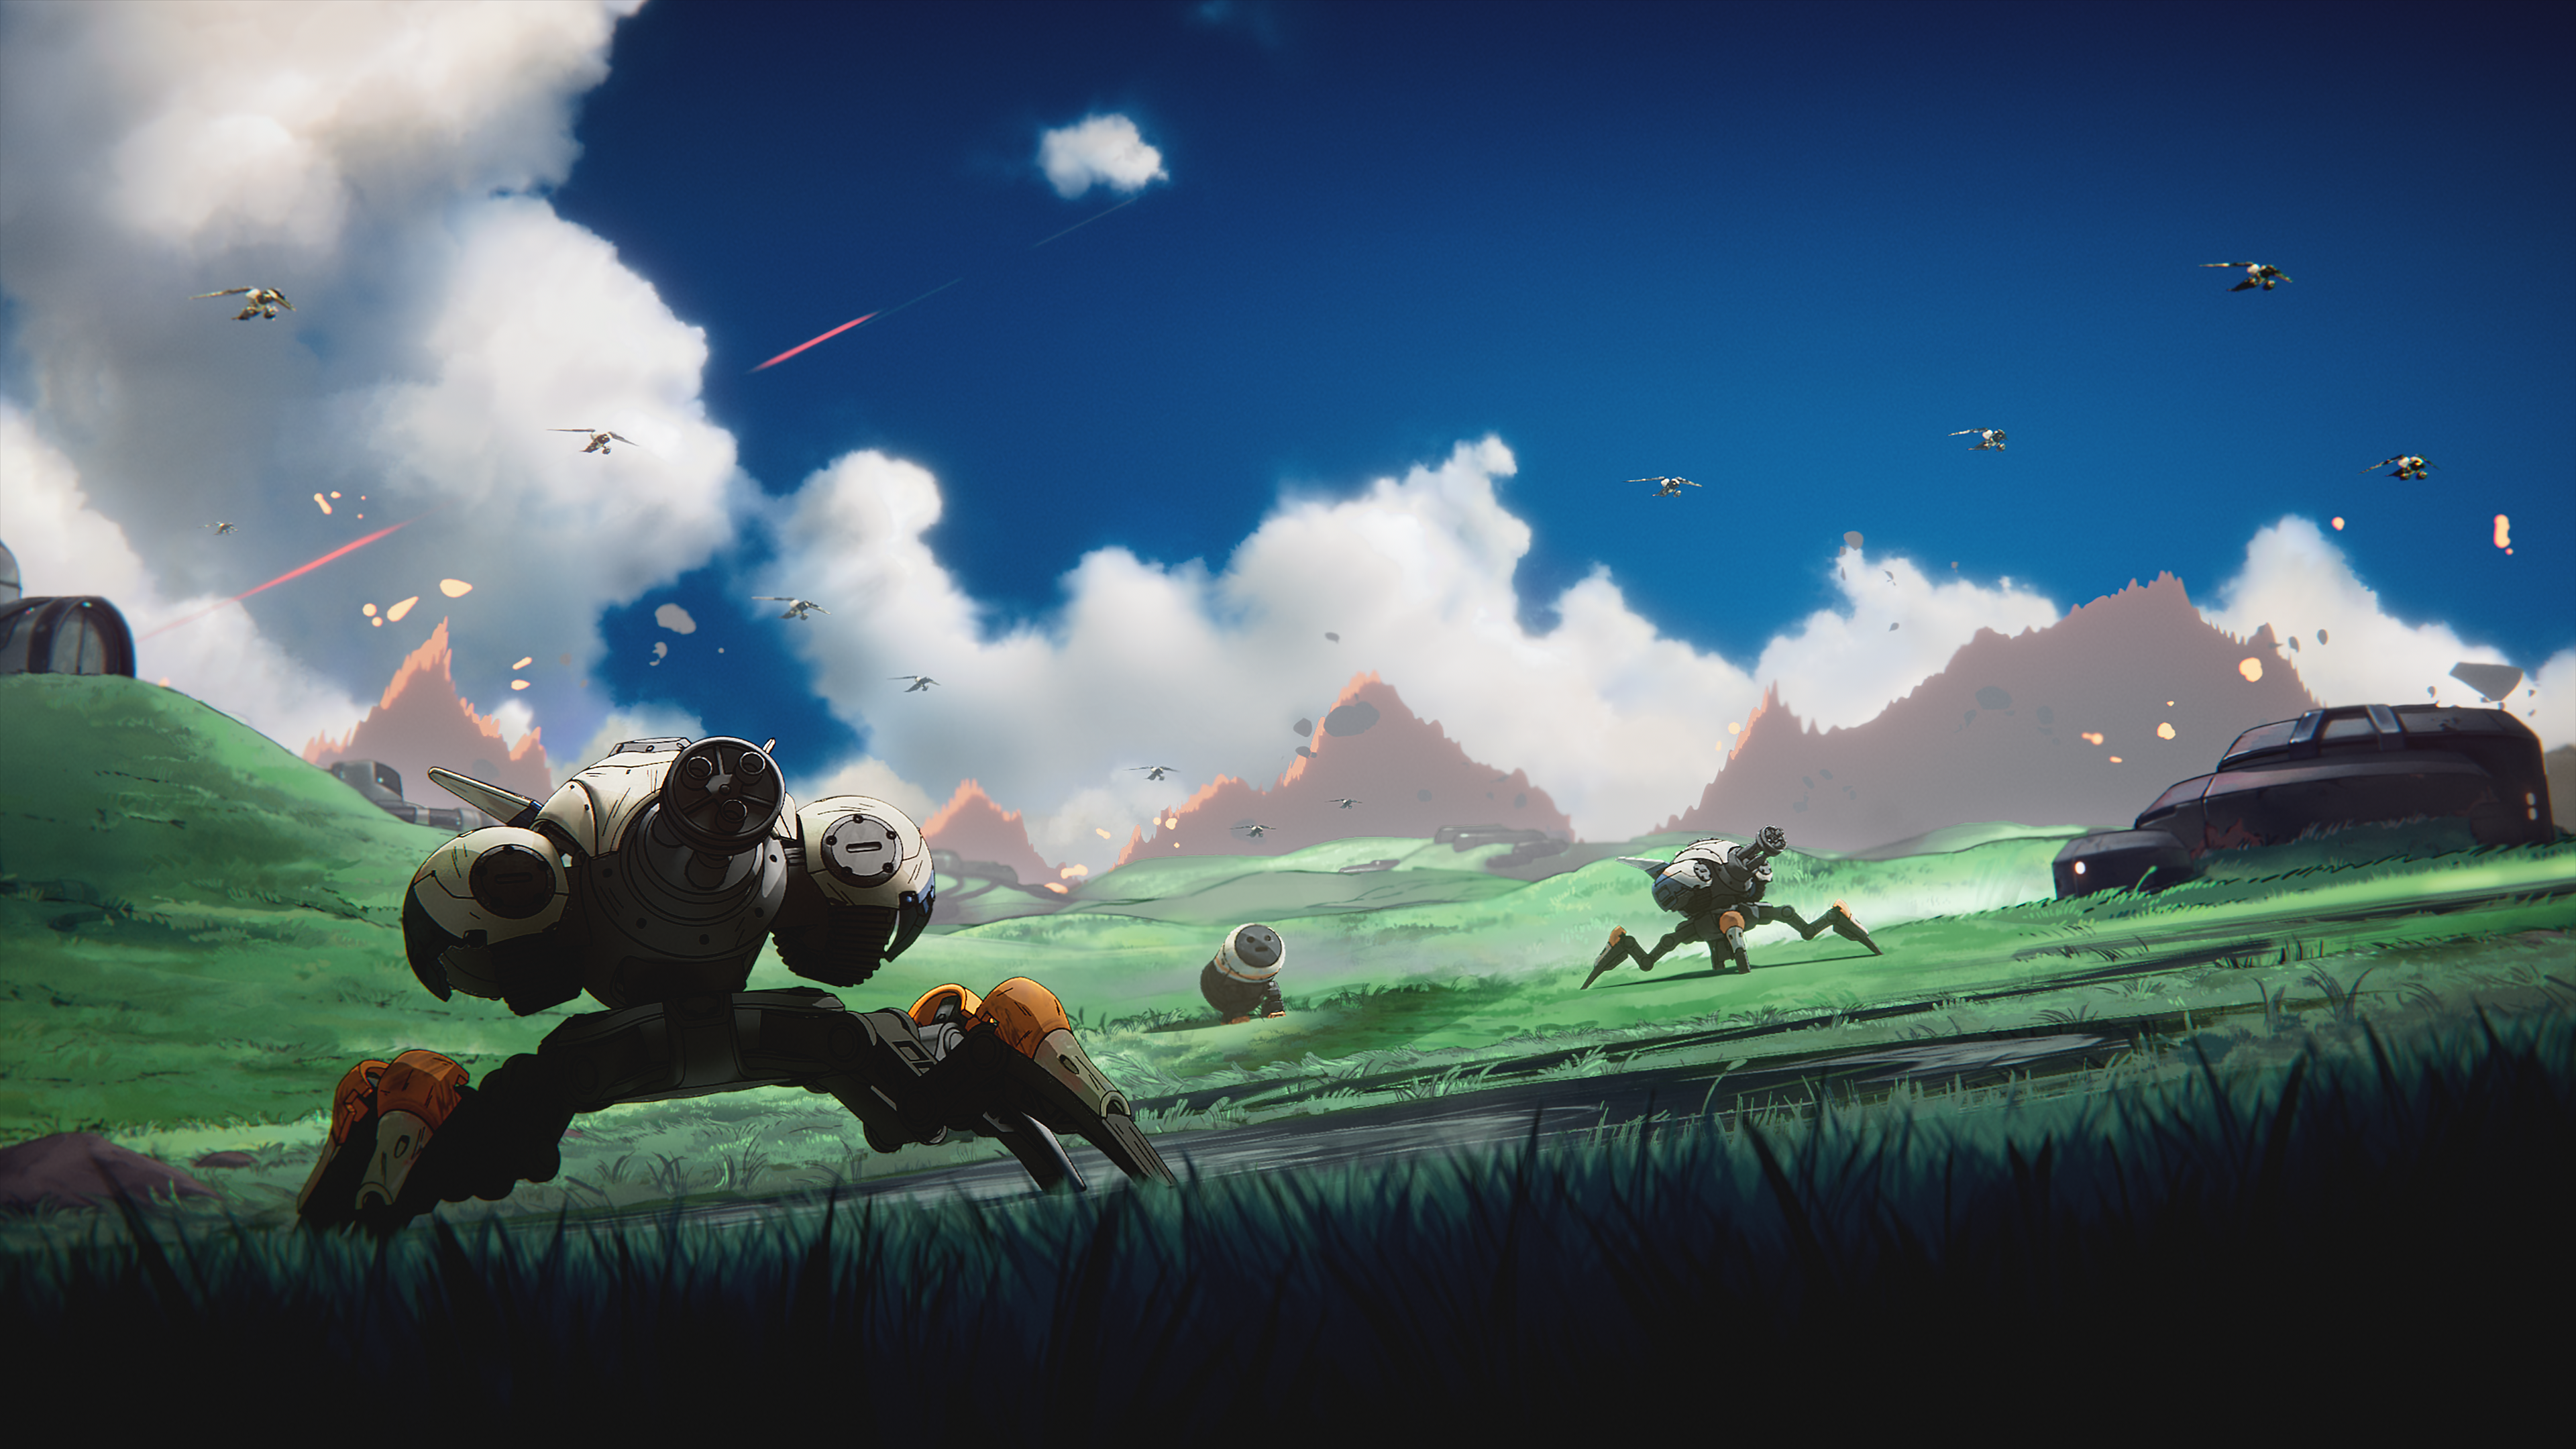
I had some passing thoughts about doing 3D print of the redesign, but with the game in full production, I didn’t really have cycles to do my day job and model this guy again in my spare time, not just as a simple modeling exercise.
And yet, this article has so many more words…
Version 2
So, as an artist, you always have to be keeping your skills sharp trying to keep on top of things.
About 5 years ago, I transitioned from being a full time Environment Artist to being a Technical Artist, which is far more varied in what skill-sets I need to keep up to date on.
That said, I still personally enjoy executing on a concept and bringing it to 3D, and recently, a tool called Plasticity was released that has made NURBS based CAD style boolean modeling techniques far more accessible for creative art applications.
There are some shapes that are genuinely hard to model using traditional subdivision approaches and, as an industry, we’re finally moving past the need to do these in a formalist ‘correct’ approach of clean, sub-div ready geometry.

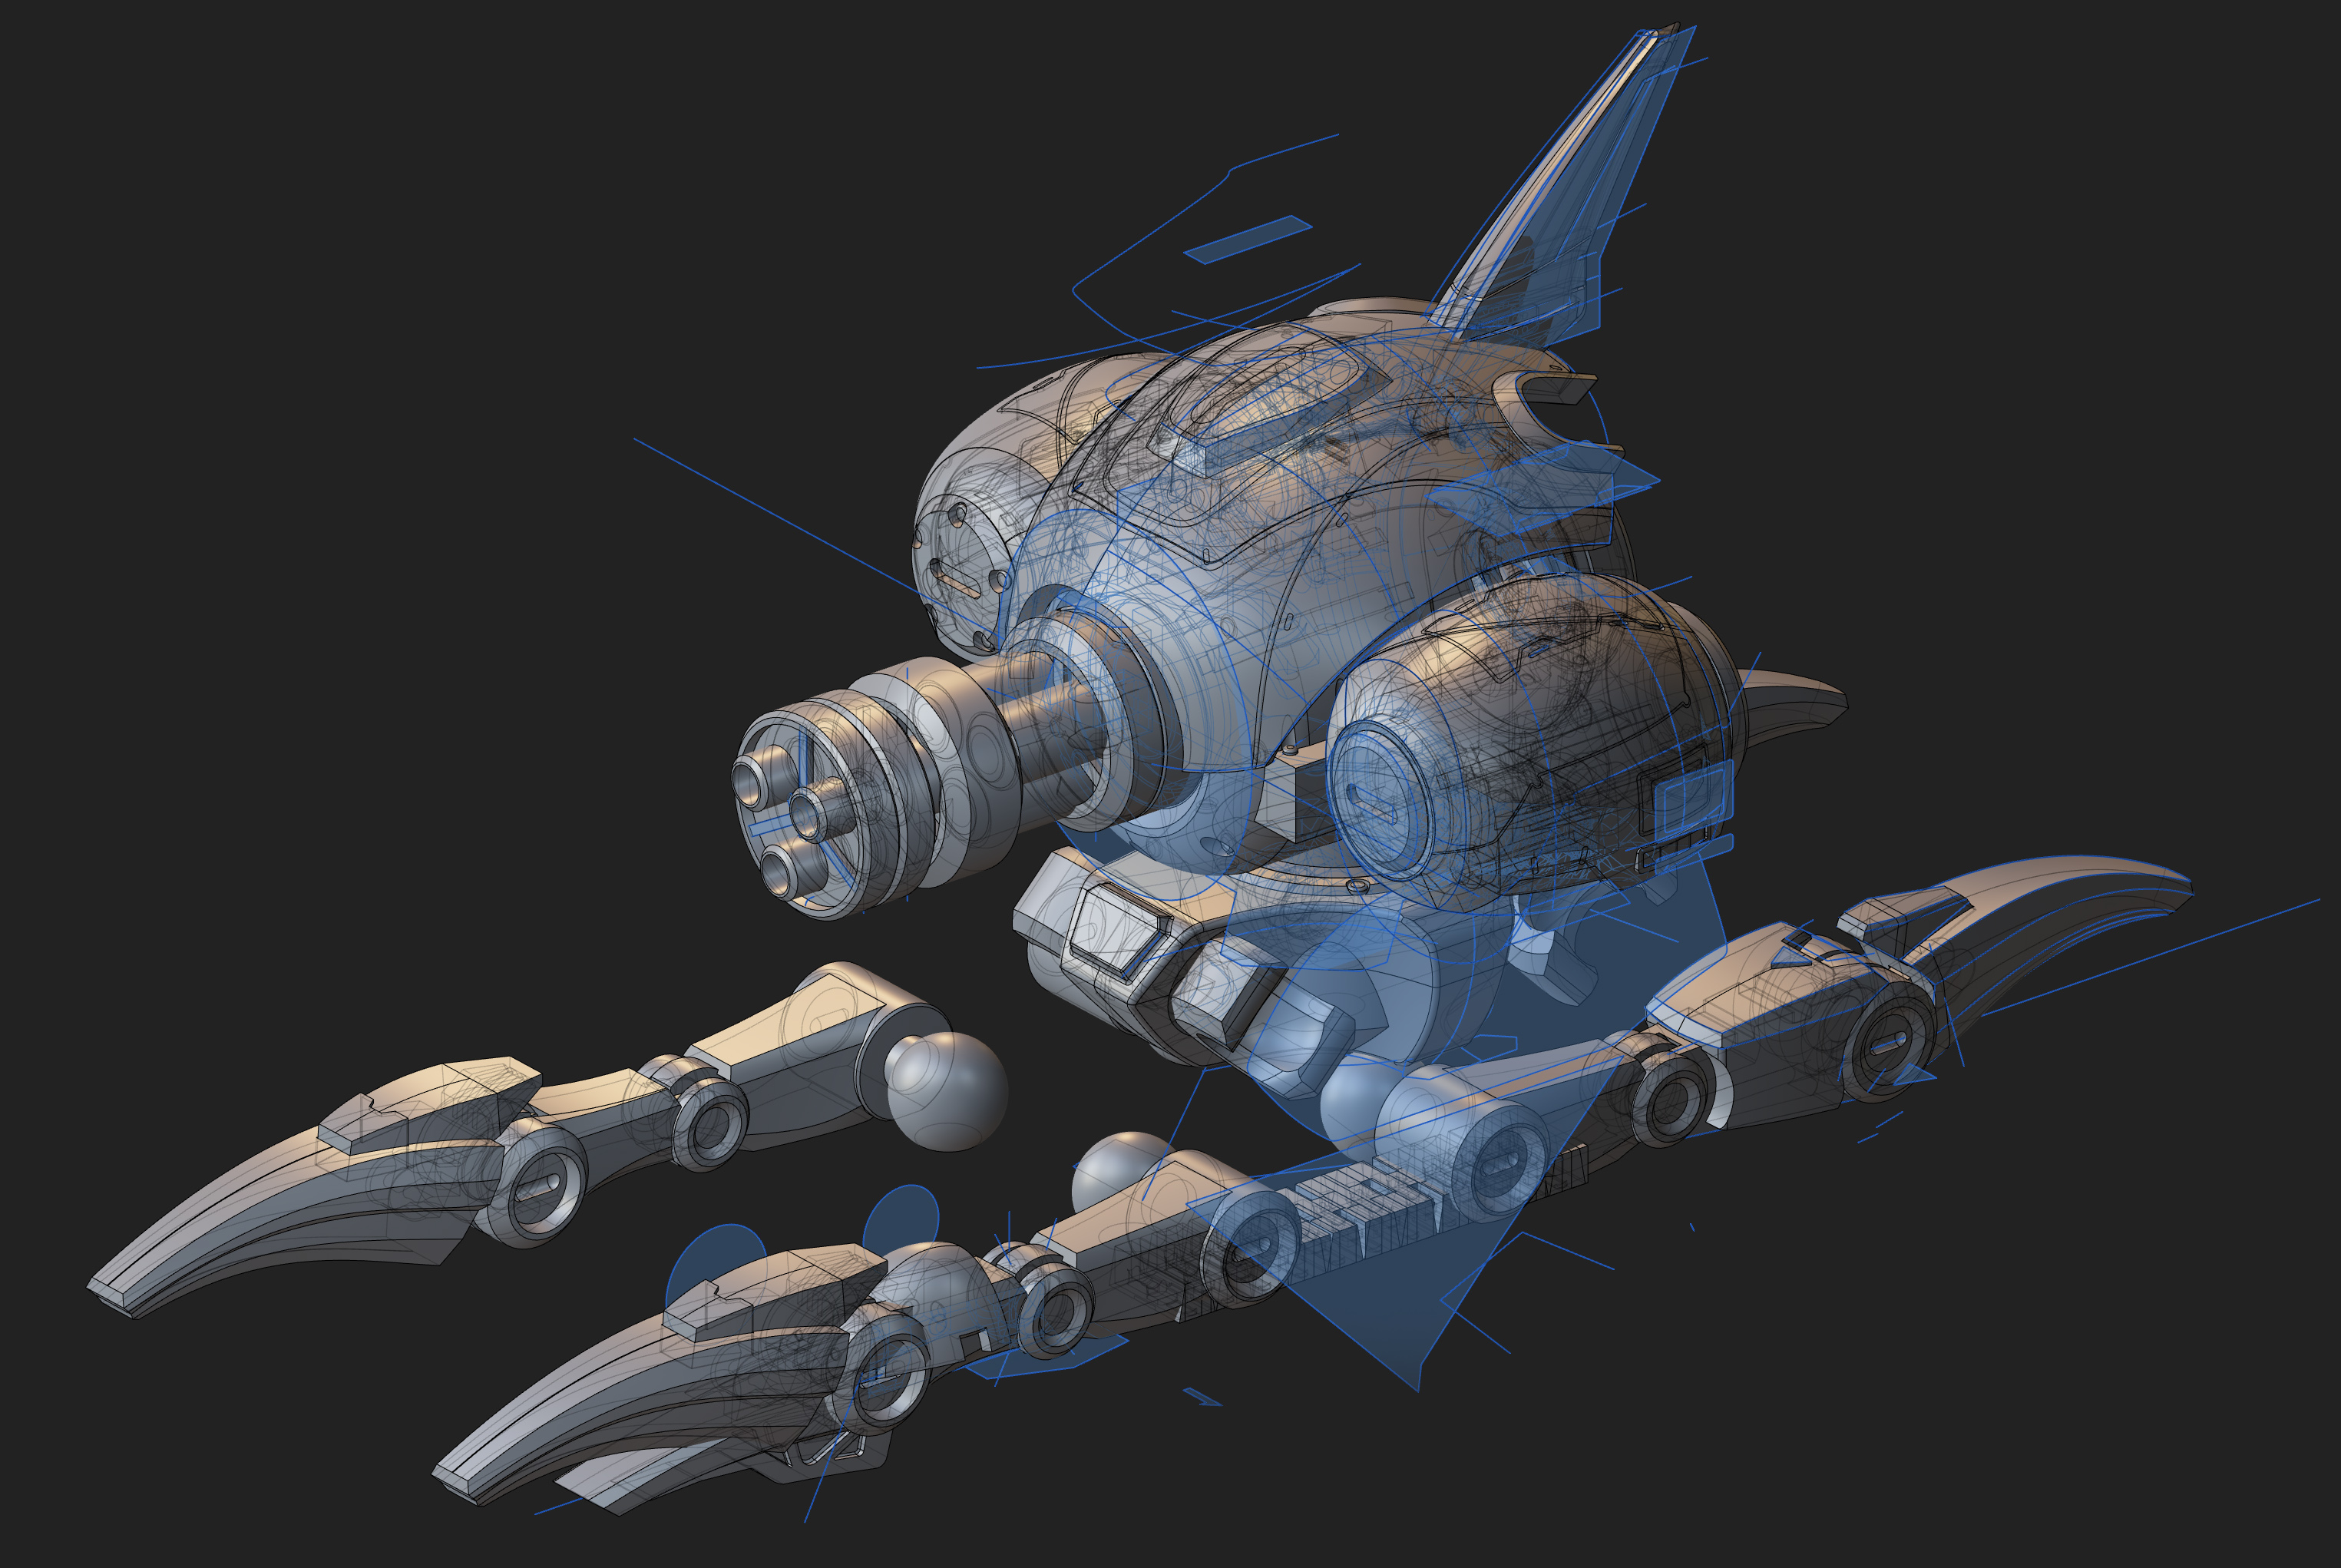
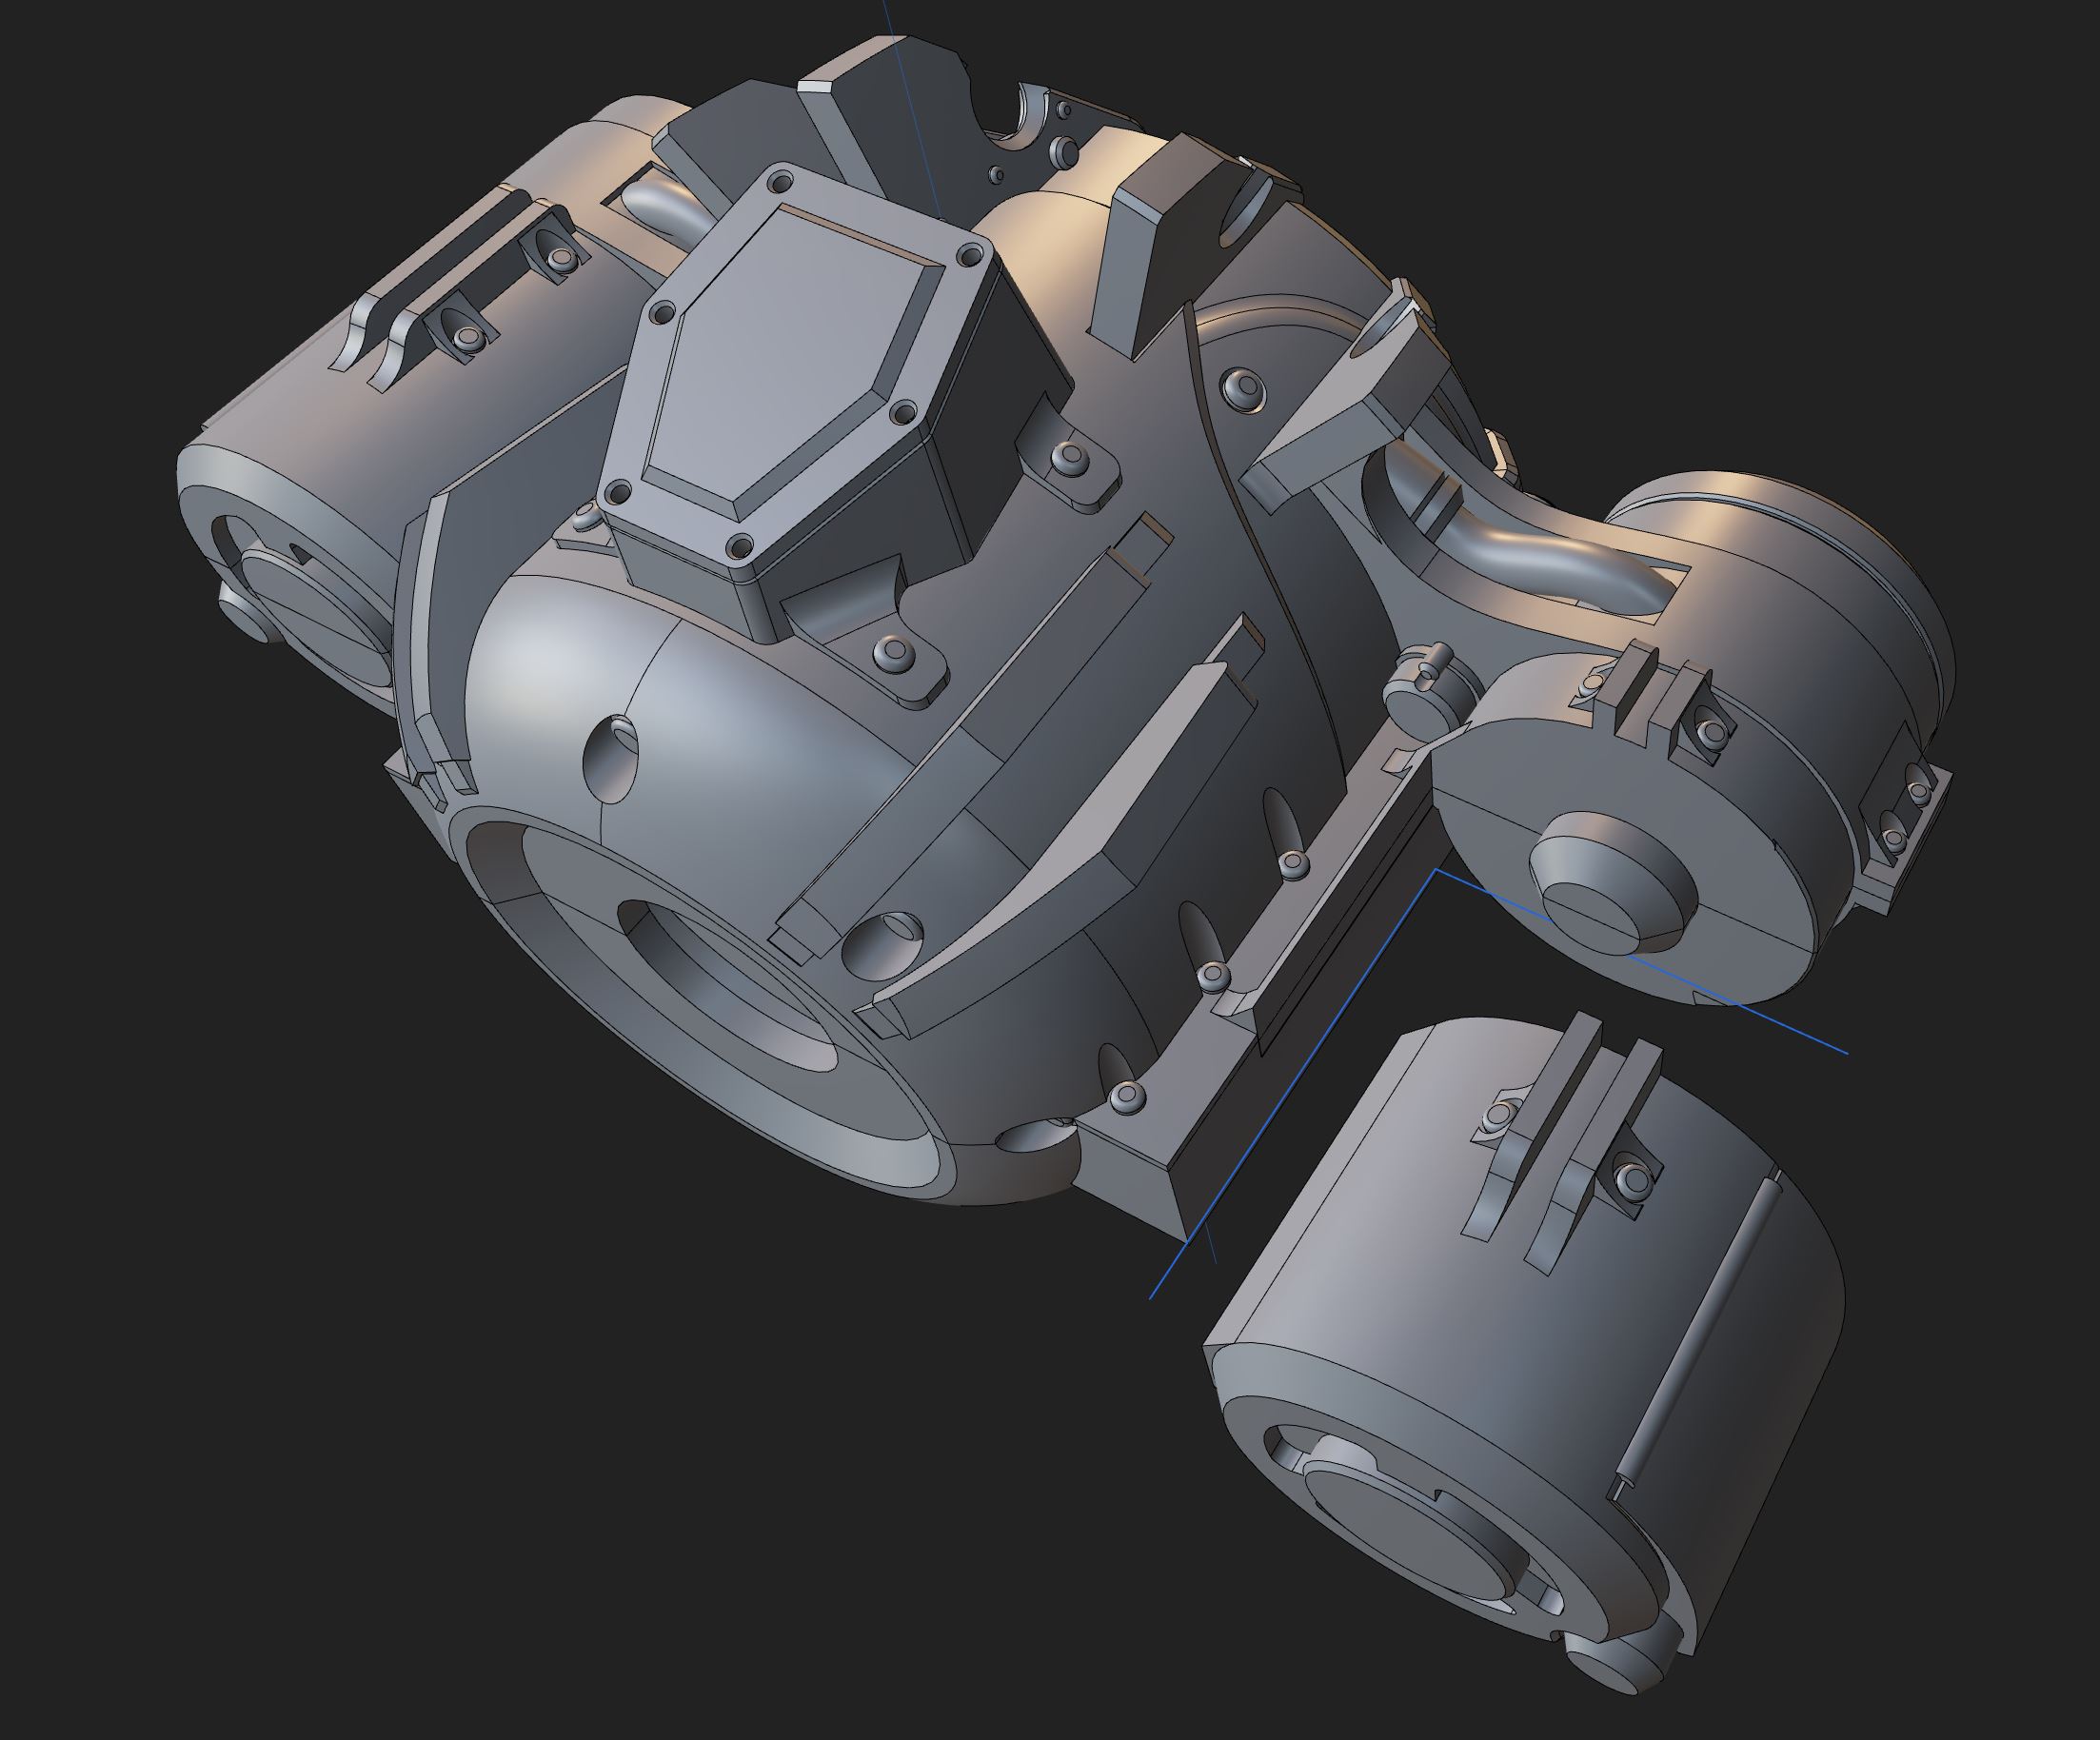
This is a render from a unit from Battle Aces called the Predator that I partially modeled in Plasticity not long after the software came out. I want to highlight the central body shape – that’s a single object.
If you don’t do a lot of 3D modeling, I’ll just highlight it – that pelvis is a complicated shape to make in 3D. Despite barely having a grip on the program I was able very quickly tell it was worth using – even fumbling through it, I modeled that and the main gun elements with relative ease.
I believed re-interpreting the Gunbot purely in Plasticity would be an excellent modeling exercise to do in my spare time to help improve my proficiency with the tool.

With an excuse in hand, I decide to scope out my ‘big, medium, and small’ goals. Projects like this can spiral, so it’s good to define ‘outs’ to feel satisfied with, and find the important things you really think are worth doing regardless of any other scope creep, i.e. ‘it was worth your time if you accomplished X.’
- What was worth my time?
- Not forgetting how to model
- Plasticity skill development
- Articulation
- Getting better at modeling for 3d printing
- What would have been nice to have?
- Doing another cool Gunbot for the team
- Iterating on the design from a mechanically functional approach
- Getting something that I modeled physically in my hands
- Improving my painting skills. My physical ones, not digital.
- What would have been a stretch?
- Recreating the nostalgic feeling of making a model kit
- Interchangeable parts and exploring the already growing collection of variants of this design, possibly in a clever way, like how I handled the Fallout 4 Sniper Rifle.

Initial burst
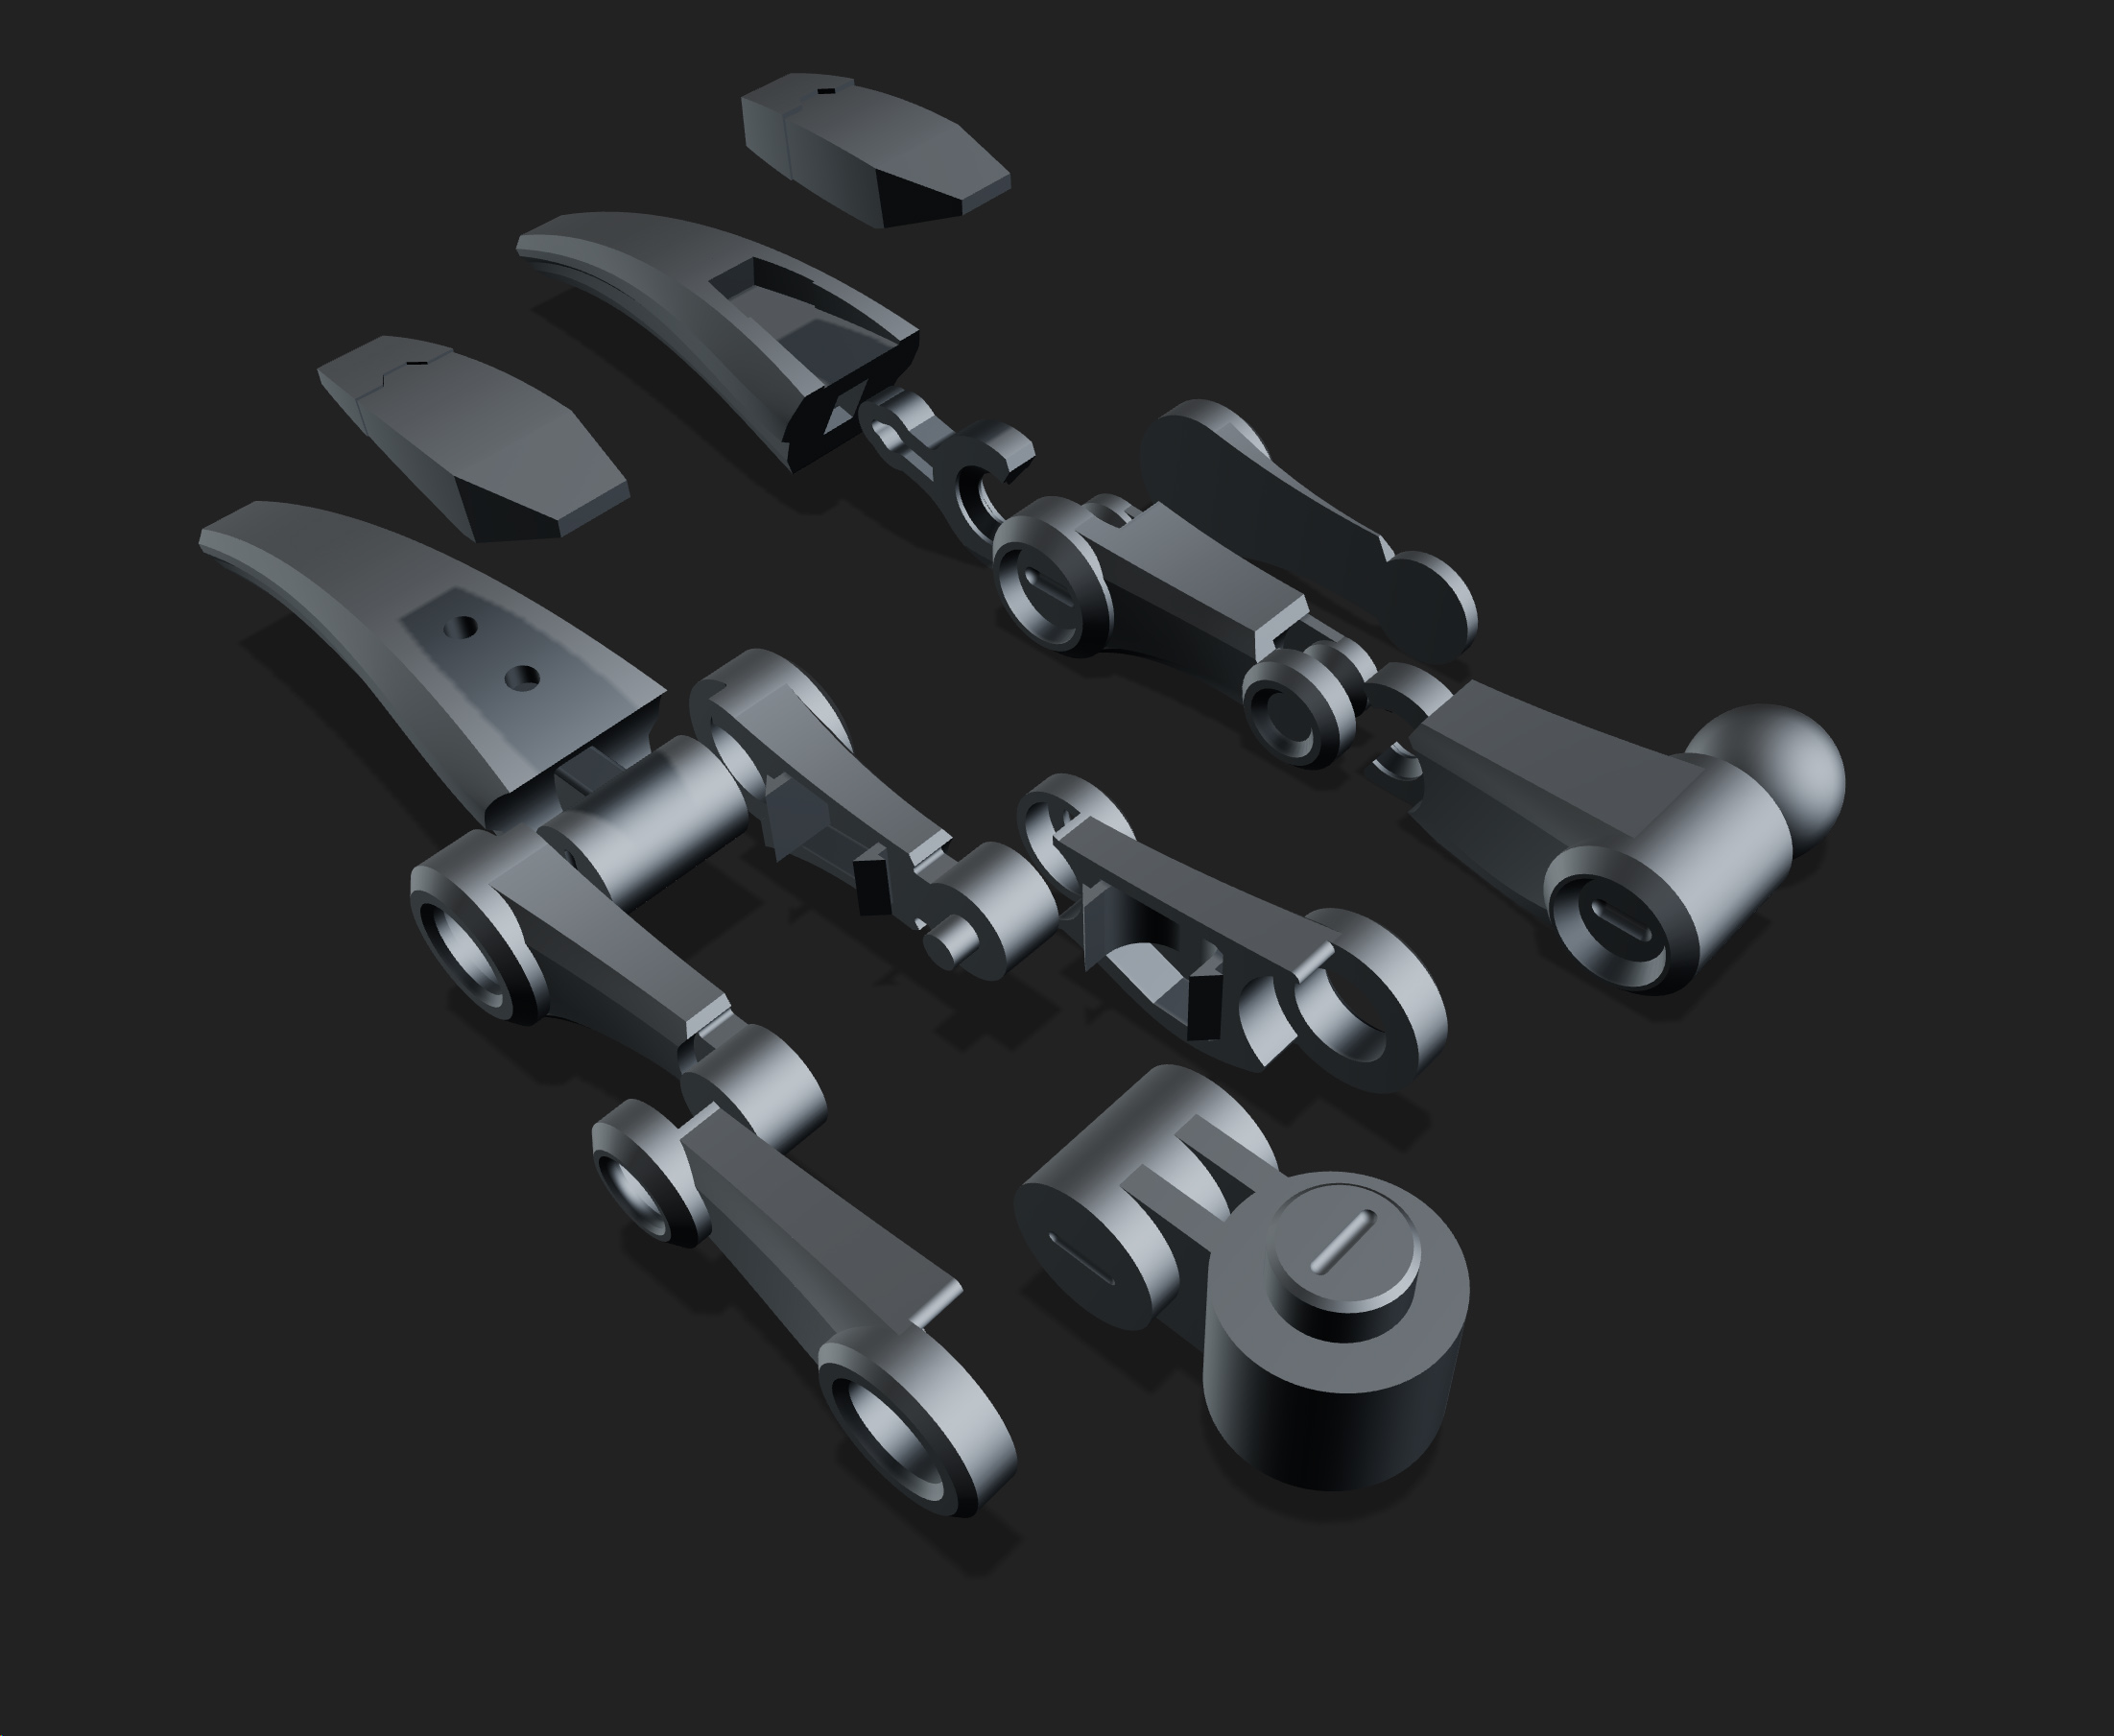
Using Plasticity, things moved far faster in the modeling department. Since it inherits heavily from CAD programs, it’s actually better suited as a modeler for 3d printing then Max, Maya, or Blender, and has only gotten better with time. I explored importing reference meshes and following the shapes with curves to make surfaces and solids (which is now far easier with vertex snapping, btw!)

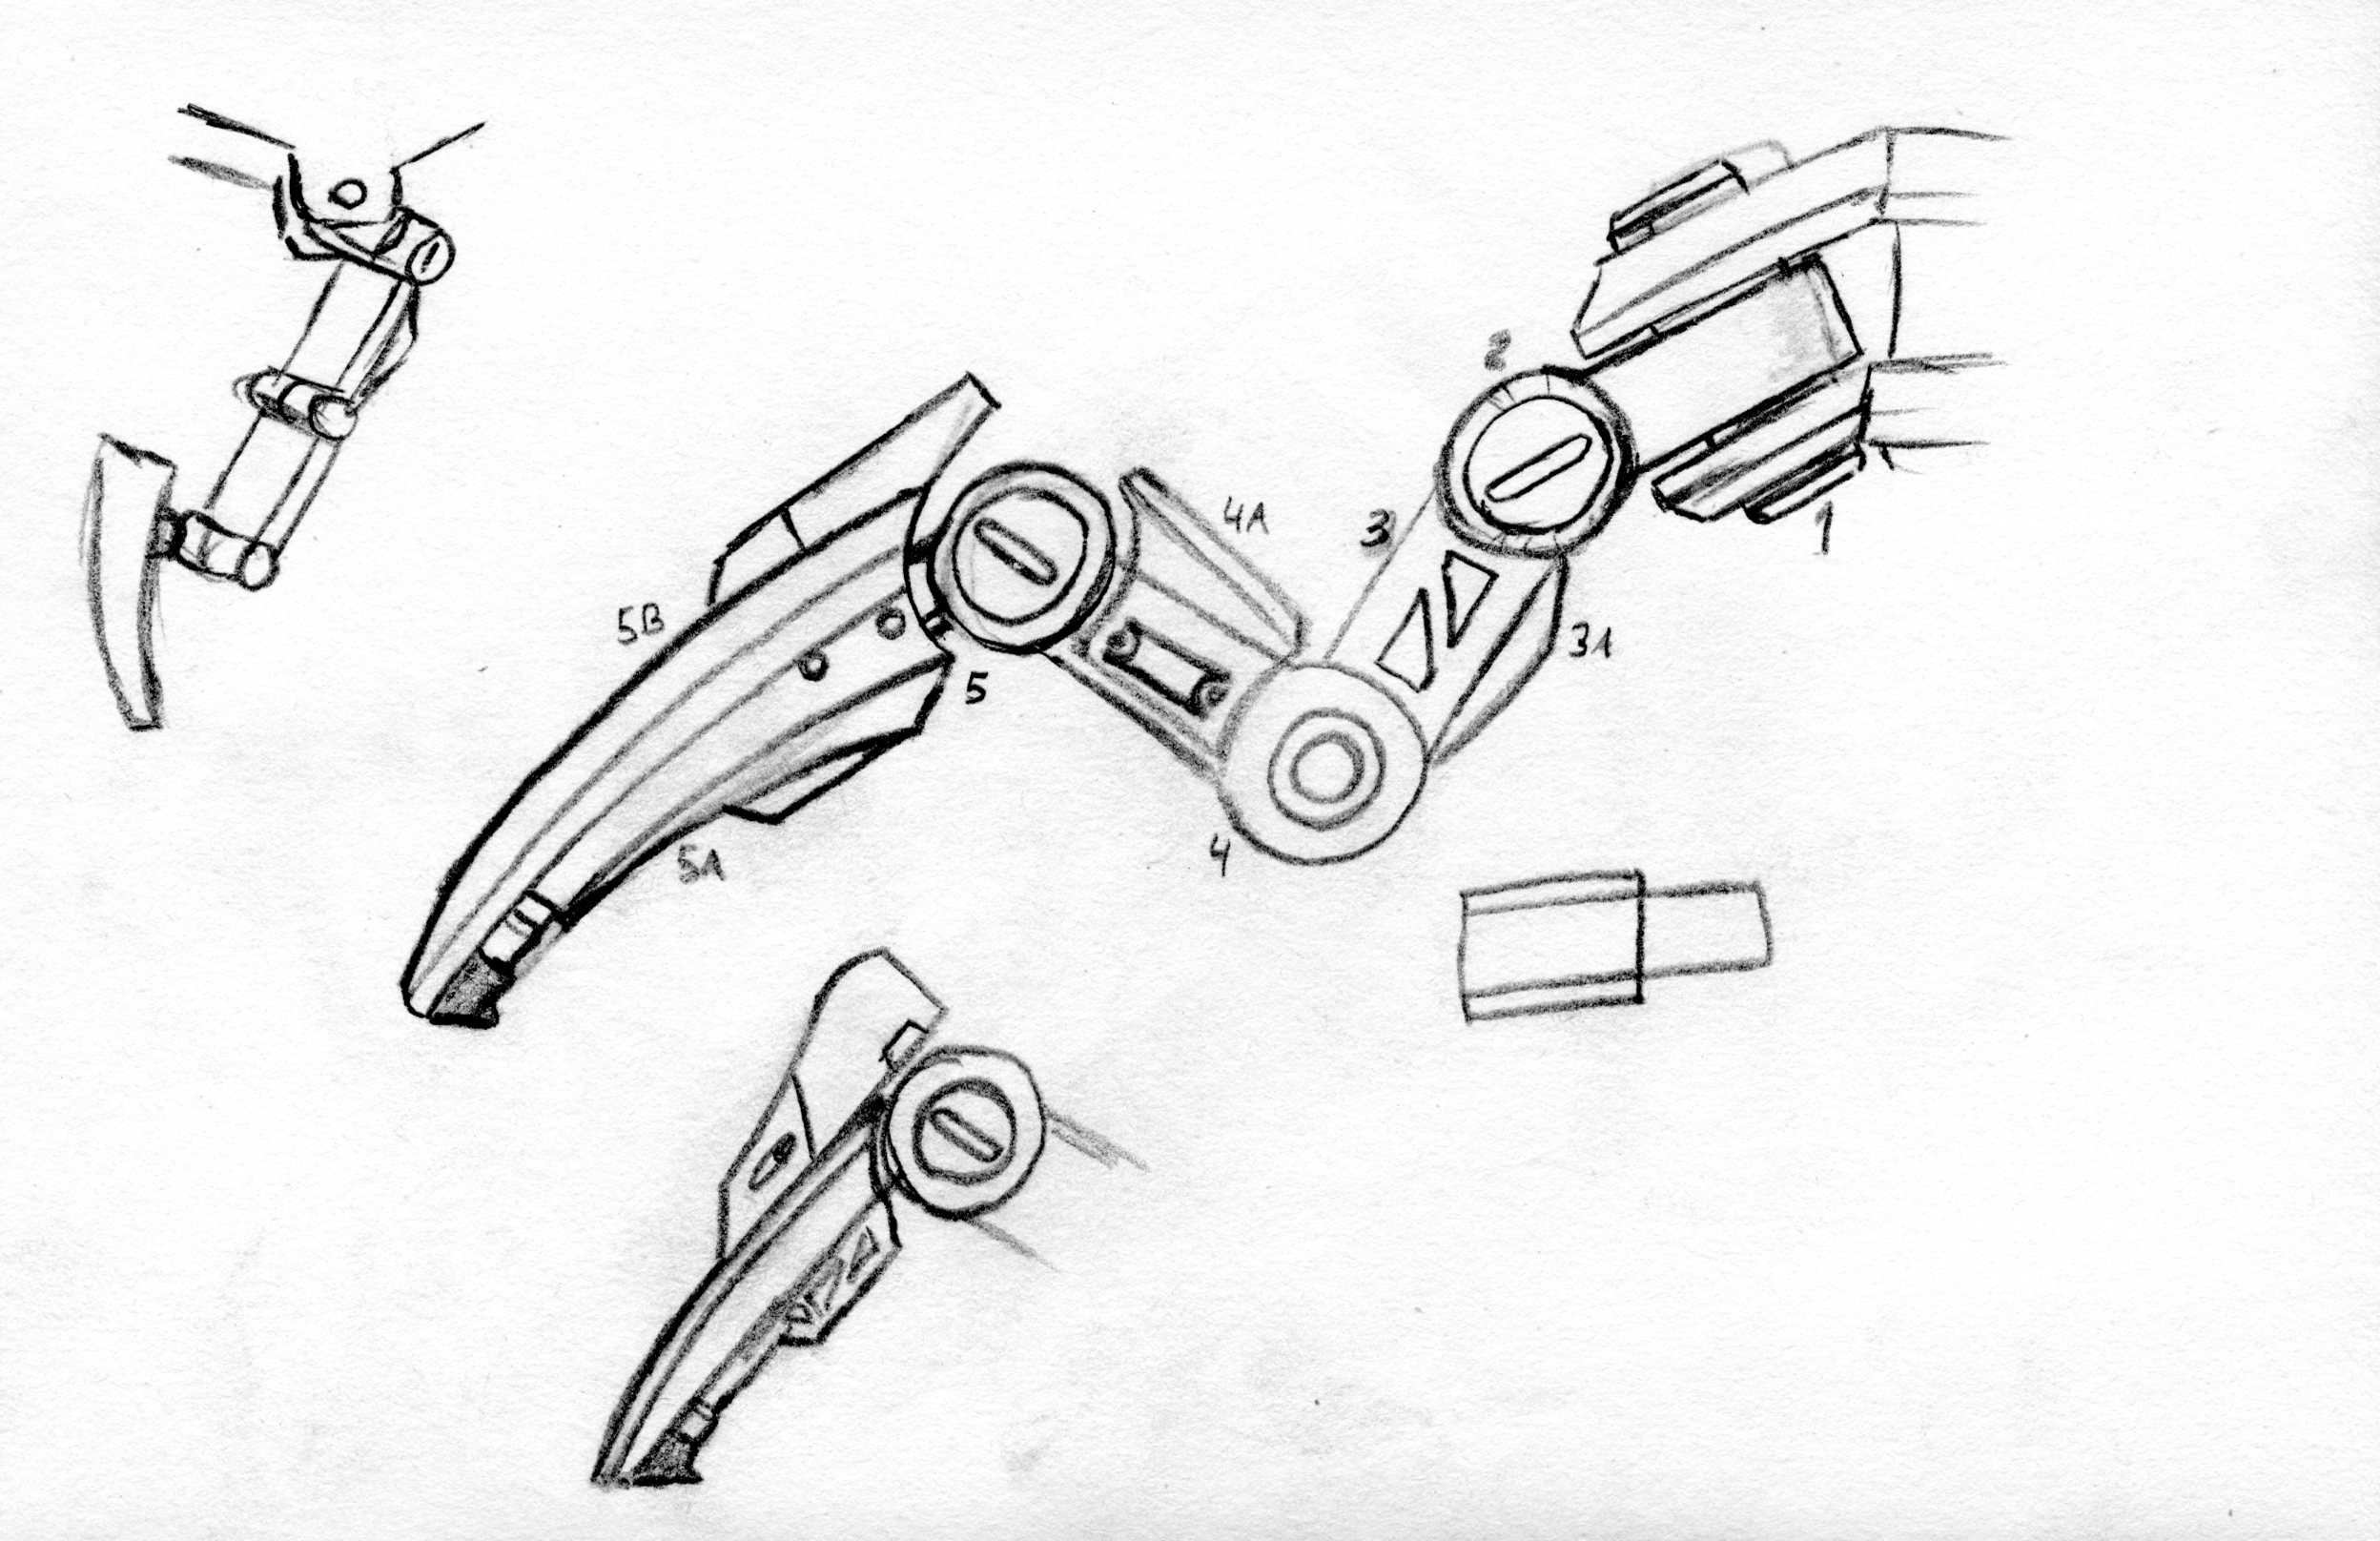
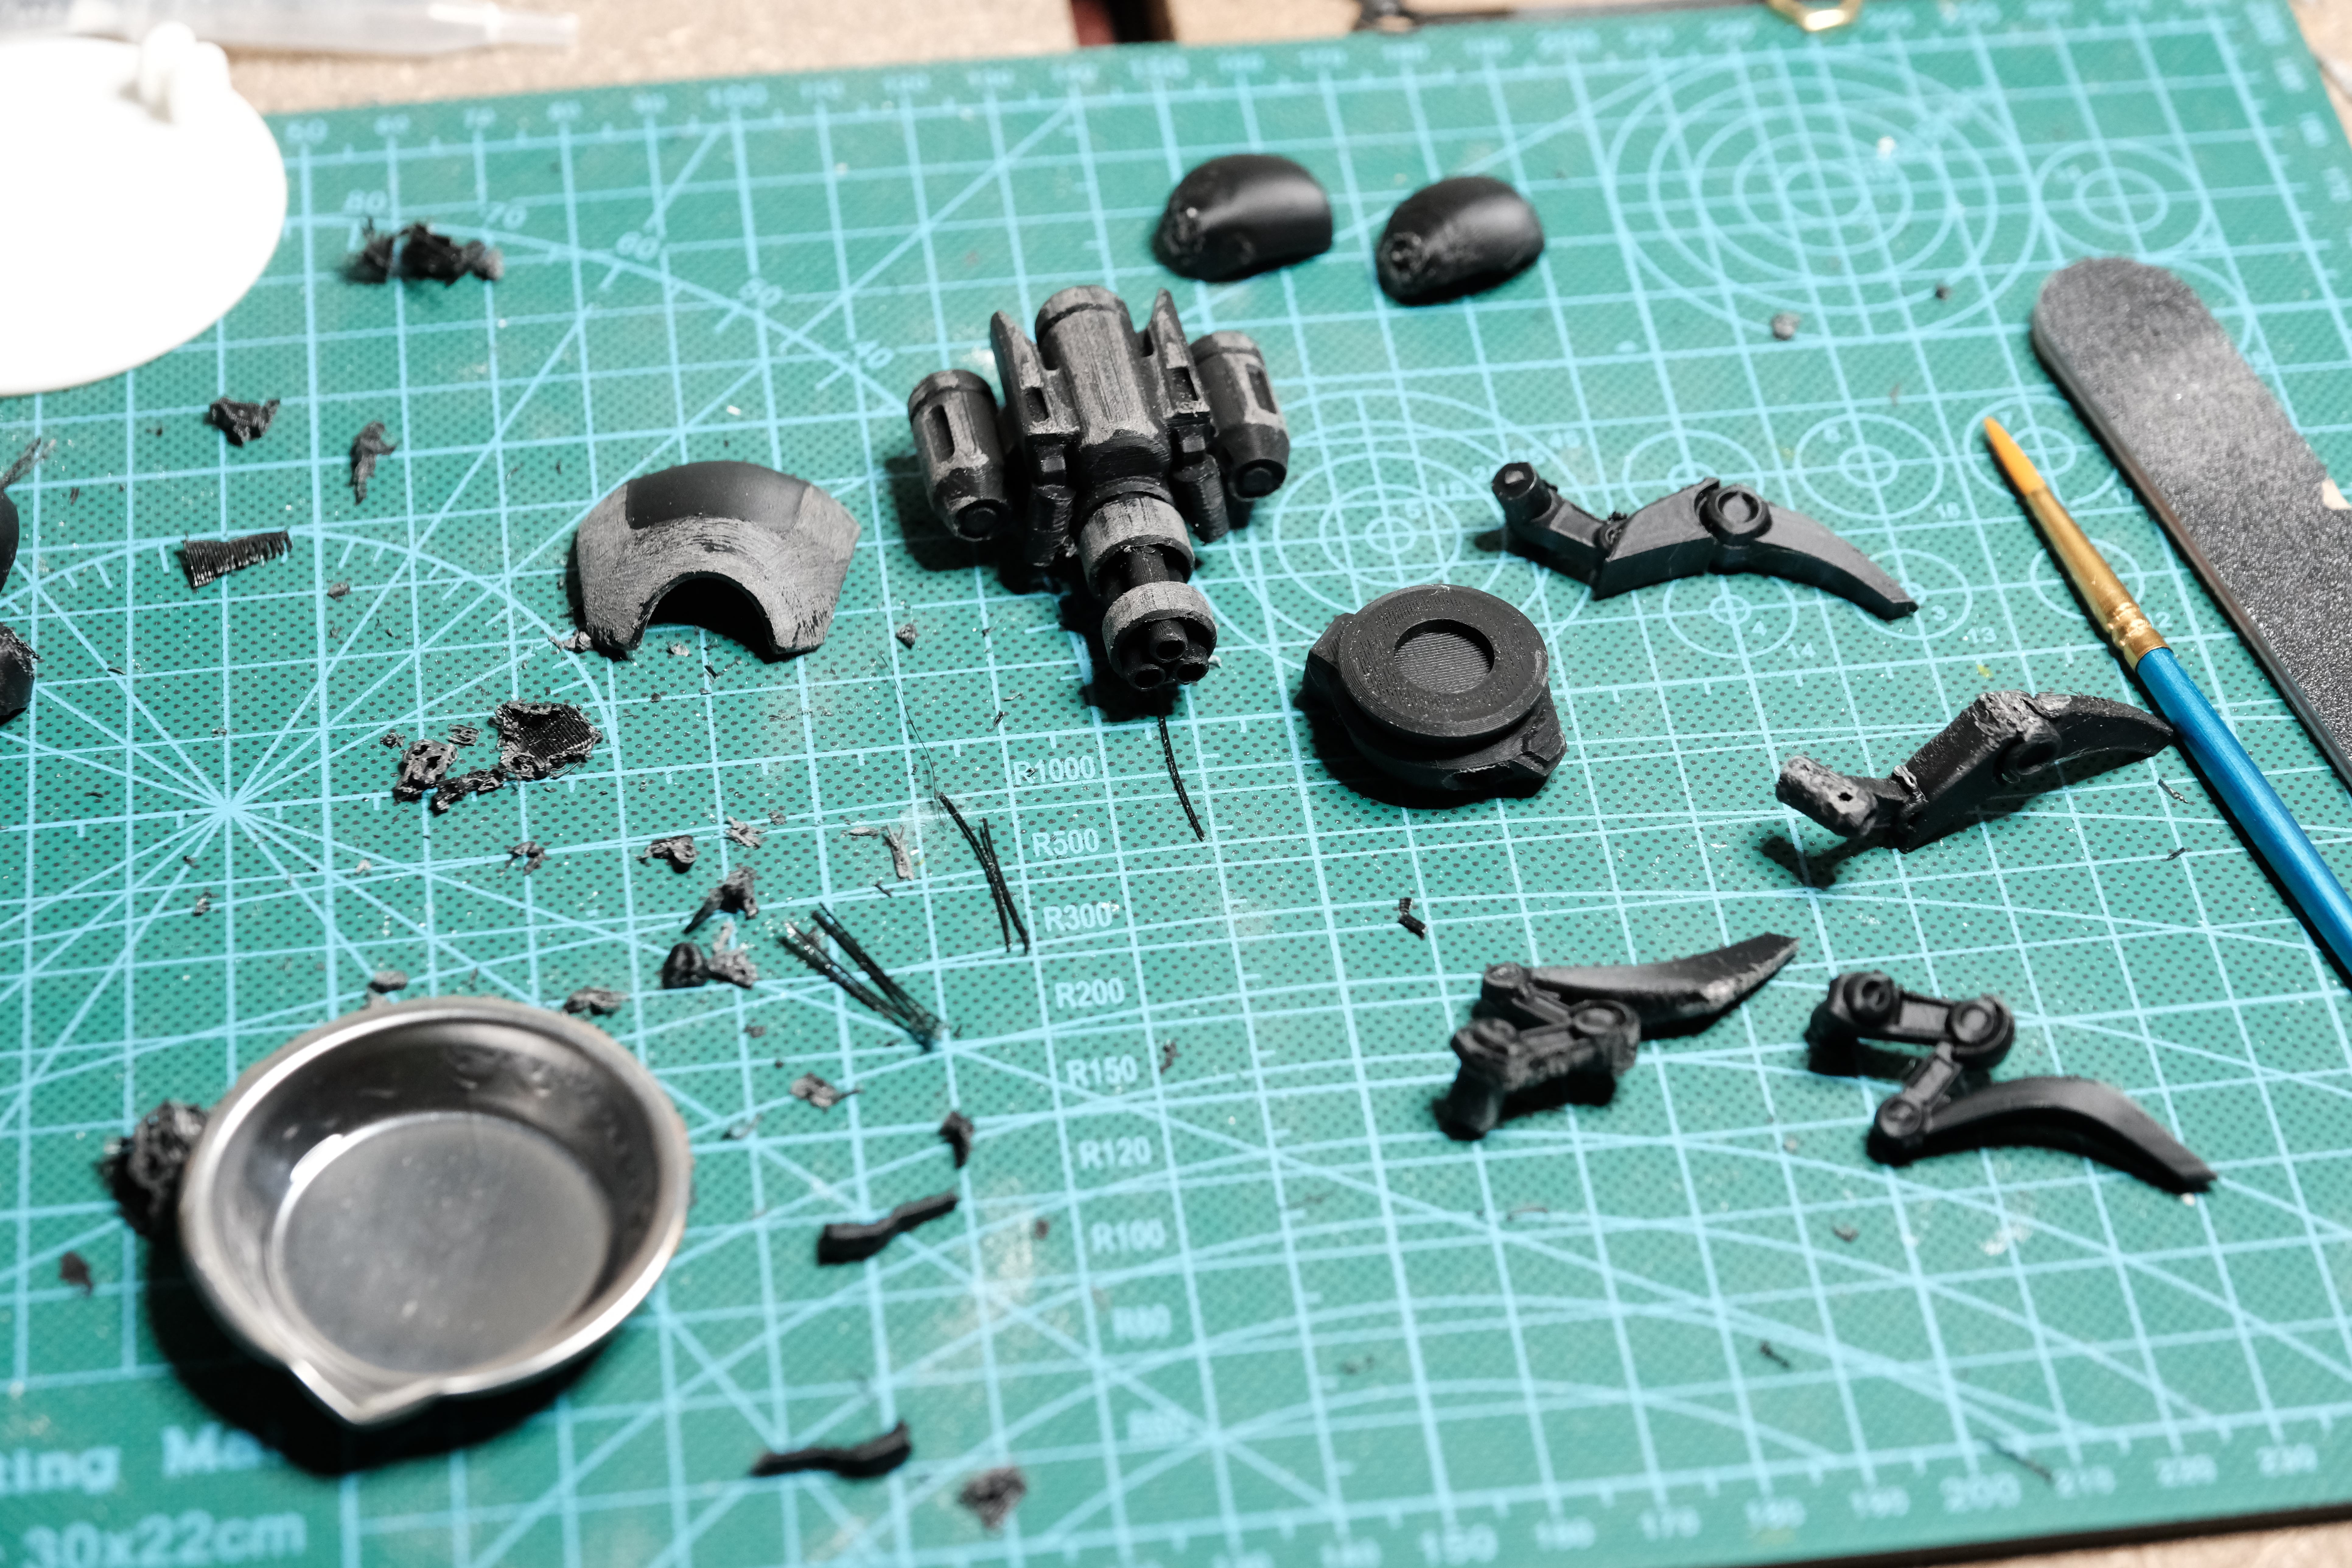
Decided to start with the legs to test articulation theory, just winging it. While I still didn’t have a printer, one of the guys in the office did have a resin printer, so I asked if he could give me a test print of the legs.
After a few weeks, I got some great looking prints of some leg parts, but they sanded weird and snapped apart when trying to assemble. It didn’t help that I missed a few booleans and left absolutely no tolerances for anything.
It was disheartening, and a momentum killer. With no real deadline, I put it on the shelf. I still learned a bit, not many people knew I had even started working on it, and I could quietly end it.
But it sat there. Unfinished. Broken. If you’re an artist, you’ve probably had the need to prove out an idea, or fix the issues at hand. This one sat in the back of my mind. For months. Waiting.
Getting a printer
While I didn’t buy a 3d printer solely for this project, it was a driving motivator.
After doing a bit of homework over a few months, I settled on an A1 Mini from Bambu Lab. It’s a compact design, but known for high quality, high detail prints, and very easy setup. Here’s the general takeaways for my pick:
- Great for high detail small stuff – 0.4 and 0.2 nozzles and plenty of videos on how to get the most out of small parts made this printer a clear option.
- Not as much of a mess as resin
- Better for apartments then resin, breathability wise, too.
- Bambu’s ‘just print’ approach: the hobby is the 3d part, not 3d printer.
- It was also on sale at the time, so size and cost, a good ‘first’ printer.
Side Projects
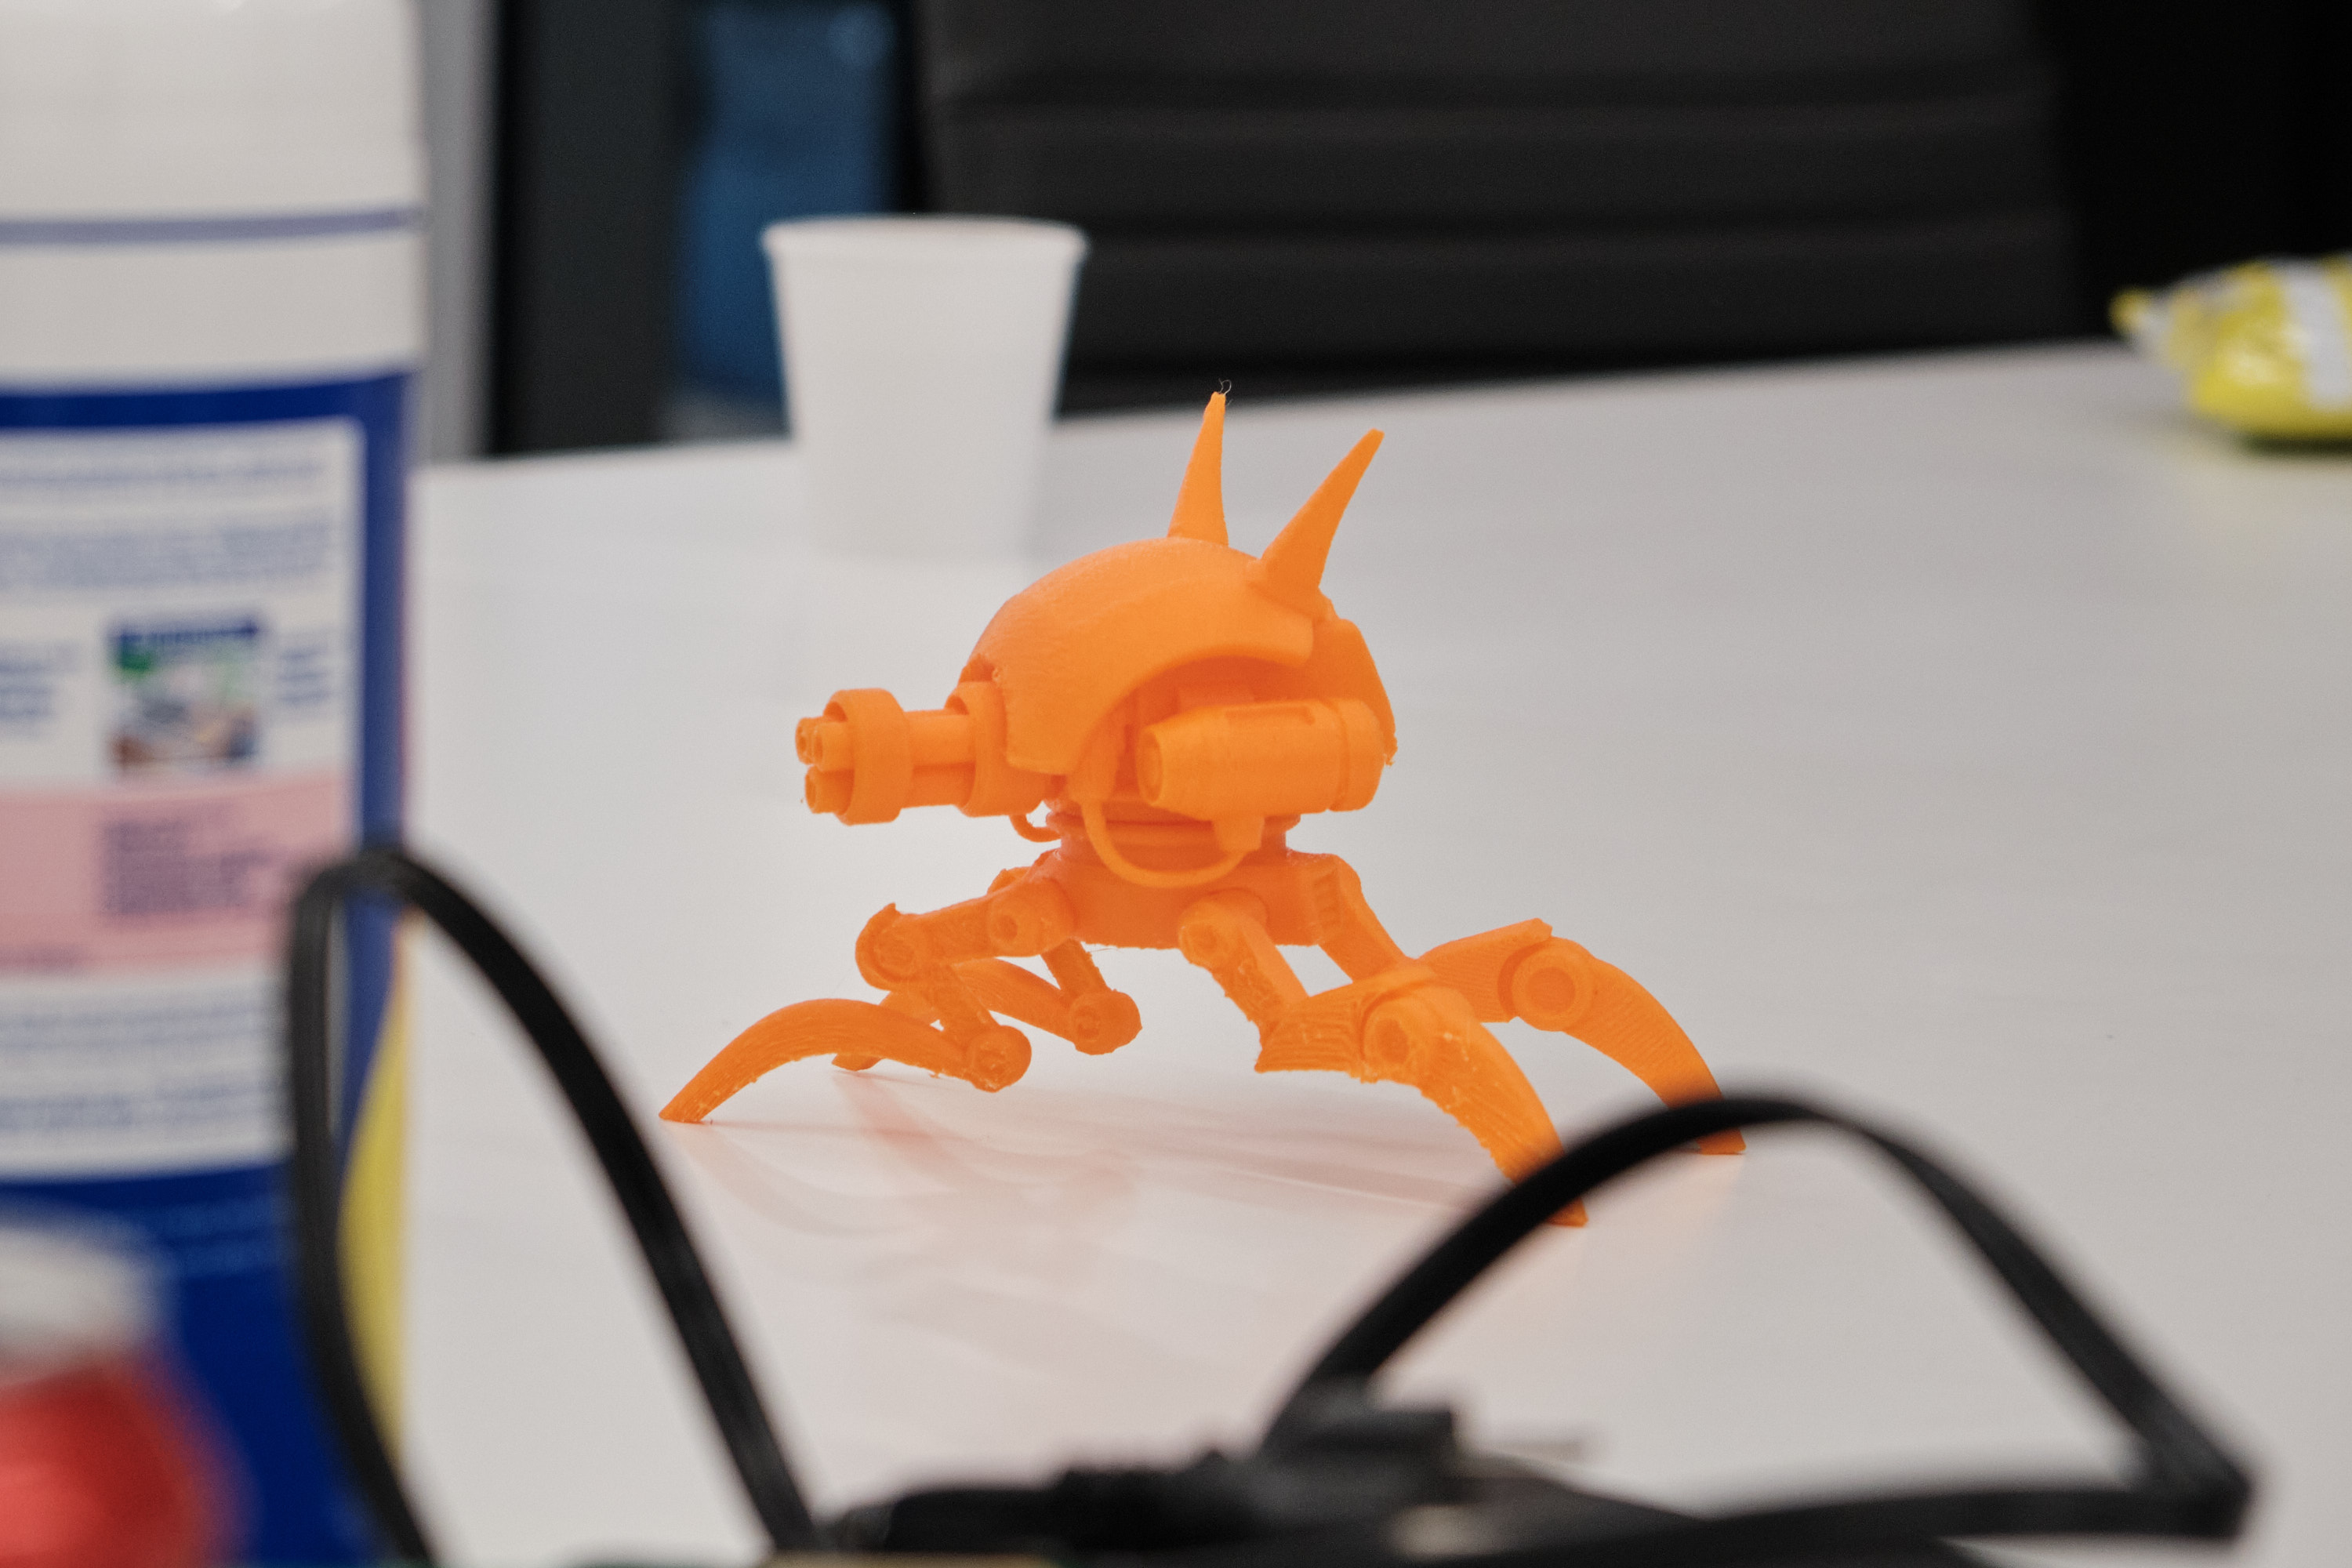
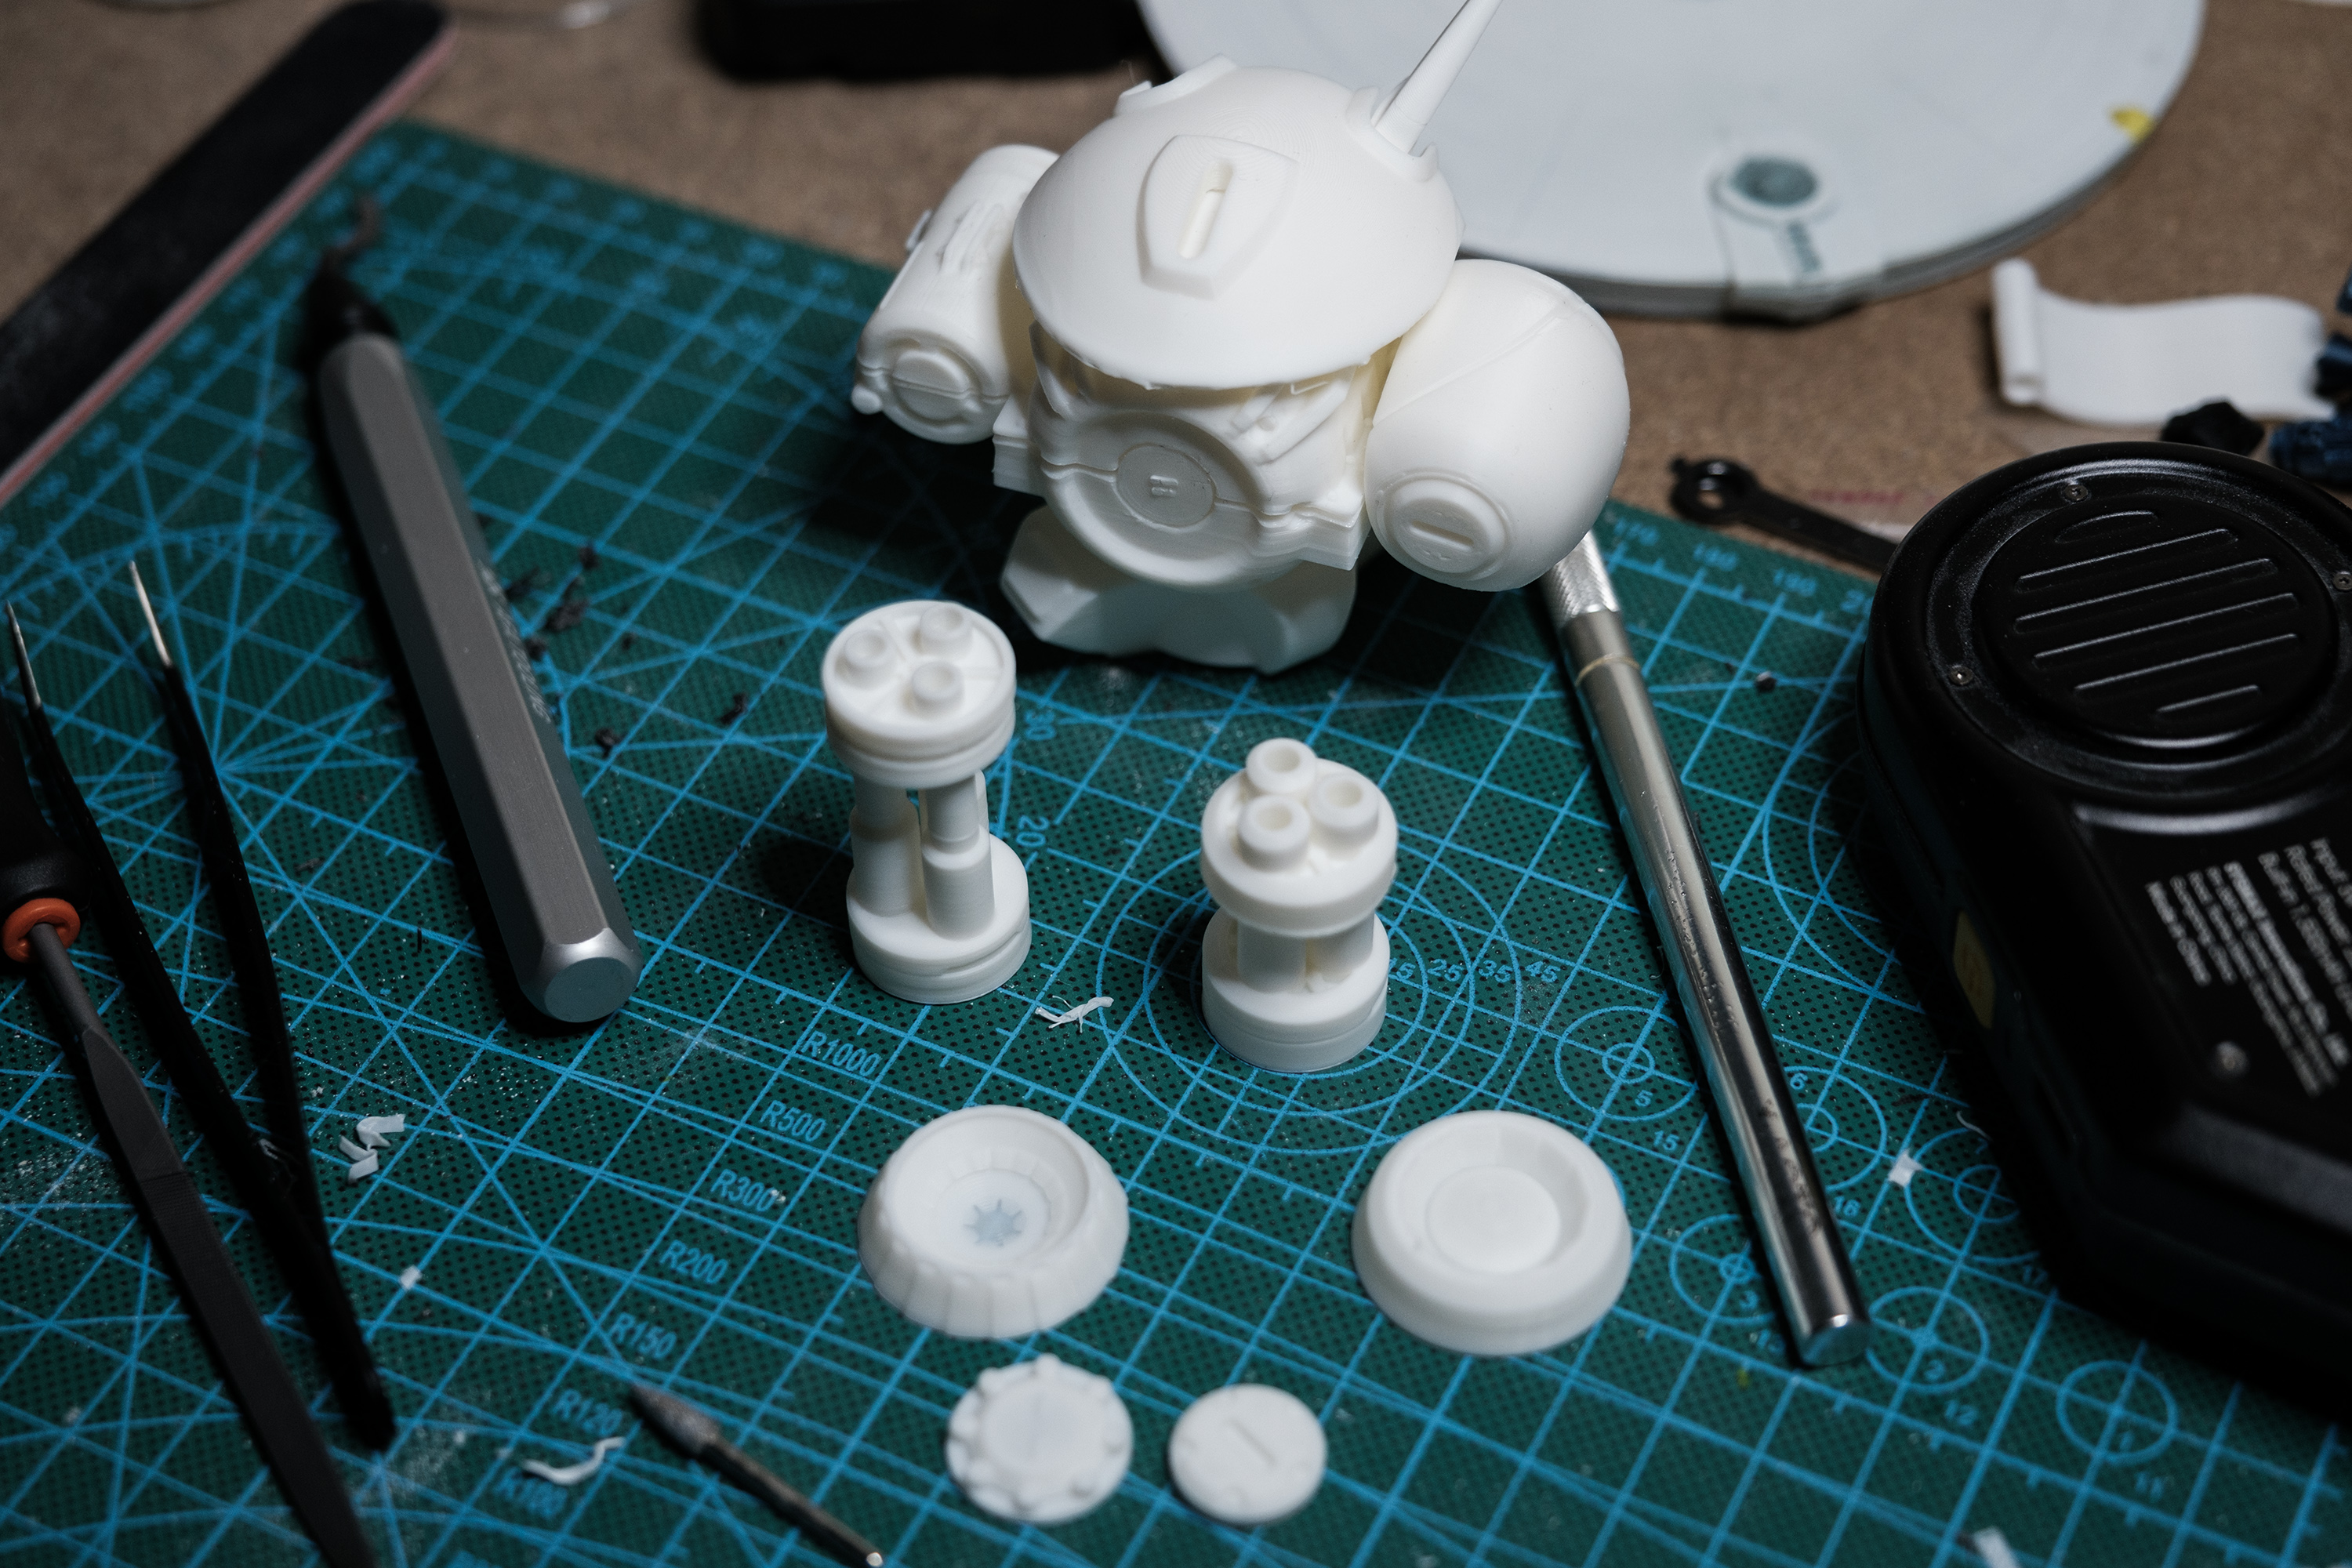
I didn’t jump right into working on the Gunbot again, I wanted to get my bearings with the printer first. A few Benchy prints, a whistle, a foldable jeep, and and a few other simple projects got me to get an idea what the machine could do, but I decided to take the included DIY project as a chance to try the Plasticity -> Print pipeline and warm back up. Before that, let’s cover an interesting download.
Dummy 13

A notable mention from the list of models I tried printing from the community was the Dummy 13 model by Gabriel Rosiak, a very neat and FDM printing optimized articulating joint action figure that one of the guys at the office recommended once he found out I had taken the plunge into 3D printing.
This is worth noting because the joints… just work. It’s been a long time since I’ve reverse engineered a model to understand how it functioned, and definitely a first in the 3d printing space, but I went so far as to remodel some of the joints in Plasticity and print them standalone in order to better understand why they work so well despite the apparent simplicity.

Saucer Clock
With some of my gears turning again, I decided to dip my toe in on printing something made in Plasticity, a Star Trek design, of course!
I came to this post to look at Battle Aces content and you’re free-booting Star Trek half way through, this is a betrayal!
Too bad. I love Star Trek and you’re just gonna have to sit back down. My site, my rules. And there’s a point to this.
This was a modification of the starter kit project that came with my printer. While it had a model you could print, this felt like a really good one object project I could start with.
While it was a brand new model, it did serve as a simple fresh start that lets me get warmed up to the process without getting caught up in the intractable unsolved problems I was currently suck on with the Gunbot’s articulation.

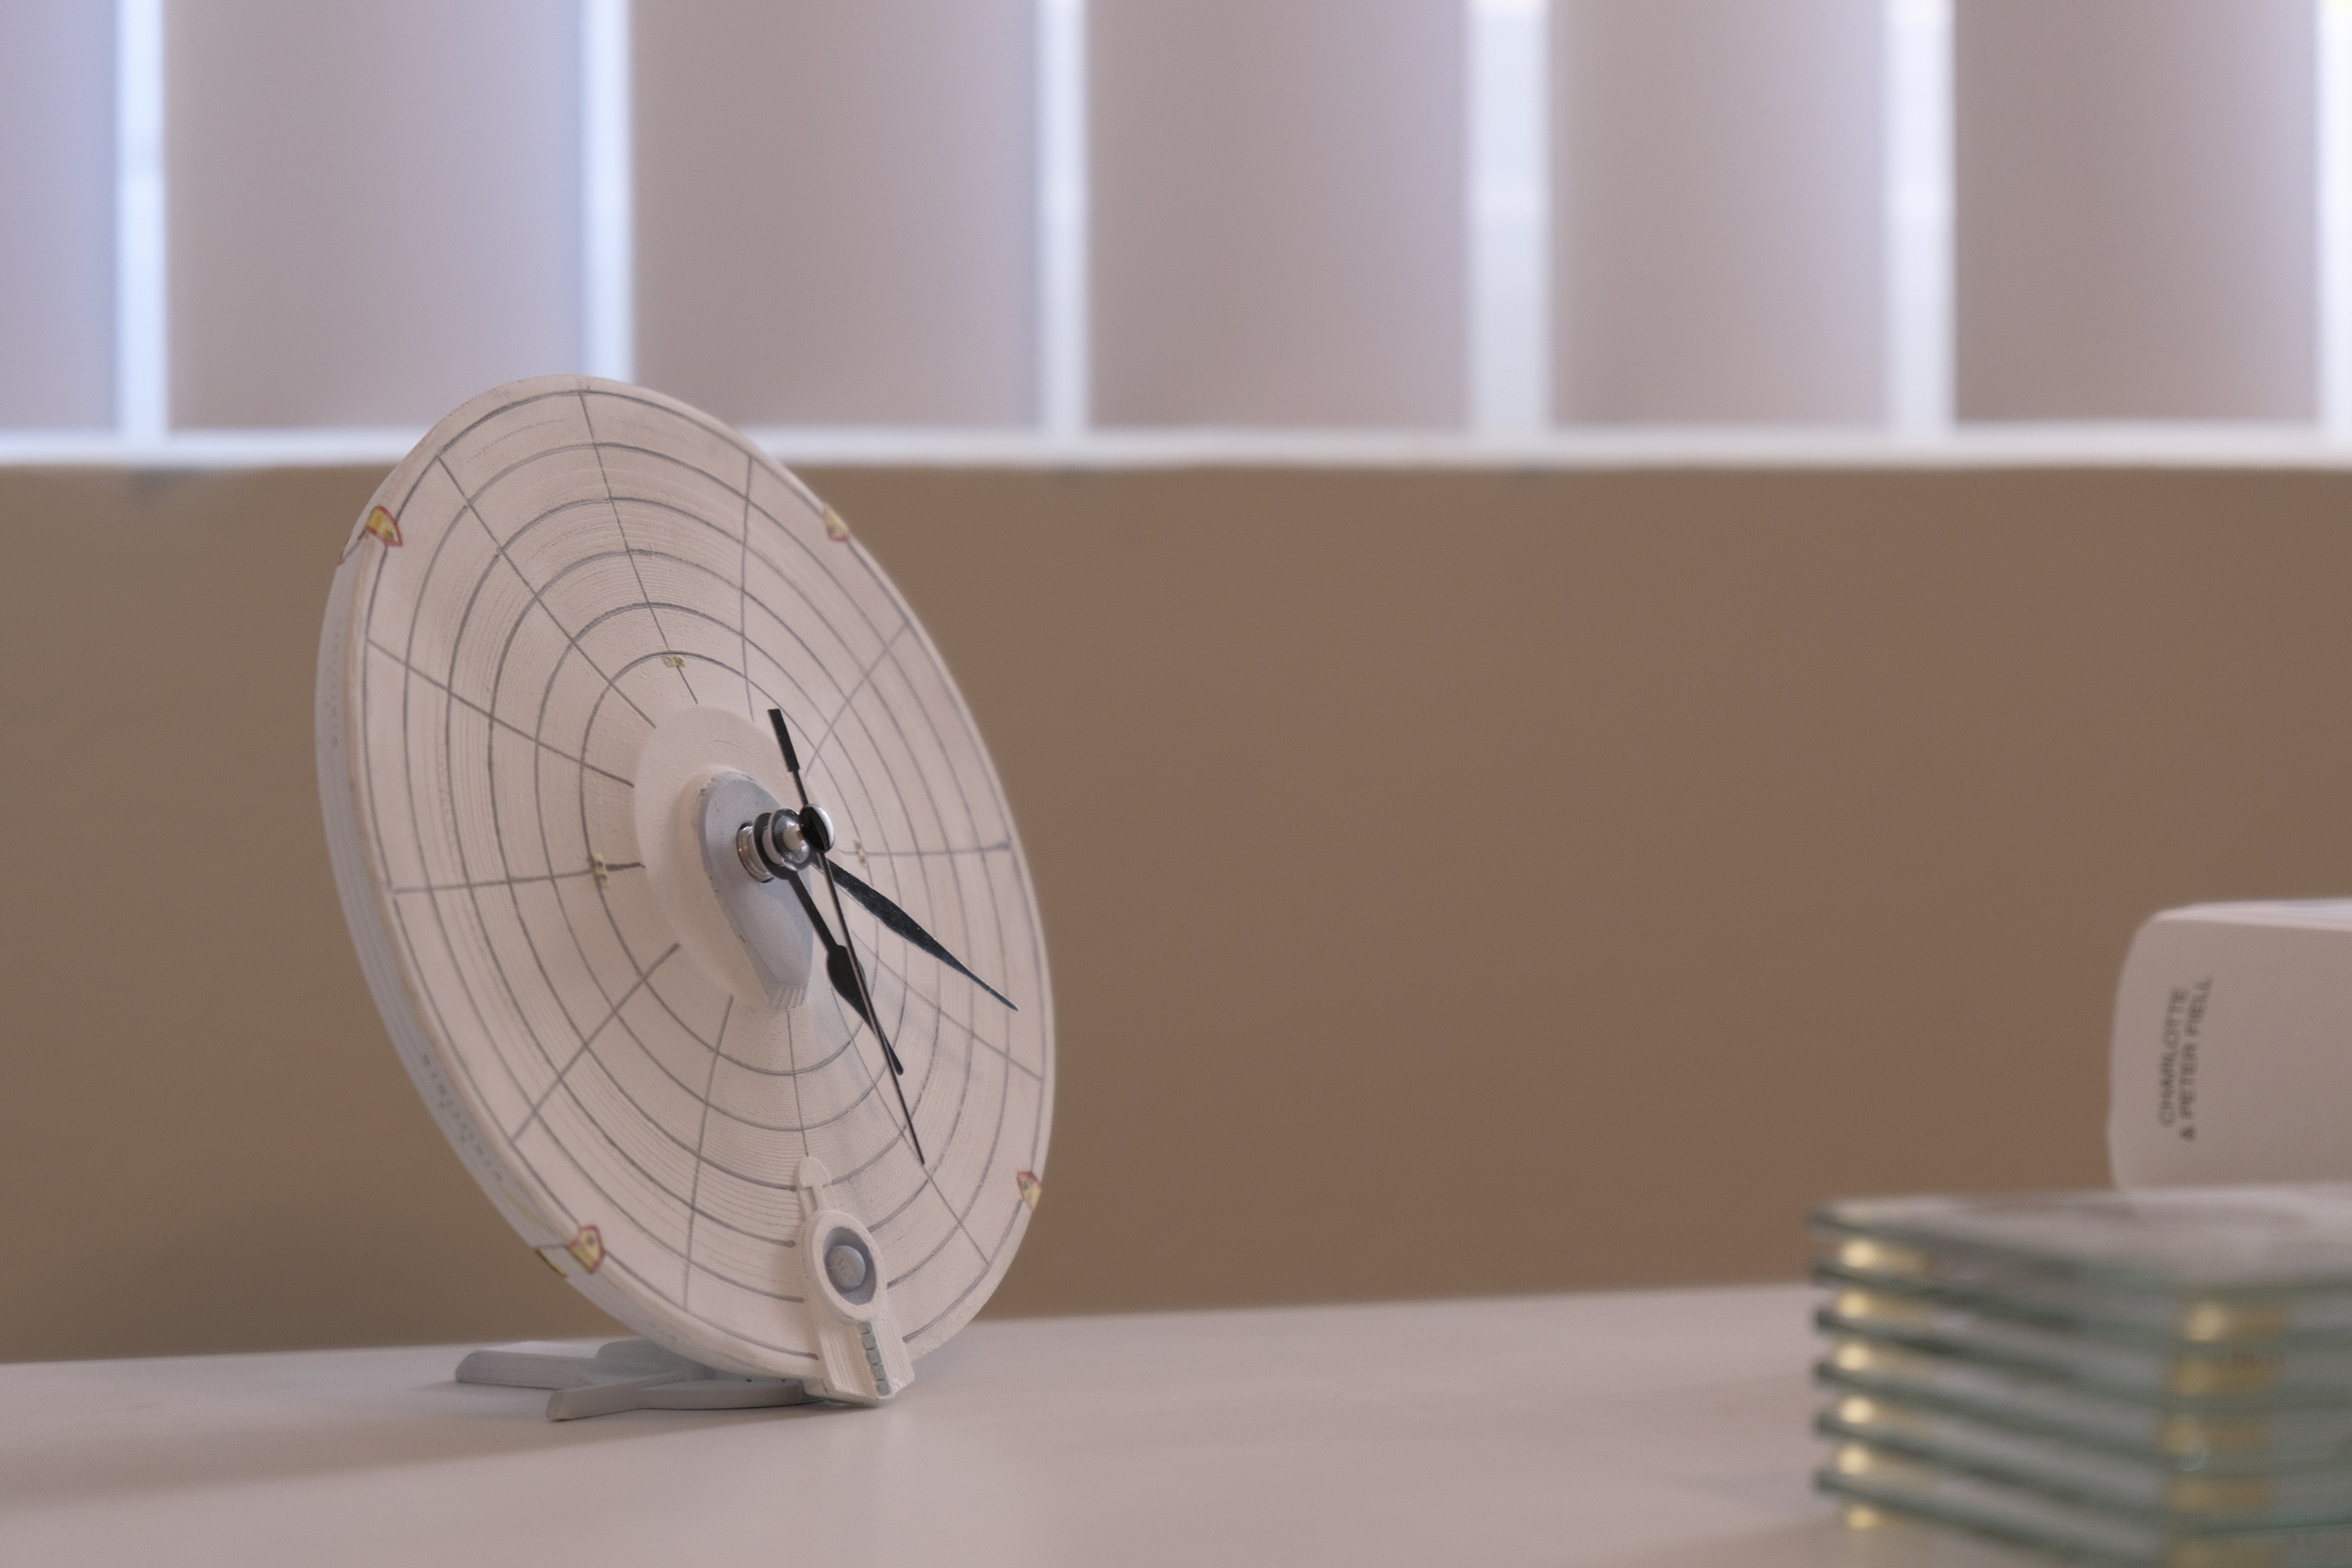
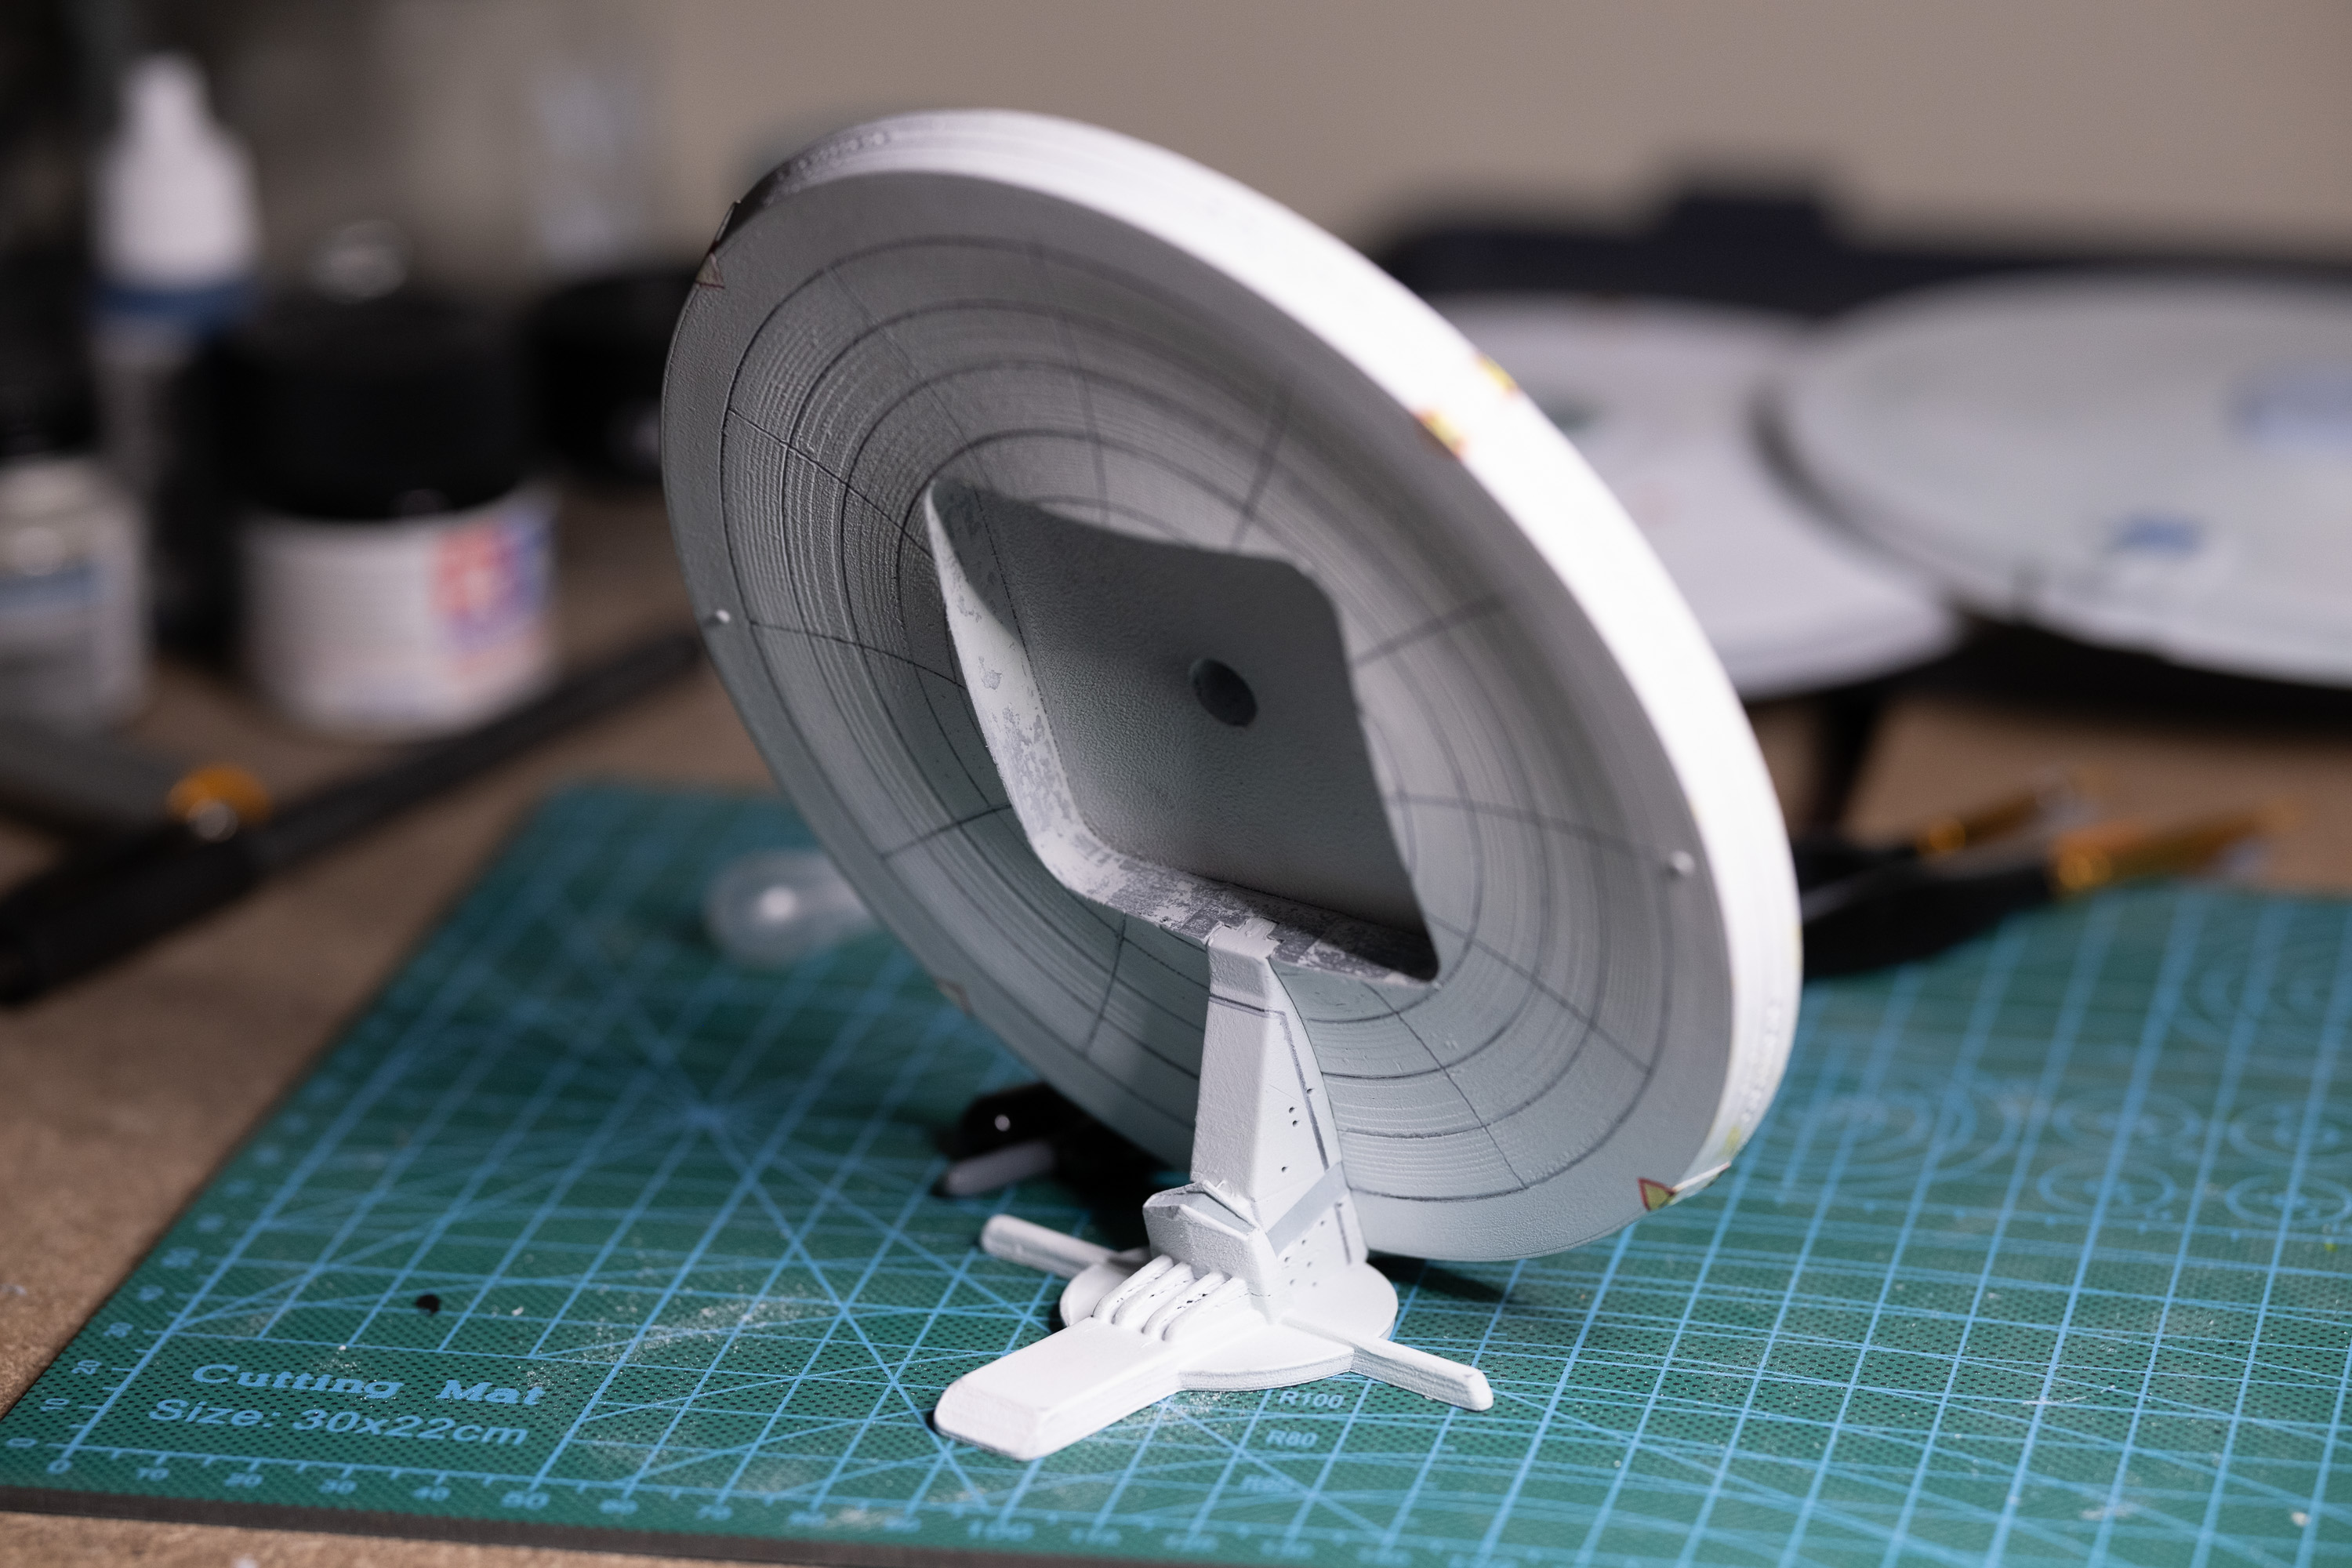
Getting this clock face modeled, printed, and painted taught me a good bit about how this additive plastic printing process works – for example, the slightly curving surface was a nightmare to get smooth, and informed later decisions around the round shell shapes on the Gunbot, as did my lessons learned about tolerances when it came to measuring and fitting the existing clock element.


Plus when I was done, I had a (maybe obvious) but still pleasing clock that I had made myself. Fun little fact – the actual model is split into even 16th’s, which makes the lines bad for telling time – I made a subtle change to 12th’s. It’s not screen accurate and harder to model, but makes the panel lines double as hour lines.


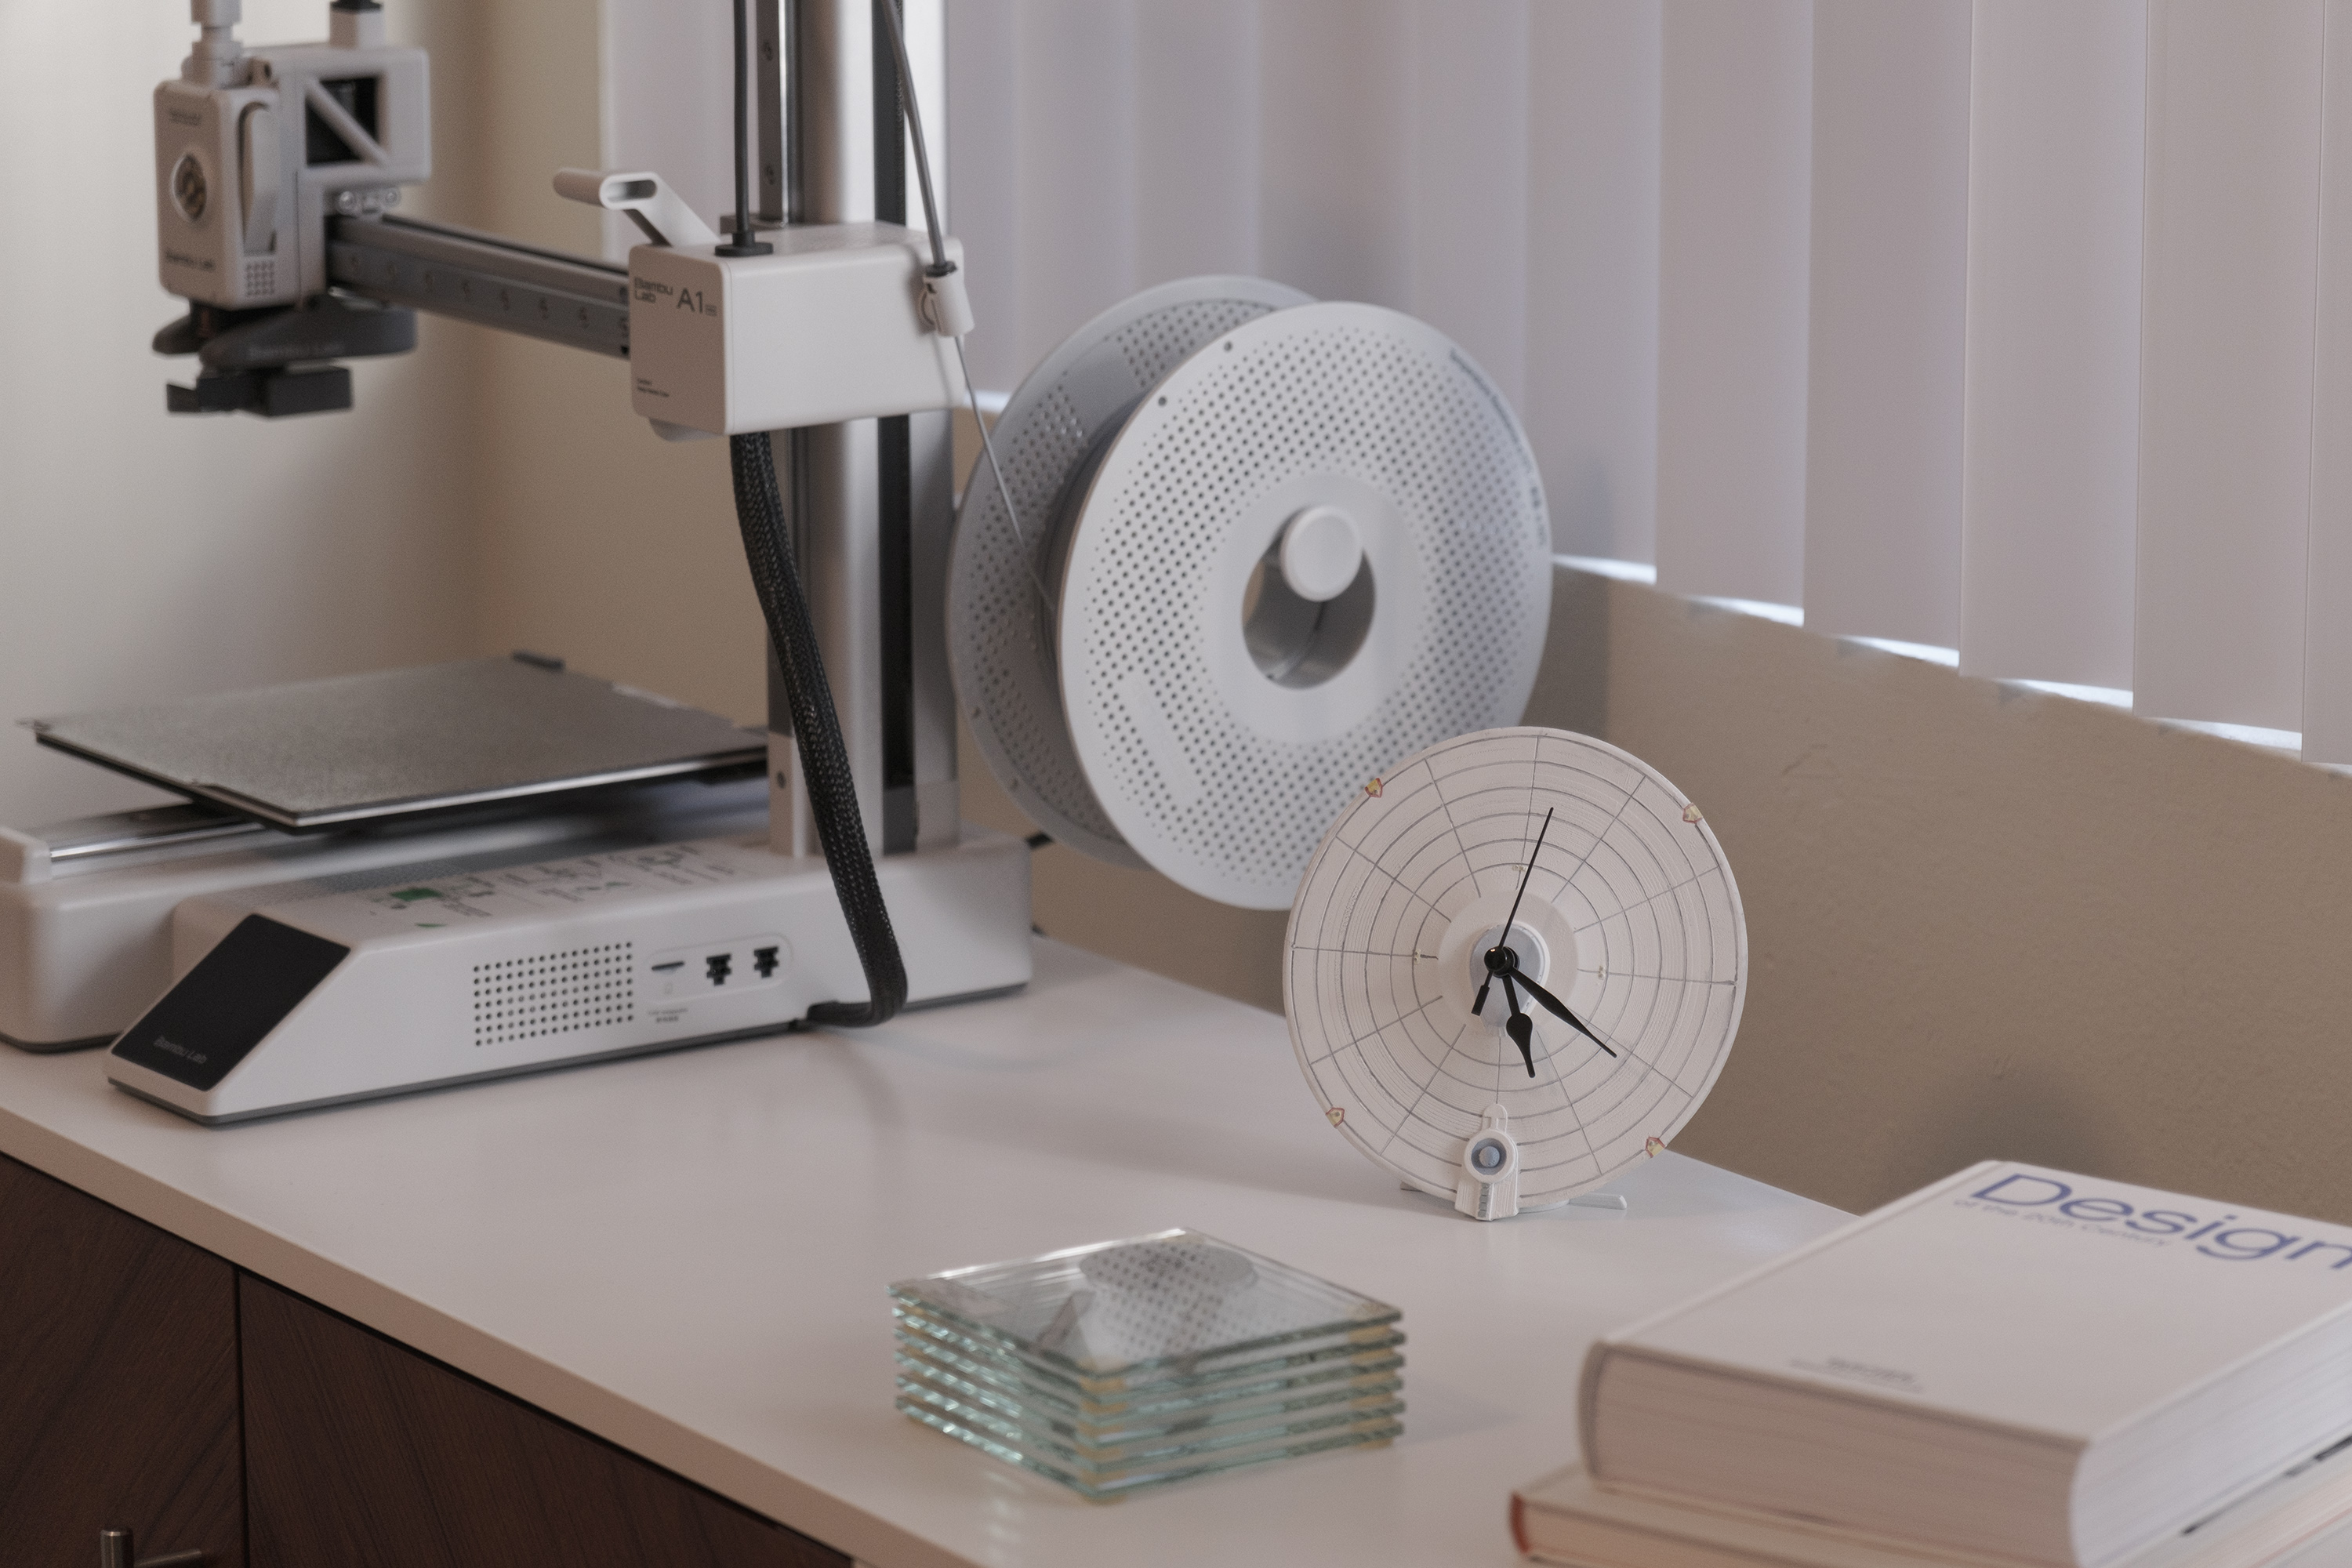
Overall, I was happy with the results, and had a clock to tell me how much time I was spending going further down this path…
Picking up the pieces
I also decided to see how that V1 print was, as a print. It was bad. I’m so sorry, other Ben. Having gone from the Dummy 13 to this, it was a double whammy of bad.
This, more then anything, was the breaking point. I could let this be where I left it with a clear path to something better in my head, and all the tools having finally manifested themselves in my hands. Through every fault of my own, everything had aligned to pick this one back up.
We are so back (to bot)
With a printer at the ready, I was able to make changes, print them, test fittings, and walk right back to Plasticity and make updates. Weeks of guessing became hours, and this project became feasible.

With the mechanically hard part done, I could then move on the fun modeling – the body.

Getting adventurous
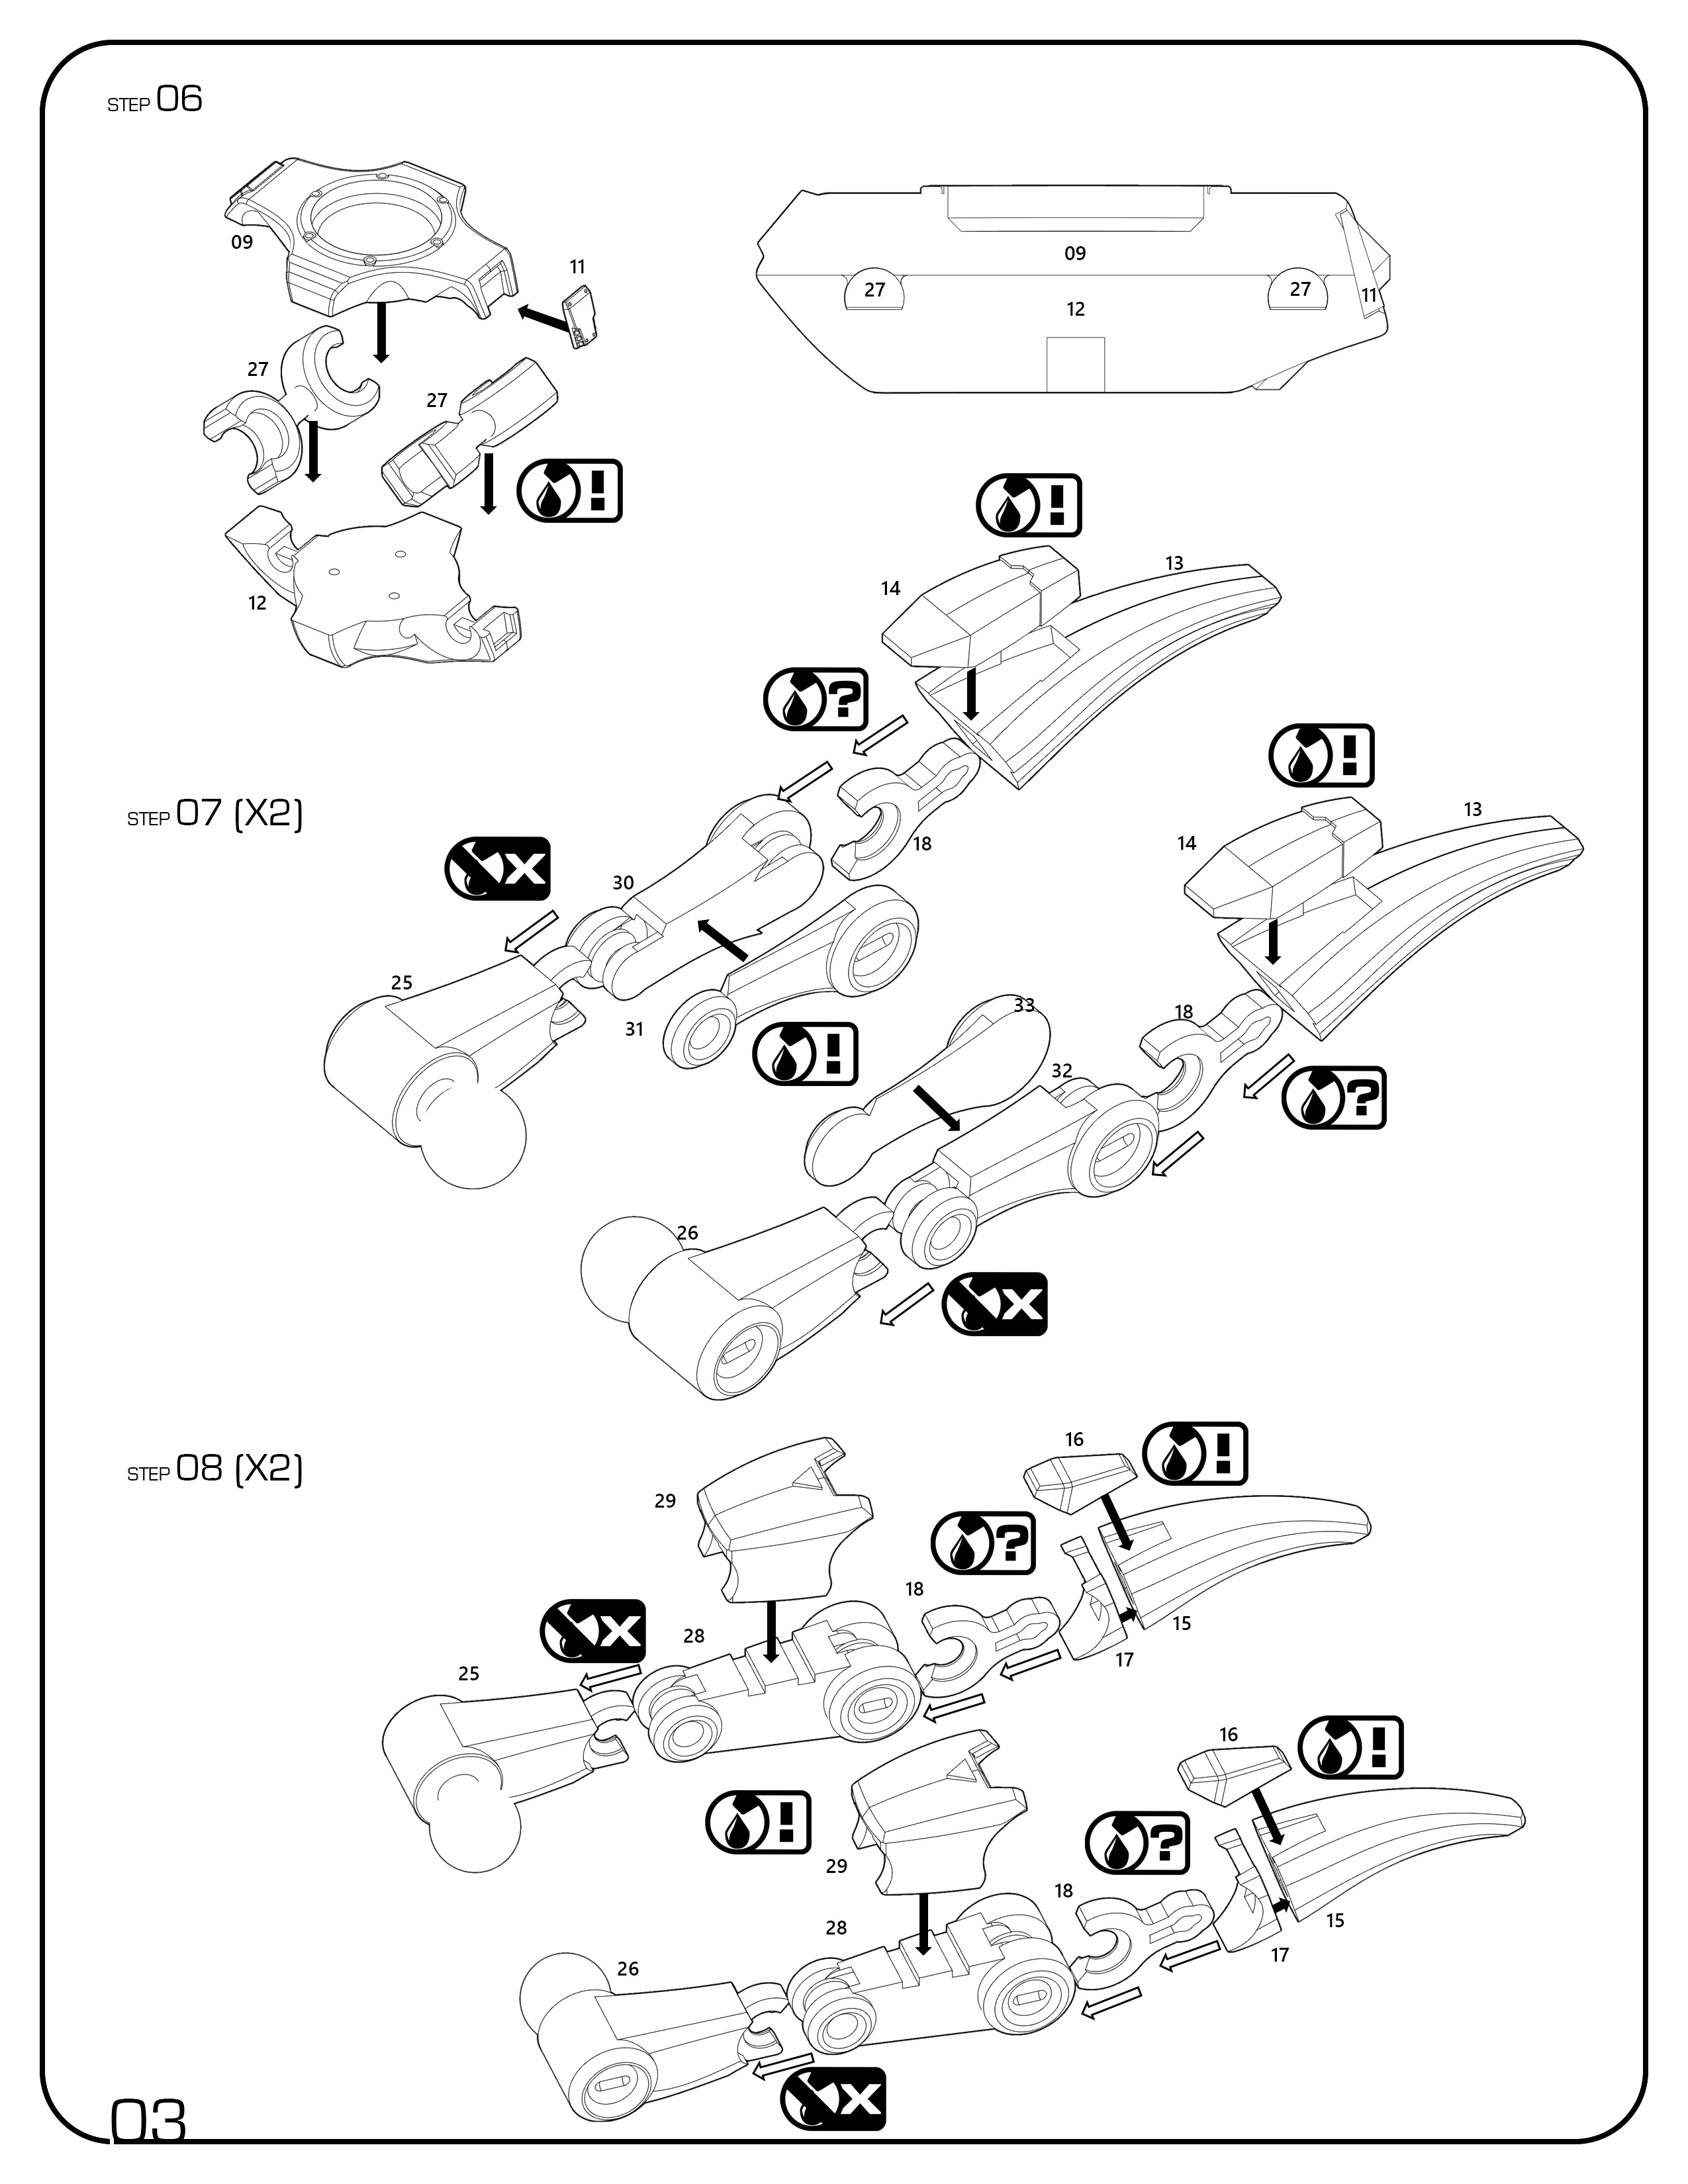
Finally having broken past the bedrock, I was in the flow zone, that mythical part of a project where it’s really fun to work on. I decided to go all in on trying to merge together the ingame and cinematic design motifs while making changes necessary for it to be printable. This became in interesting dance of finding seam and cut lines, and defining end caps and alternate parts that the model builder could mix and match between to make their ideal design from.
This did end up having its limits – to perfectly match the cinematic model, I would have had to remodel the legs and again and pelvis twice. Given how much of a momentum killer that whole process was once, I oped to limit the cinematic variant of the legs to the more distinctive feet and ‘knee-pad’ designs.

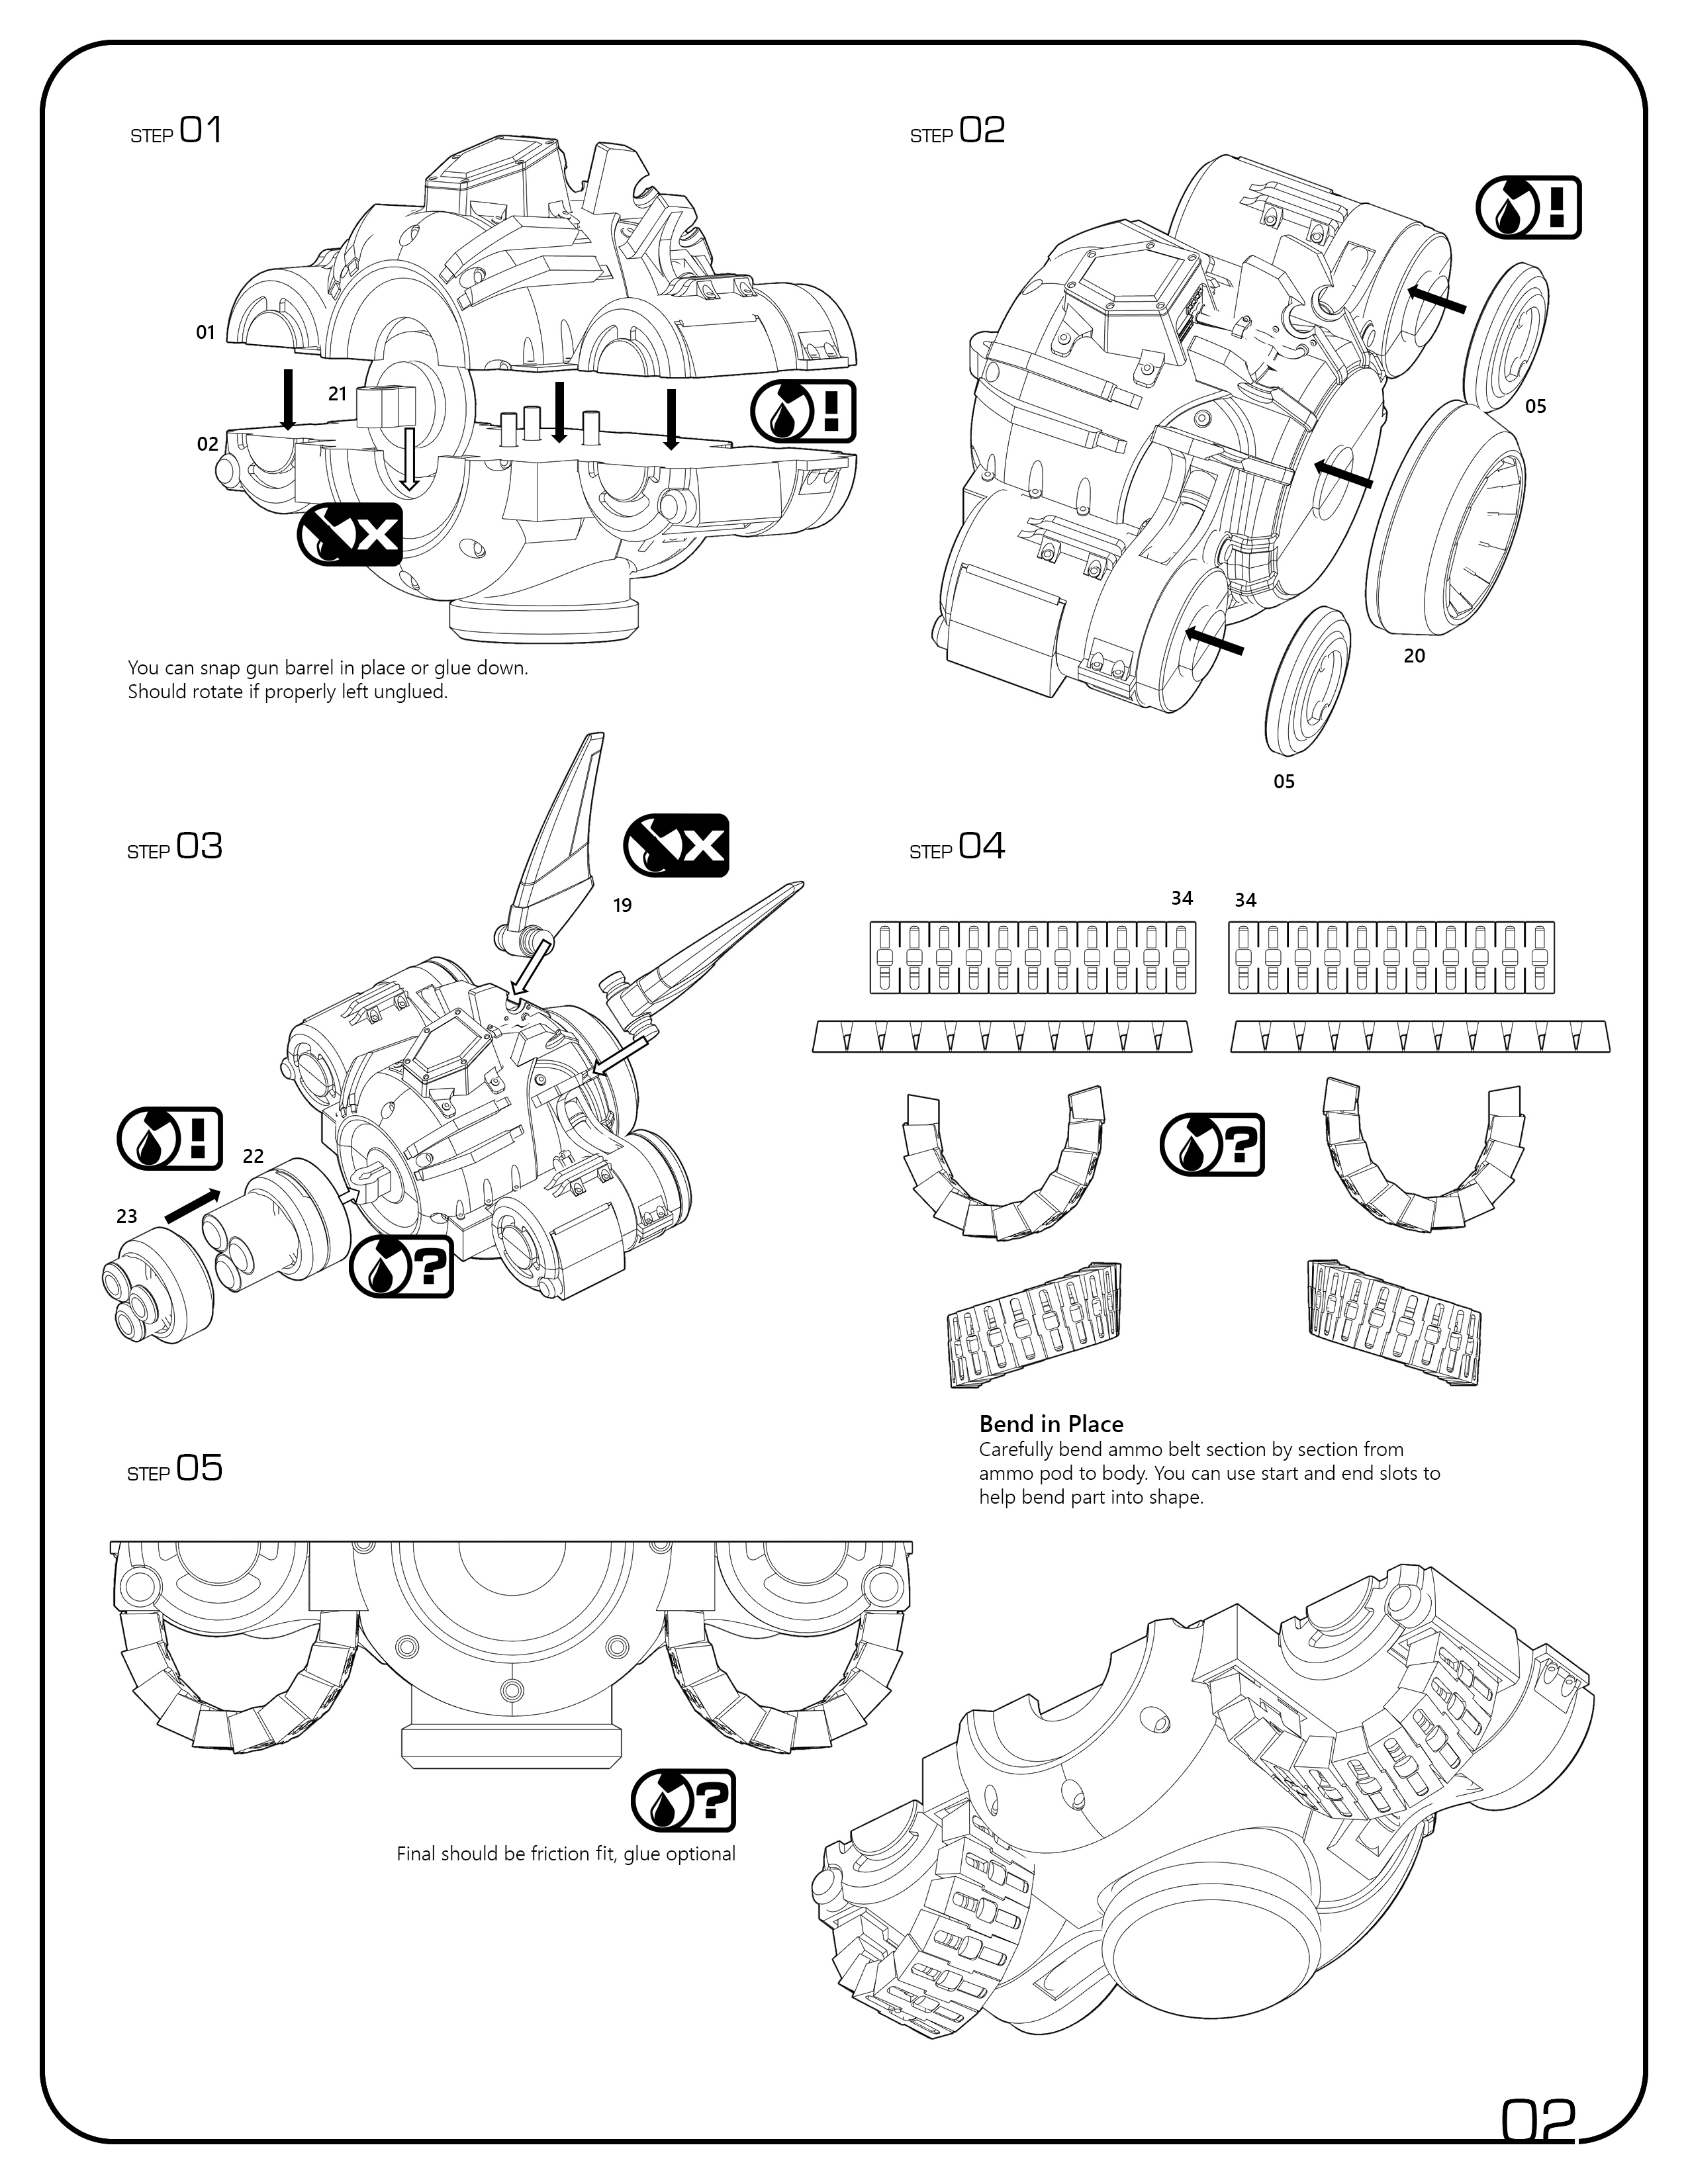
One of the last pieces was the ammo belt. By the time I started this, I was feeling far more bullish with modeling for the medium. While I could have matched the bending shape and modeled something that would have been impossible to print without supports, I instead decided to experiment and see if I could leverage the nature of thin plastic to bend a flat part into the desired shape after printing, not unlike some more complex tank tread model kits, or flat card 3d prints.


While my initial approach of having the bullets and outer sleeve as separate objects tuned out to be too fragile to really manipulate and bend, I eventually got a thicker shape that consistently bent into place and friction fit into the final model. I was even able to model the cinematic design as well, and that worked just the same, both in PLA and PETG. There are are a few part fittings I’m proud of in the final model, but this is the ‘coolest’ part, in my mind.
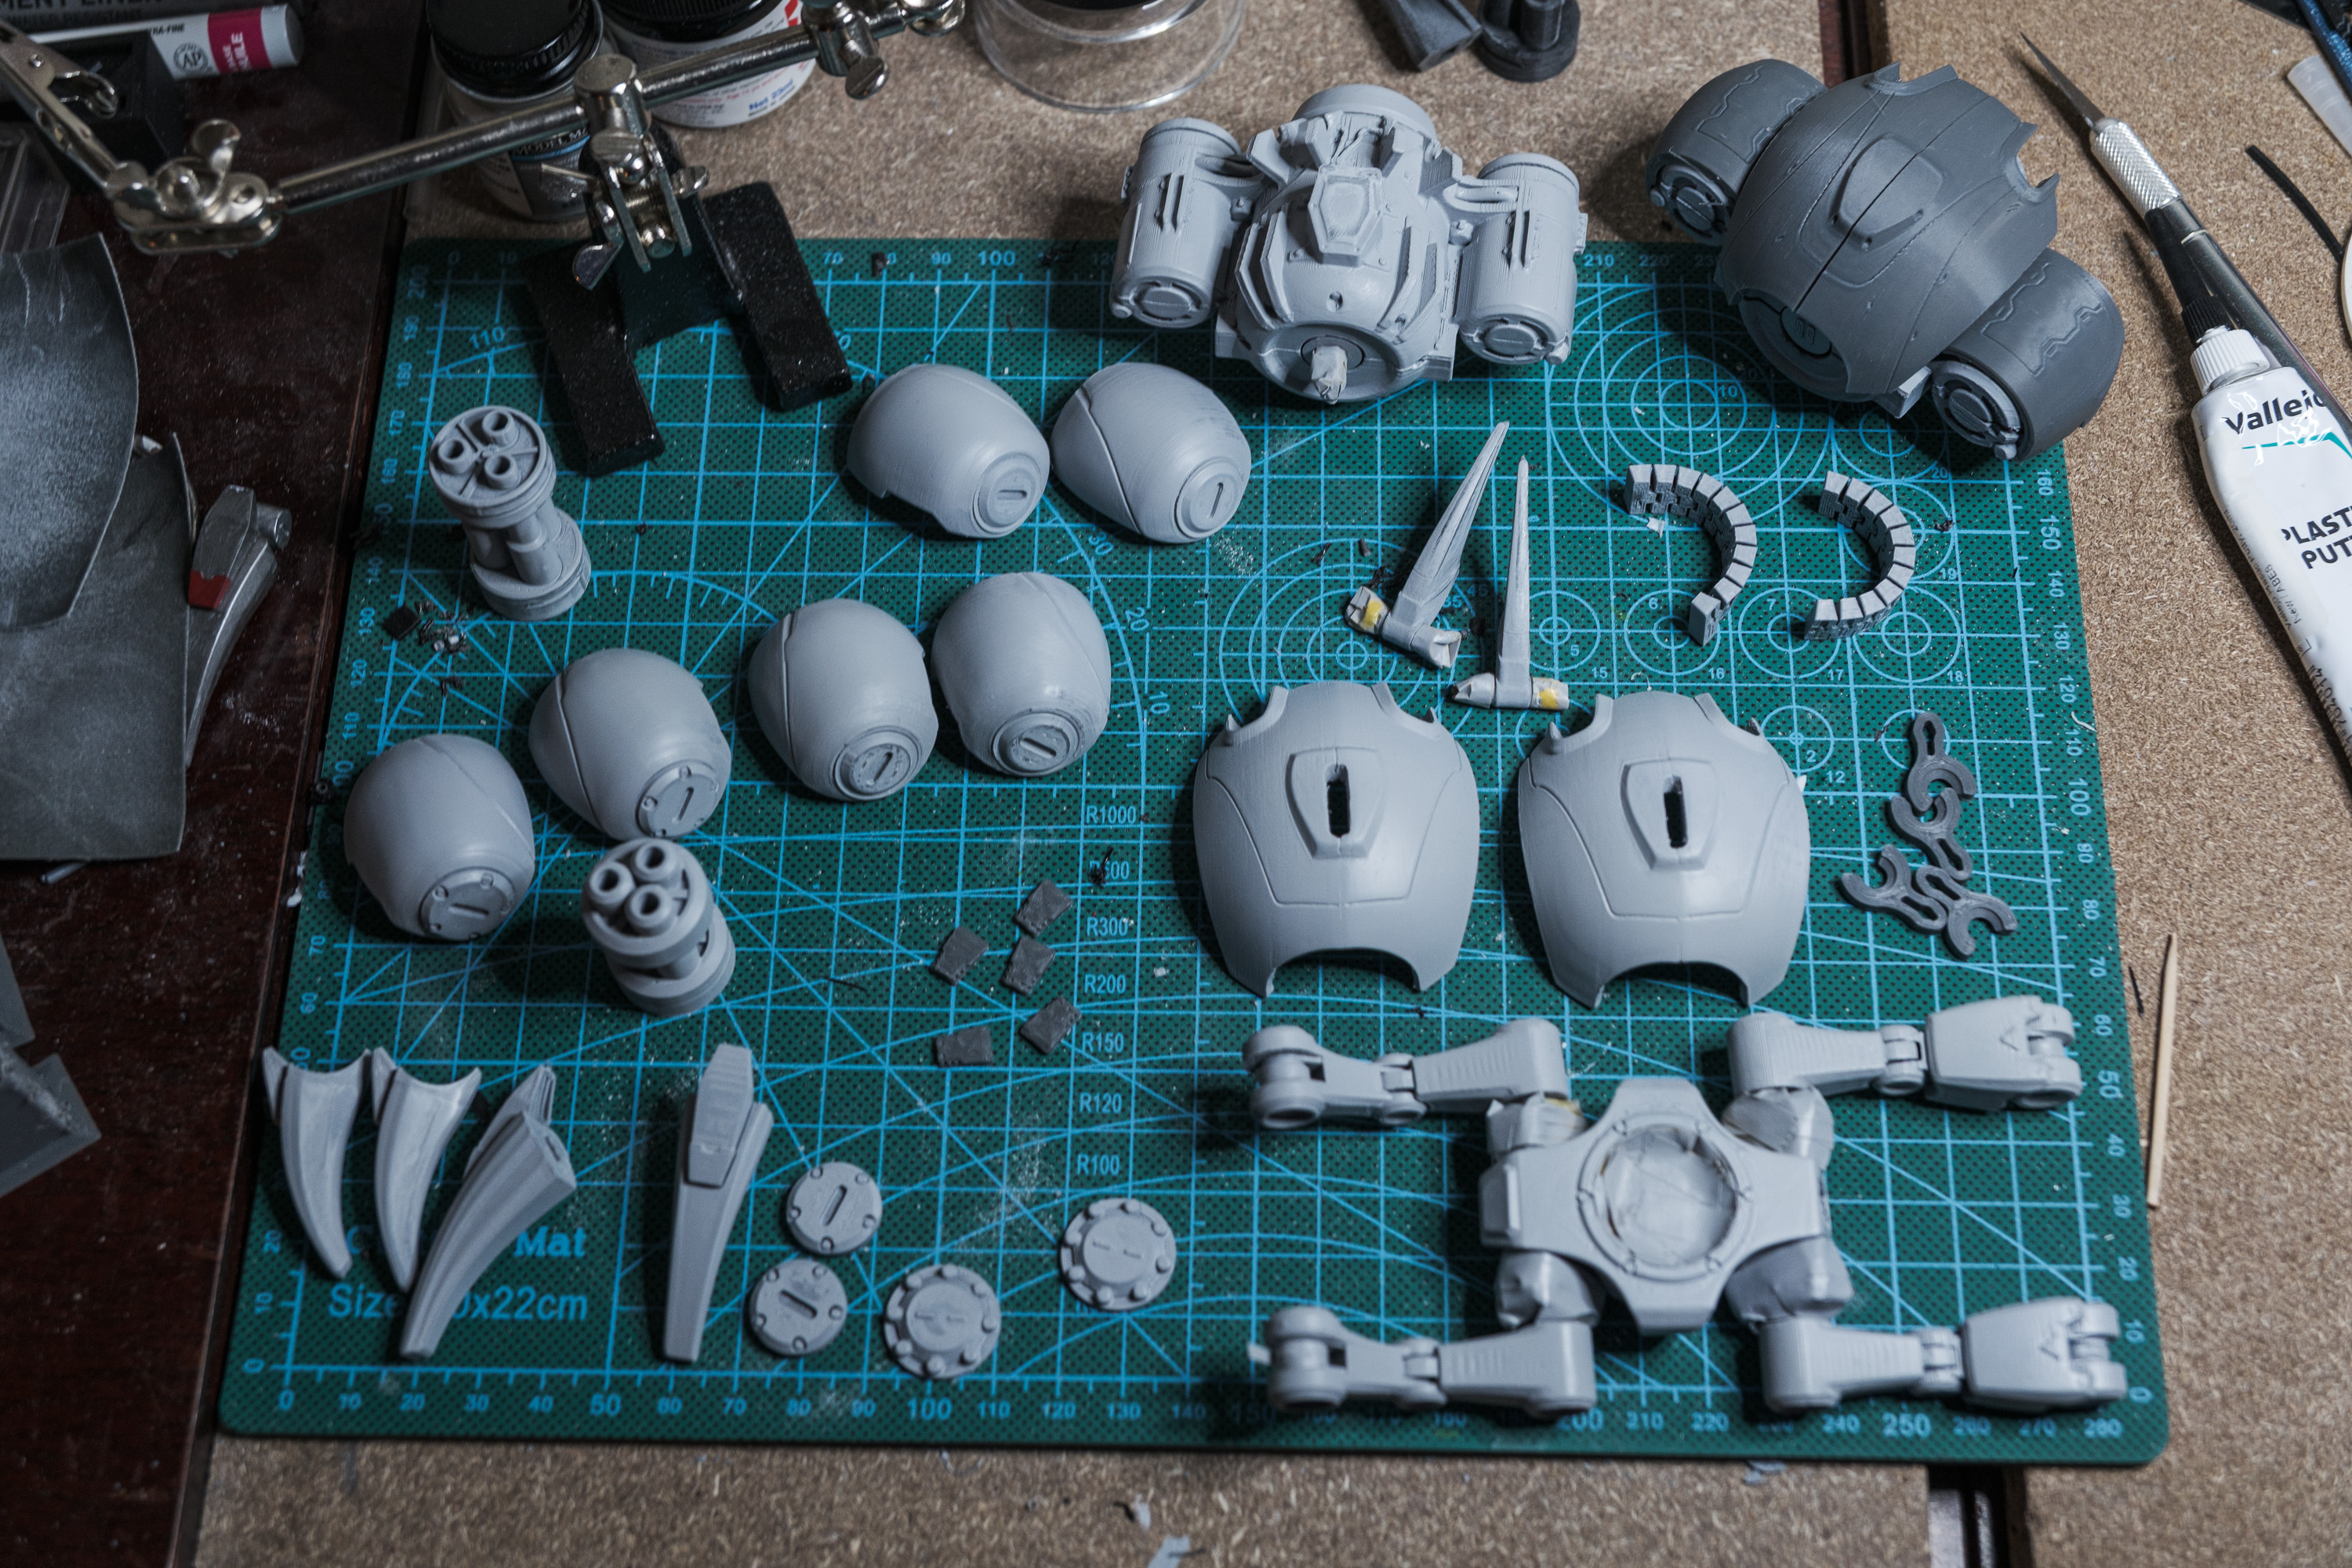
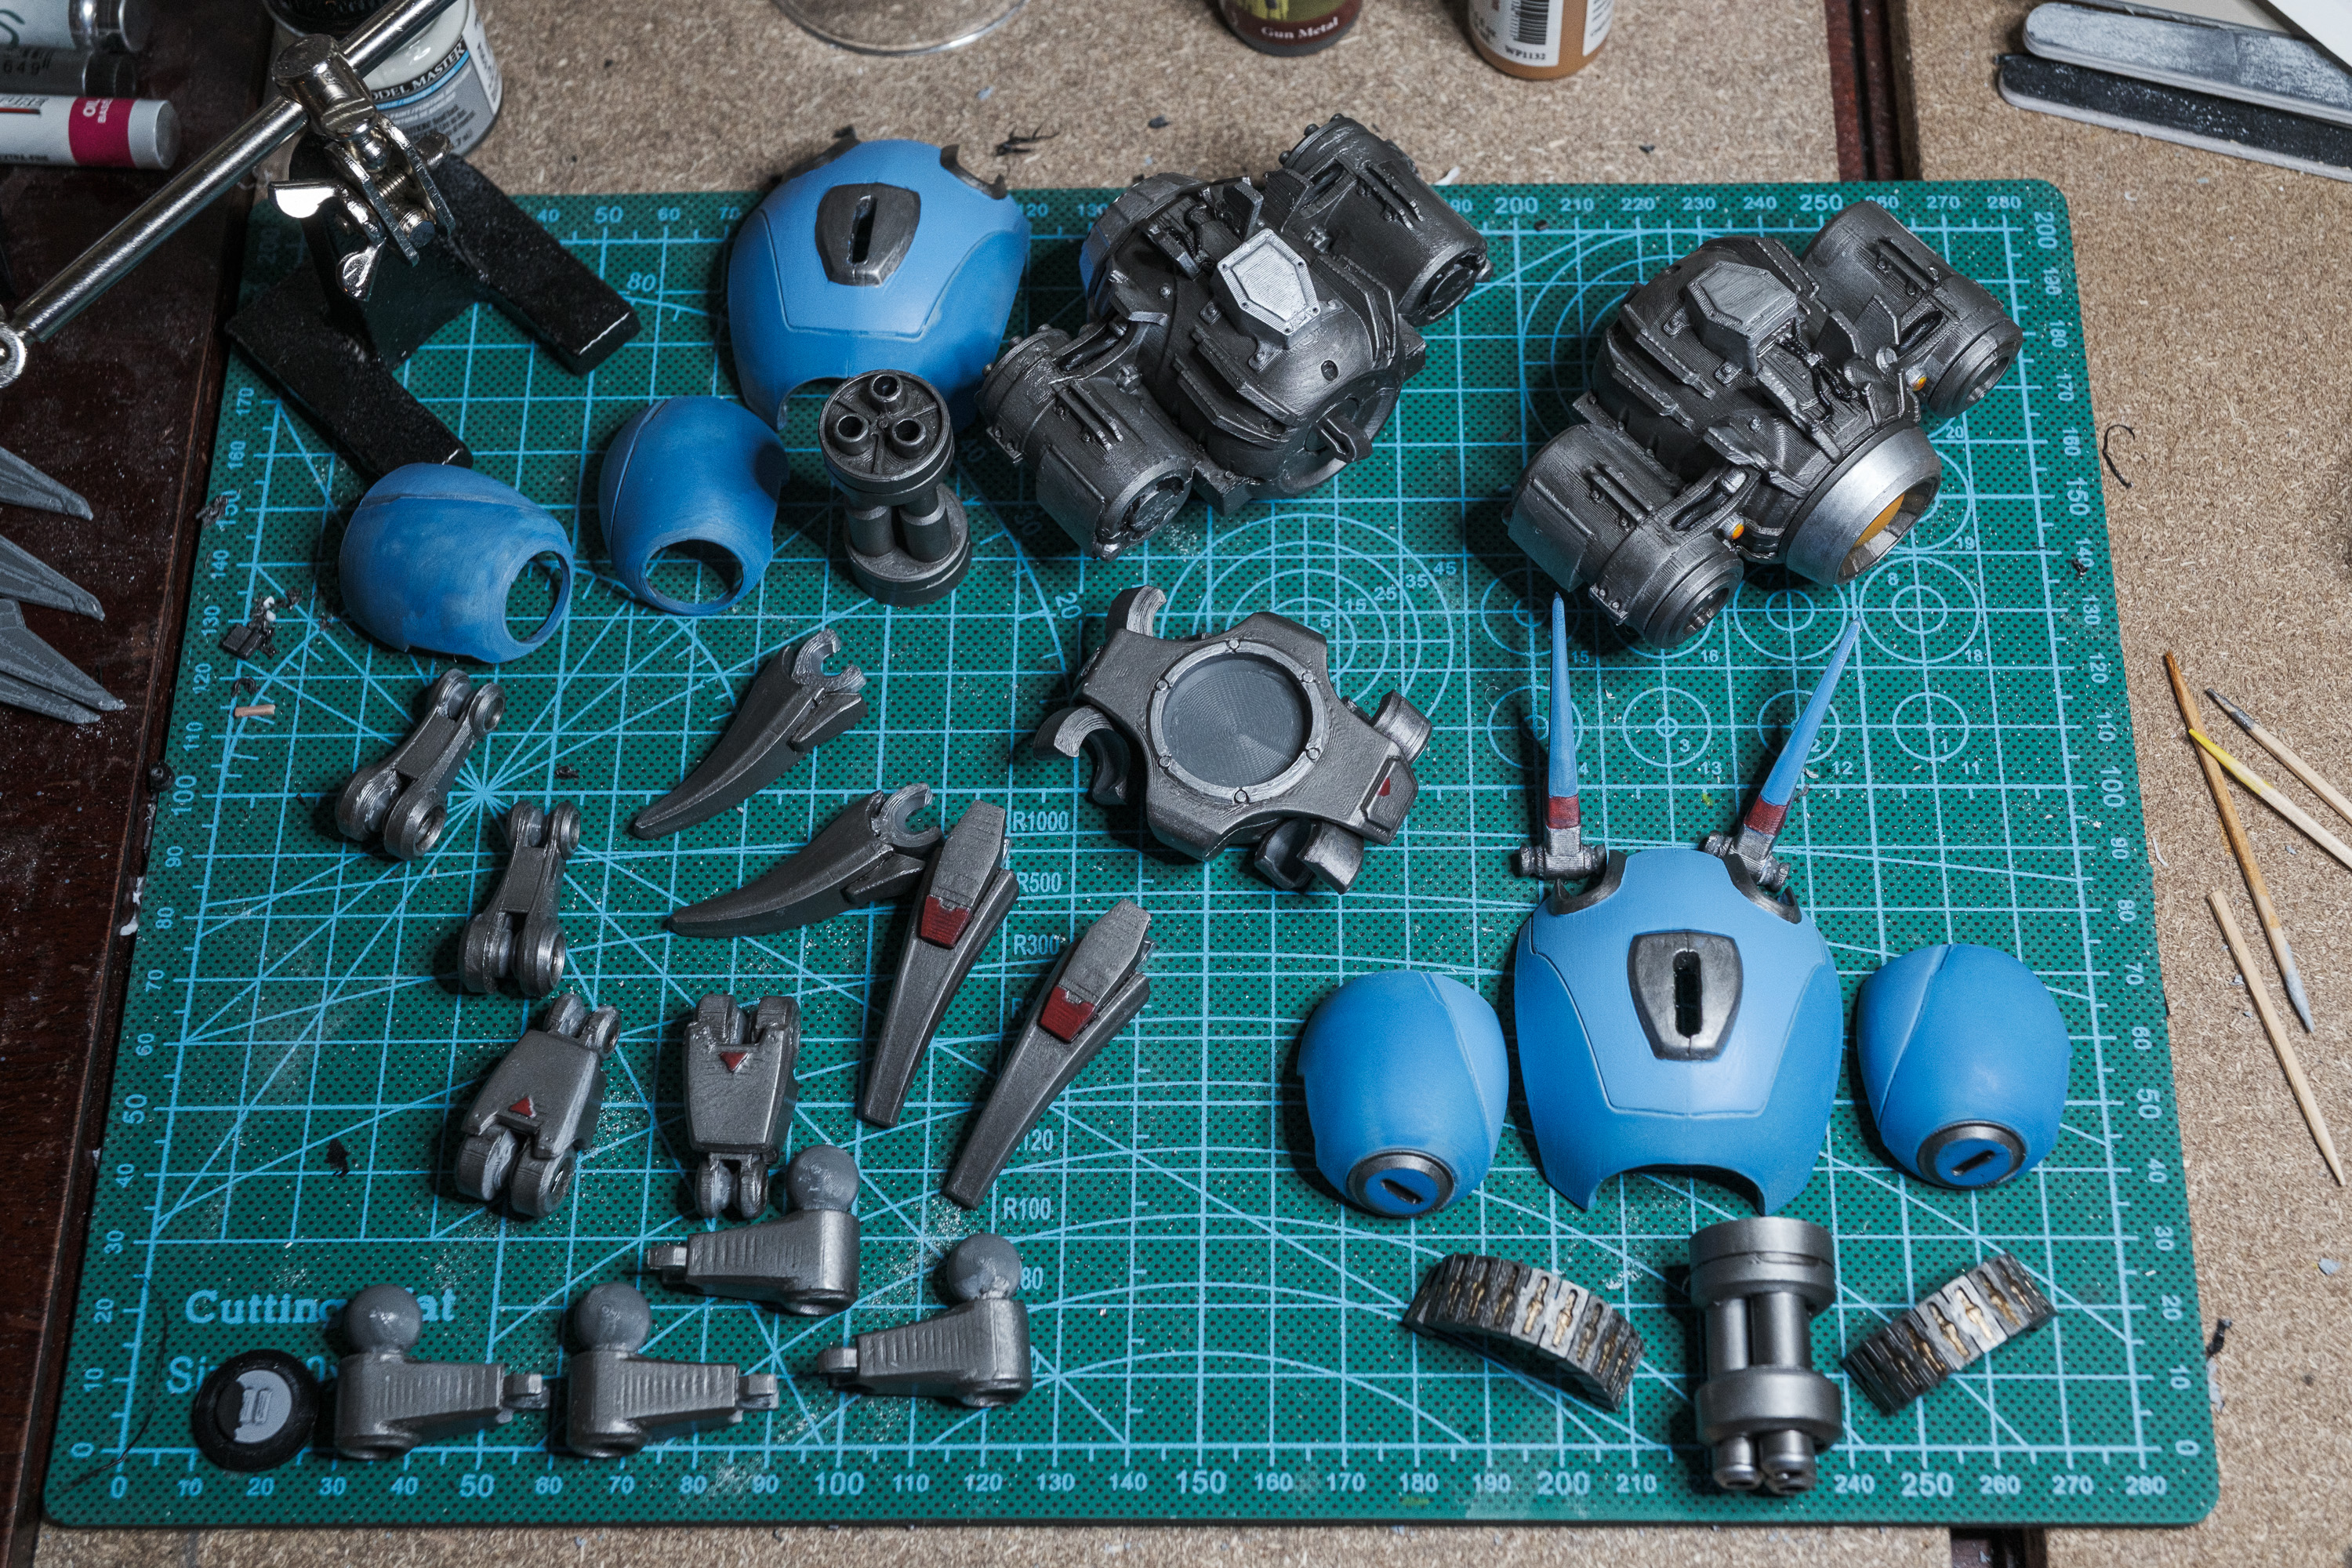
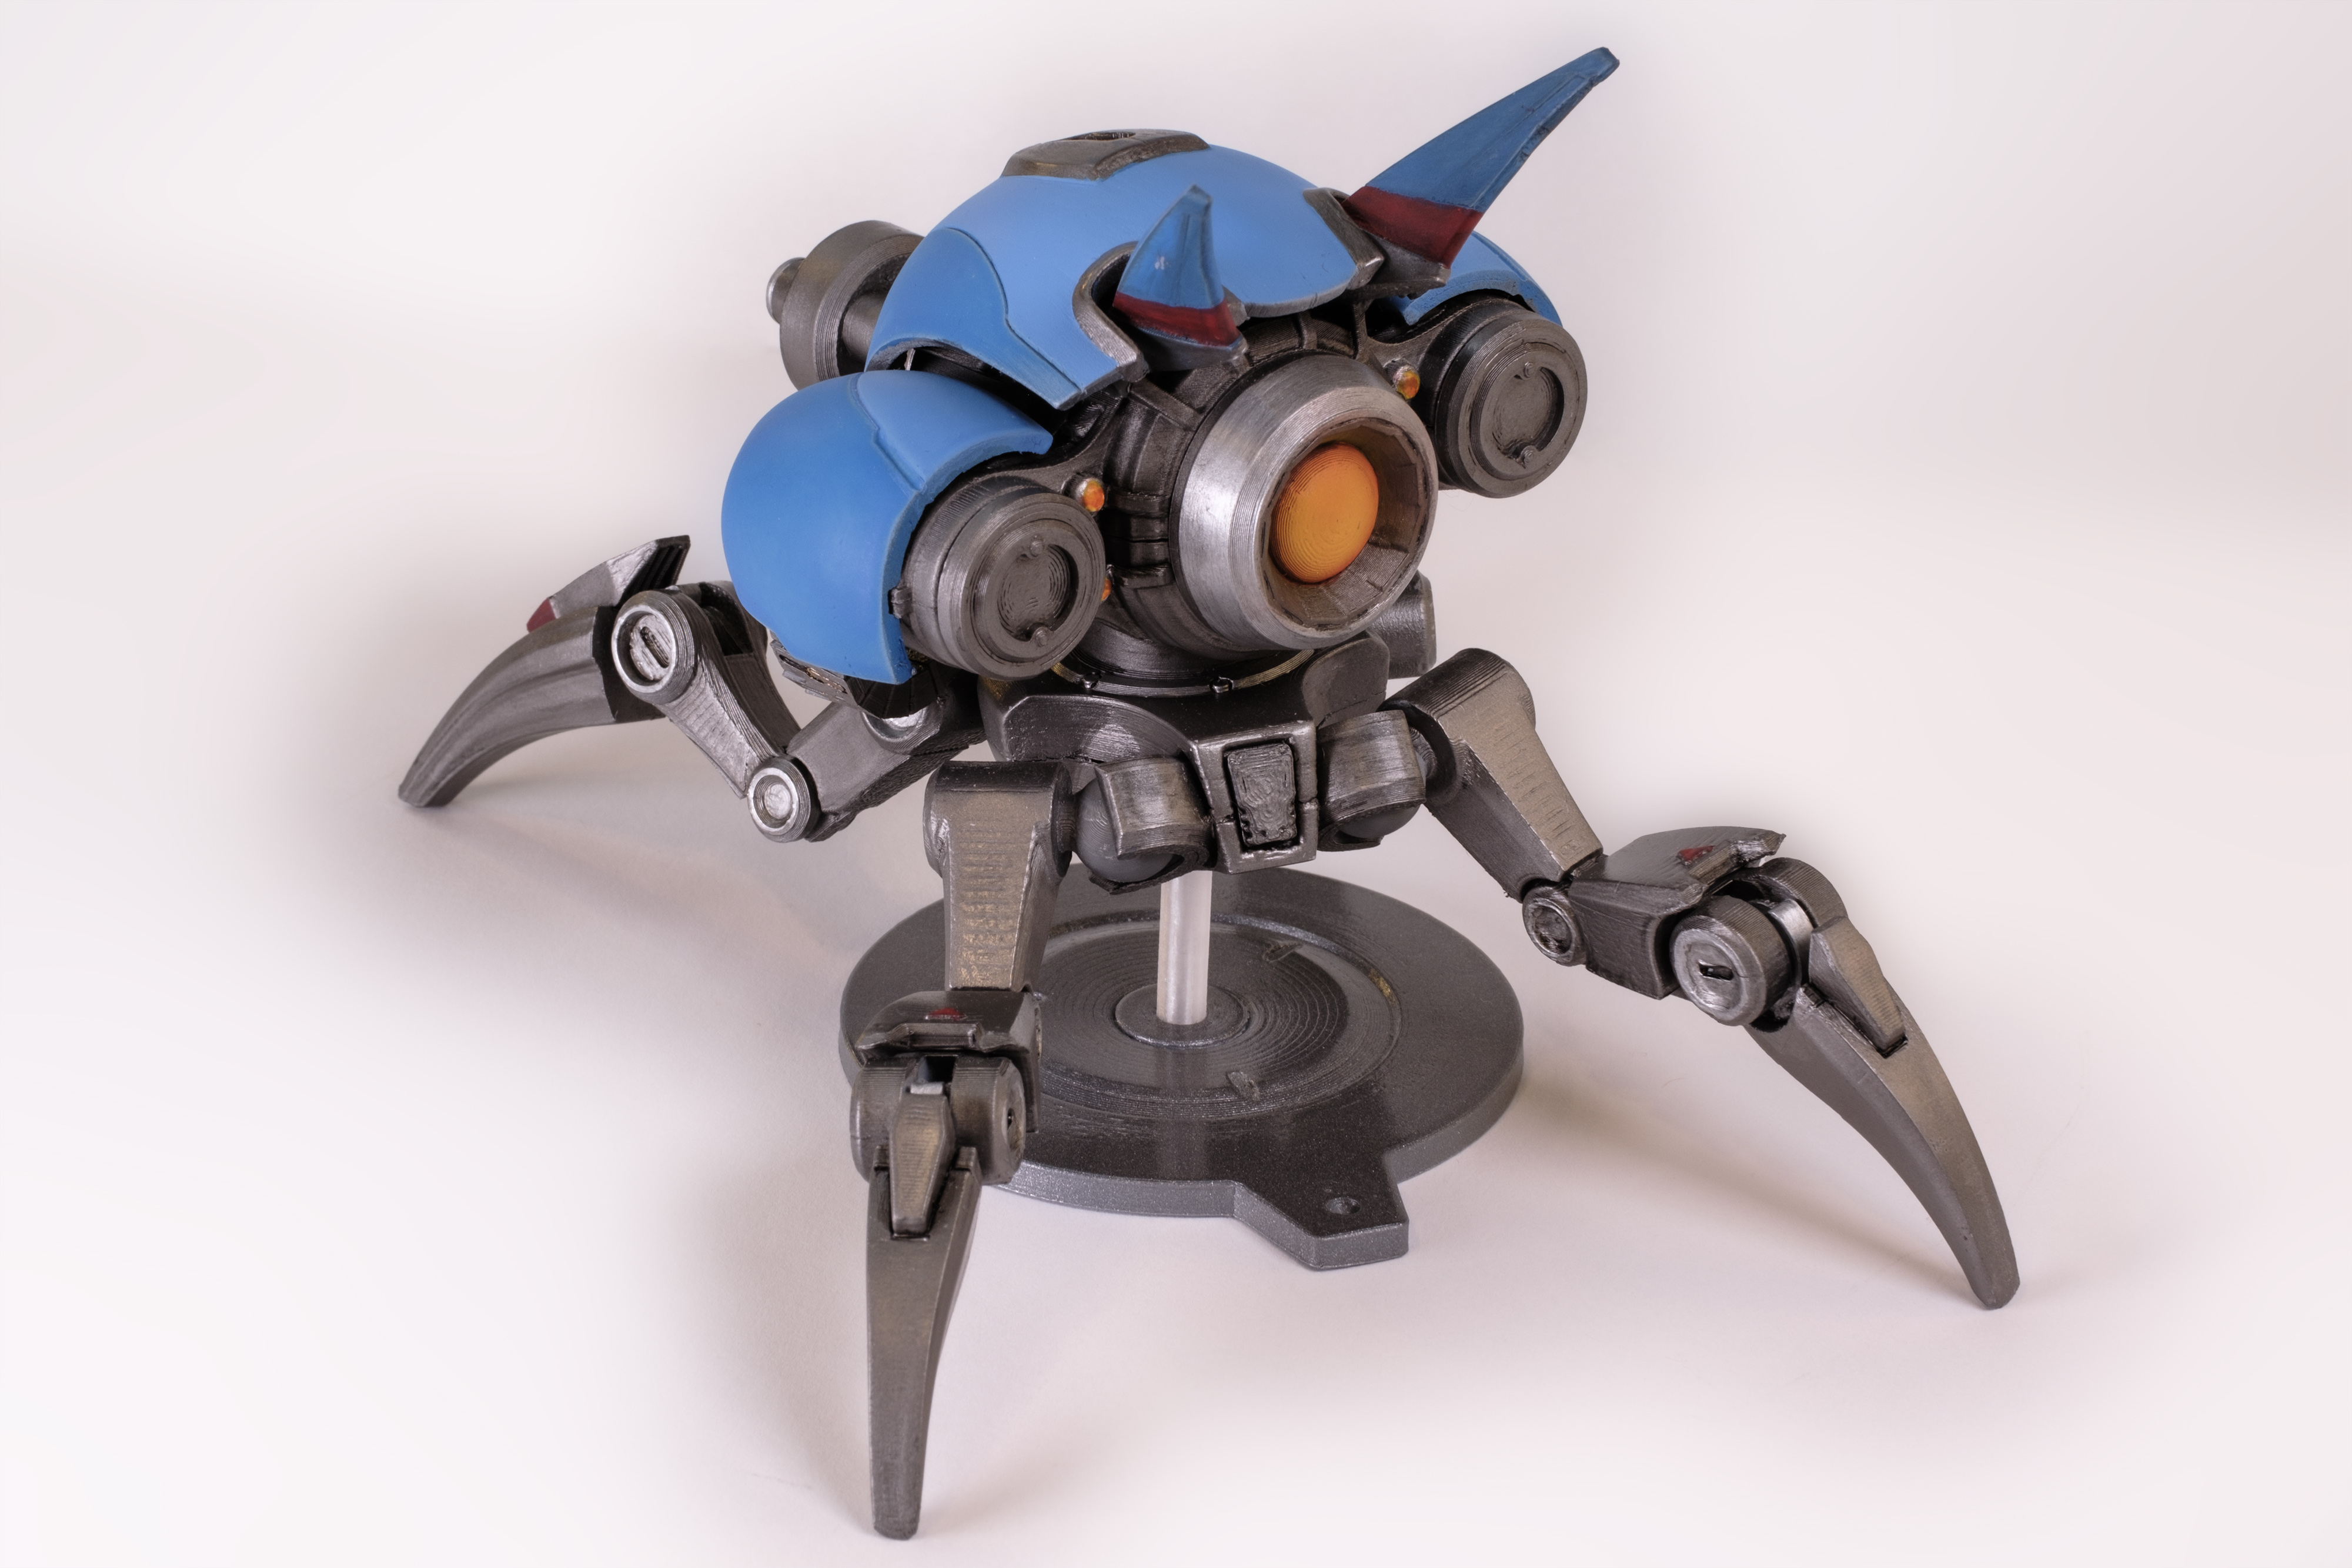
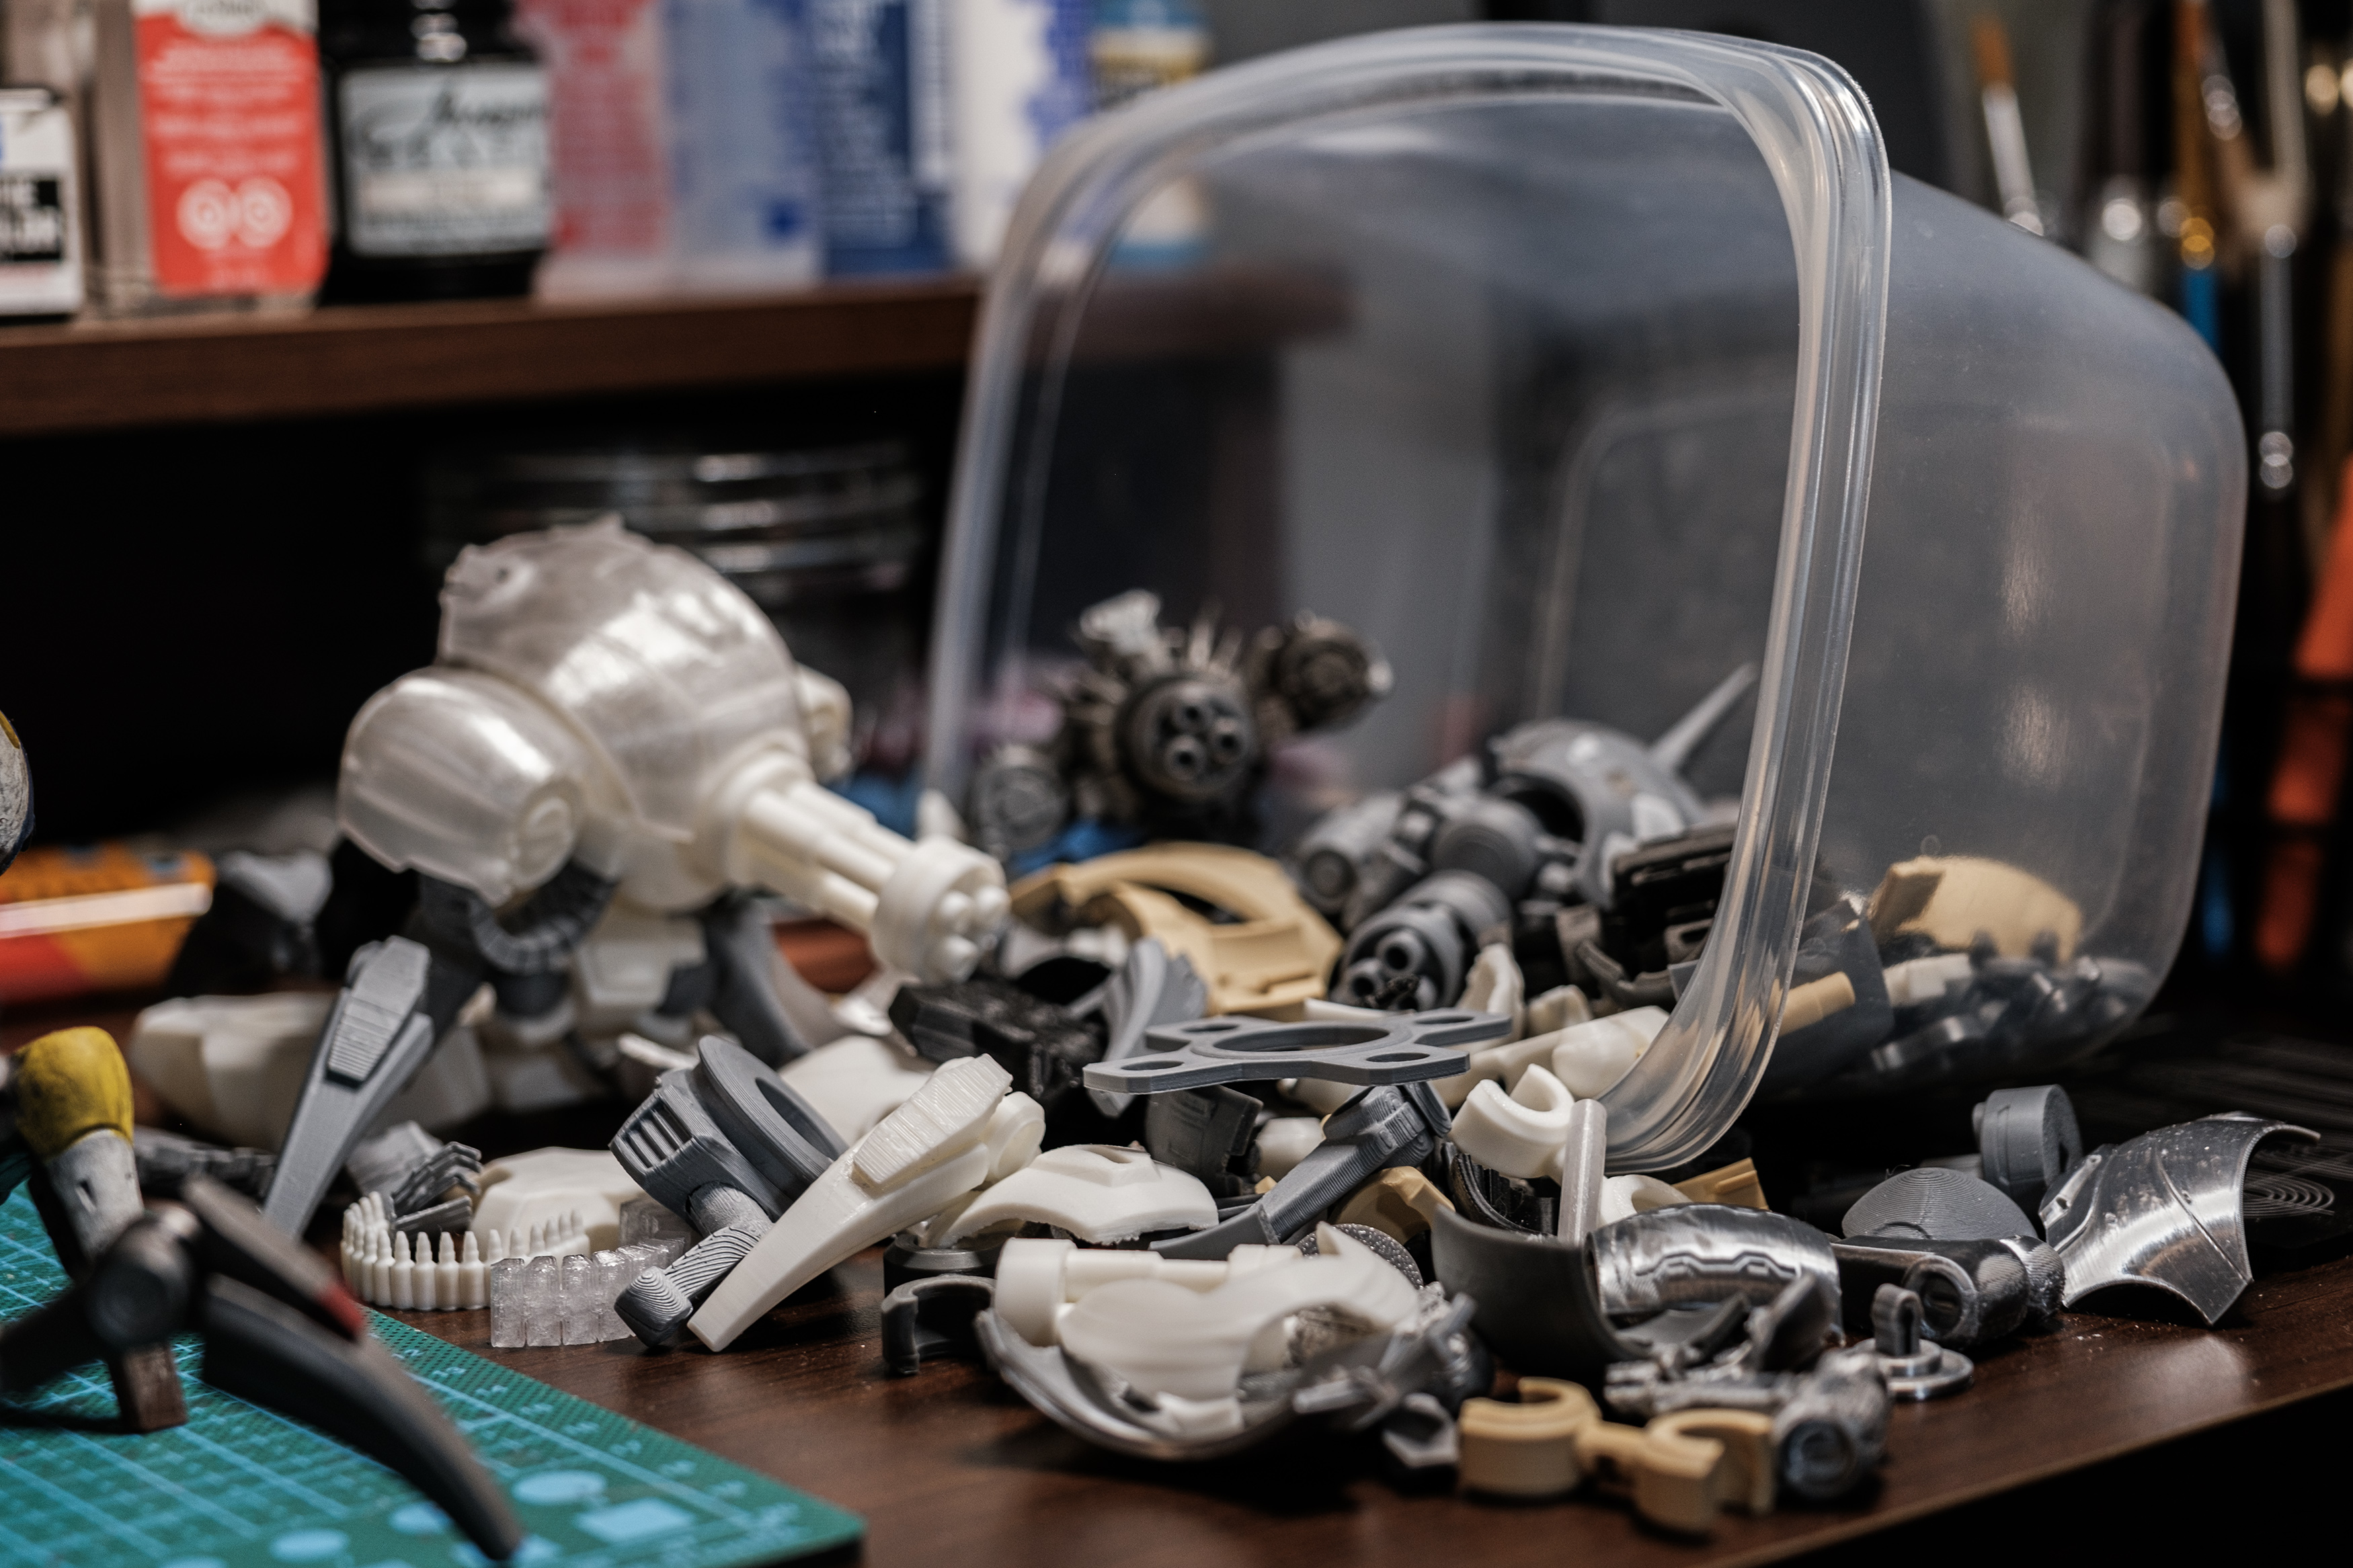
Said and done, I ended up with 6 total plates for my A1 Mini that I later compressed down to three once I had full confidence in print success, each taking about 8 hours. The rounded shell pieces proved to be the most difficult to ‘solve’ for print success – the shoulders ended up working with painted supports, proper orientation, and testing, but the center shell needed a split down the center to consistently print. Other parts I chose to orient off from flat to reduce slightly off angle layer lines, making sanding and filling easier.

It’s a lot of pieces – 63 in total, with a total of 33 unique parts that can be assembled into a single model.
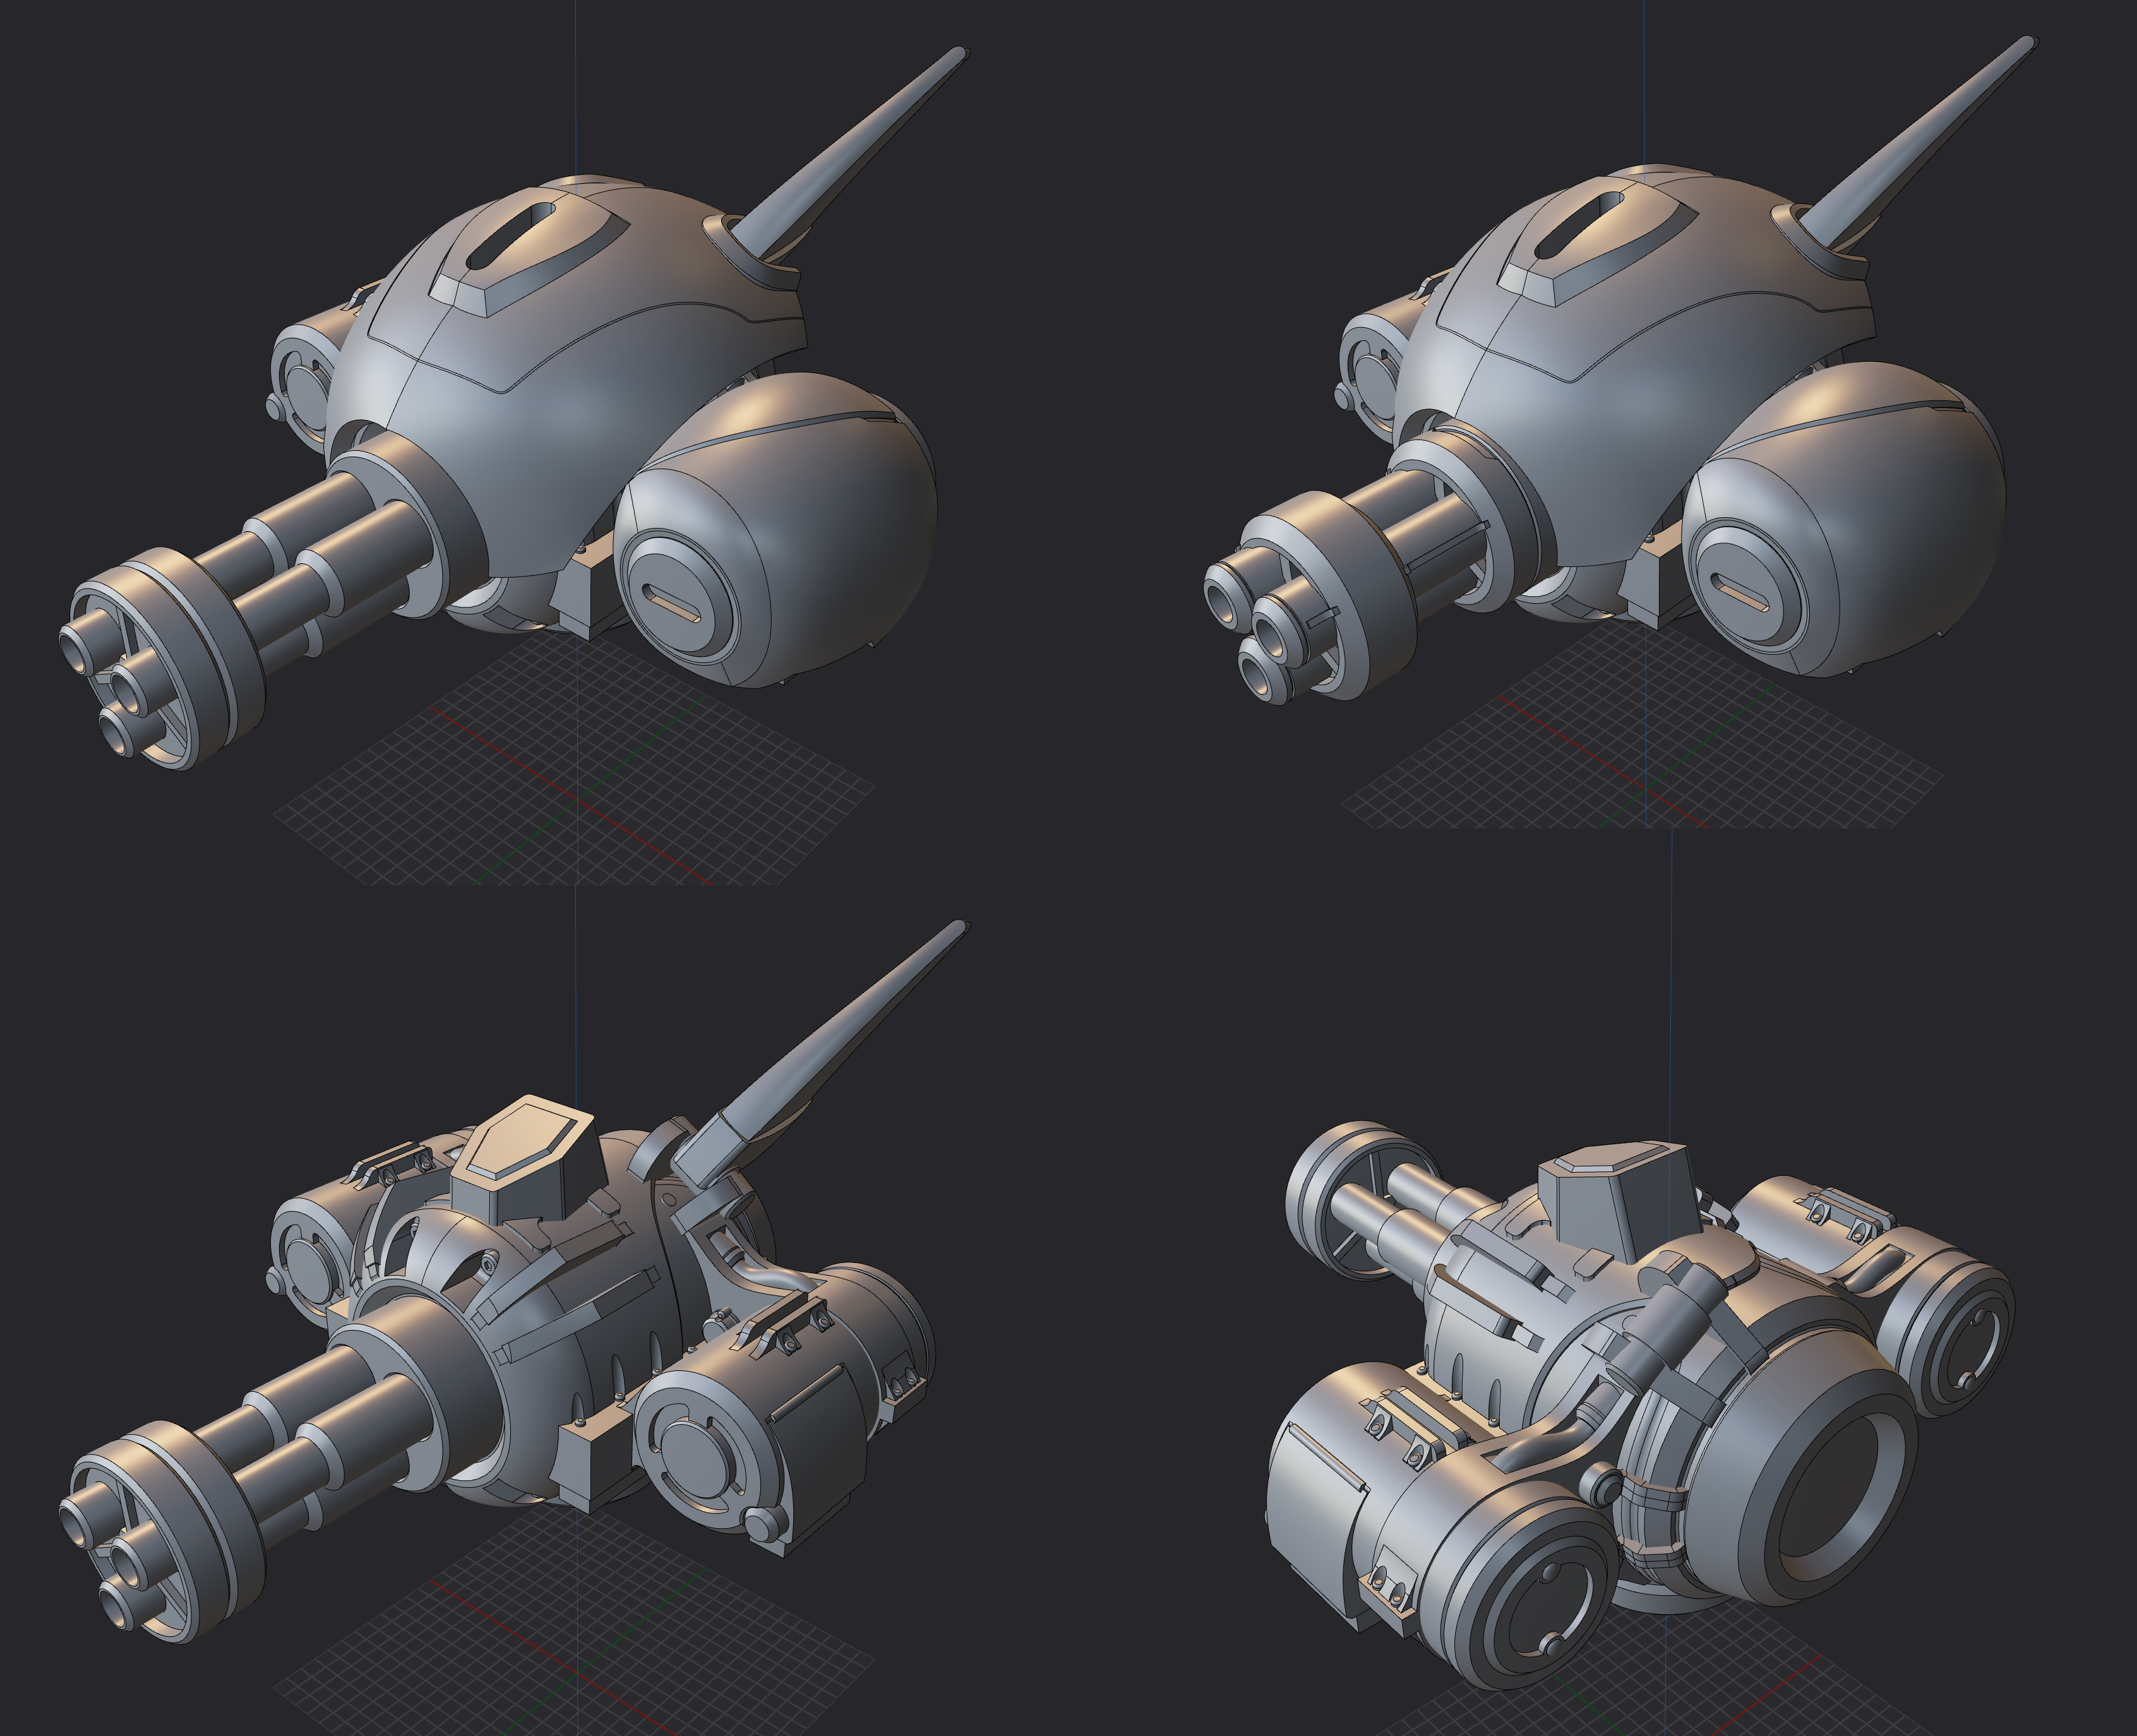
What did that end up looking like in Plasticity?

Woof. While it wasn’t a ‘challenge mode’ requirement, I did go straight from Plasticity to the slicer – no Max or Blender or anything in-between for cleanup. Honestly… the Slic3r/Prusa/Bambu/Orca family of slicers is pretty robust for model manipulation, at least for getting a clean model to print, and I just didn’t need the intermediary steps.
So now I had a finished model on my hands, but it was never my intention to just stop there.
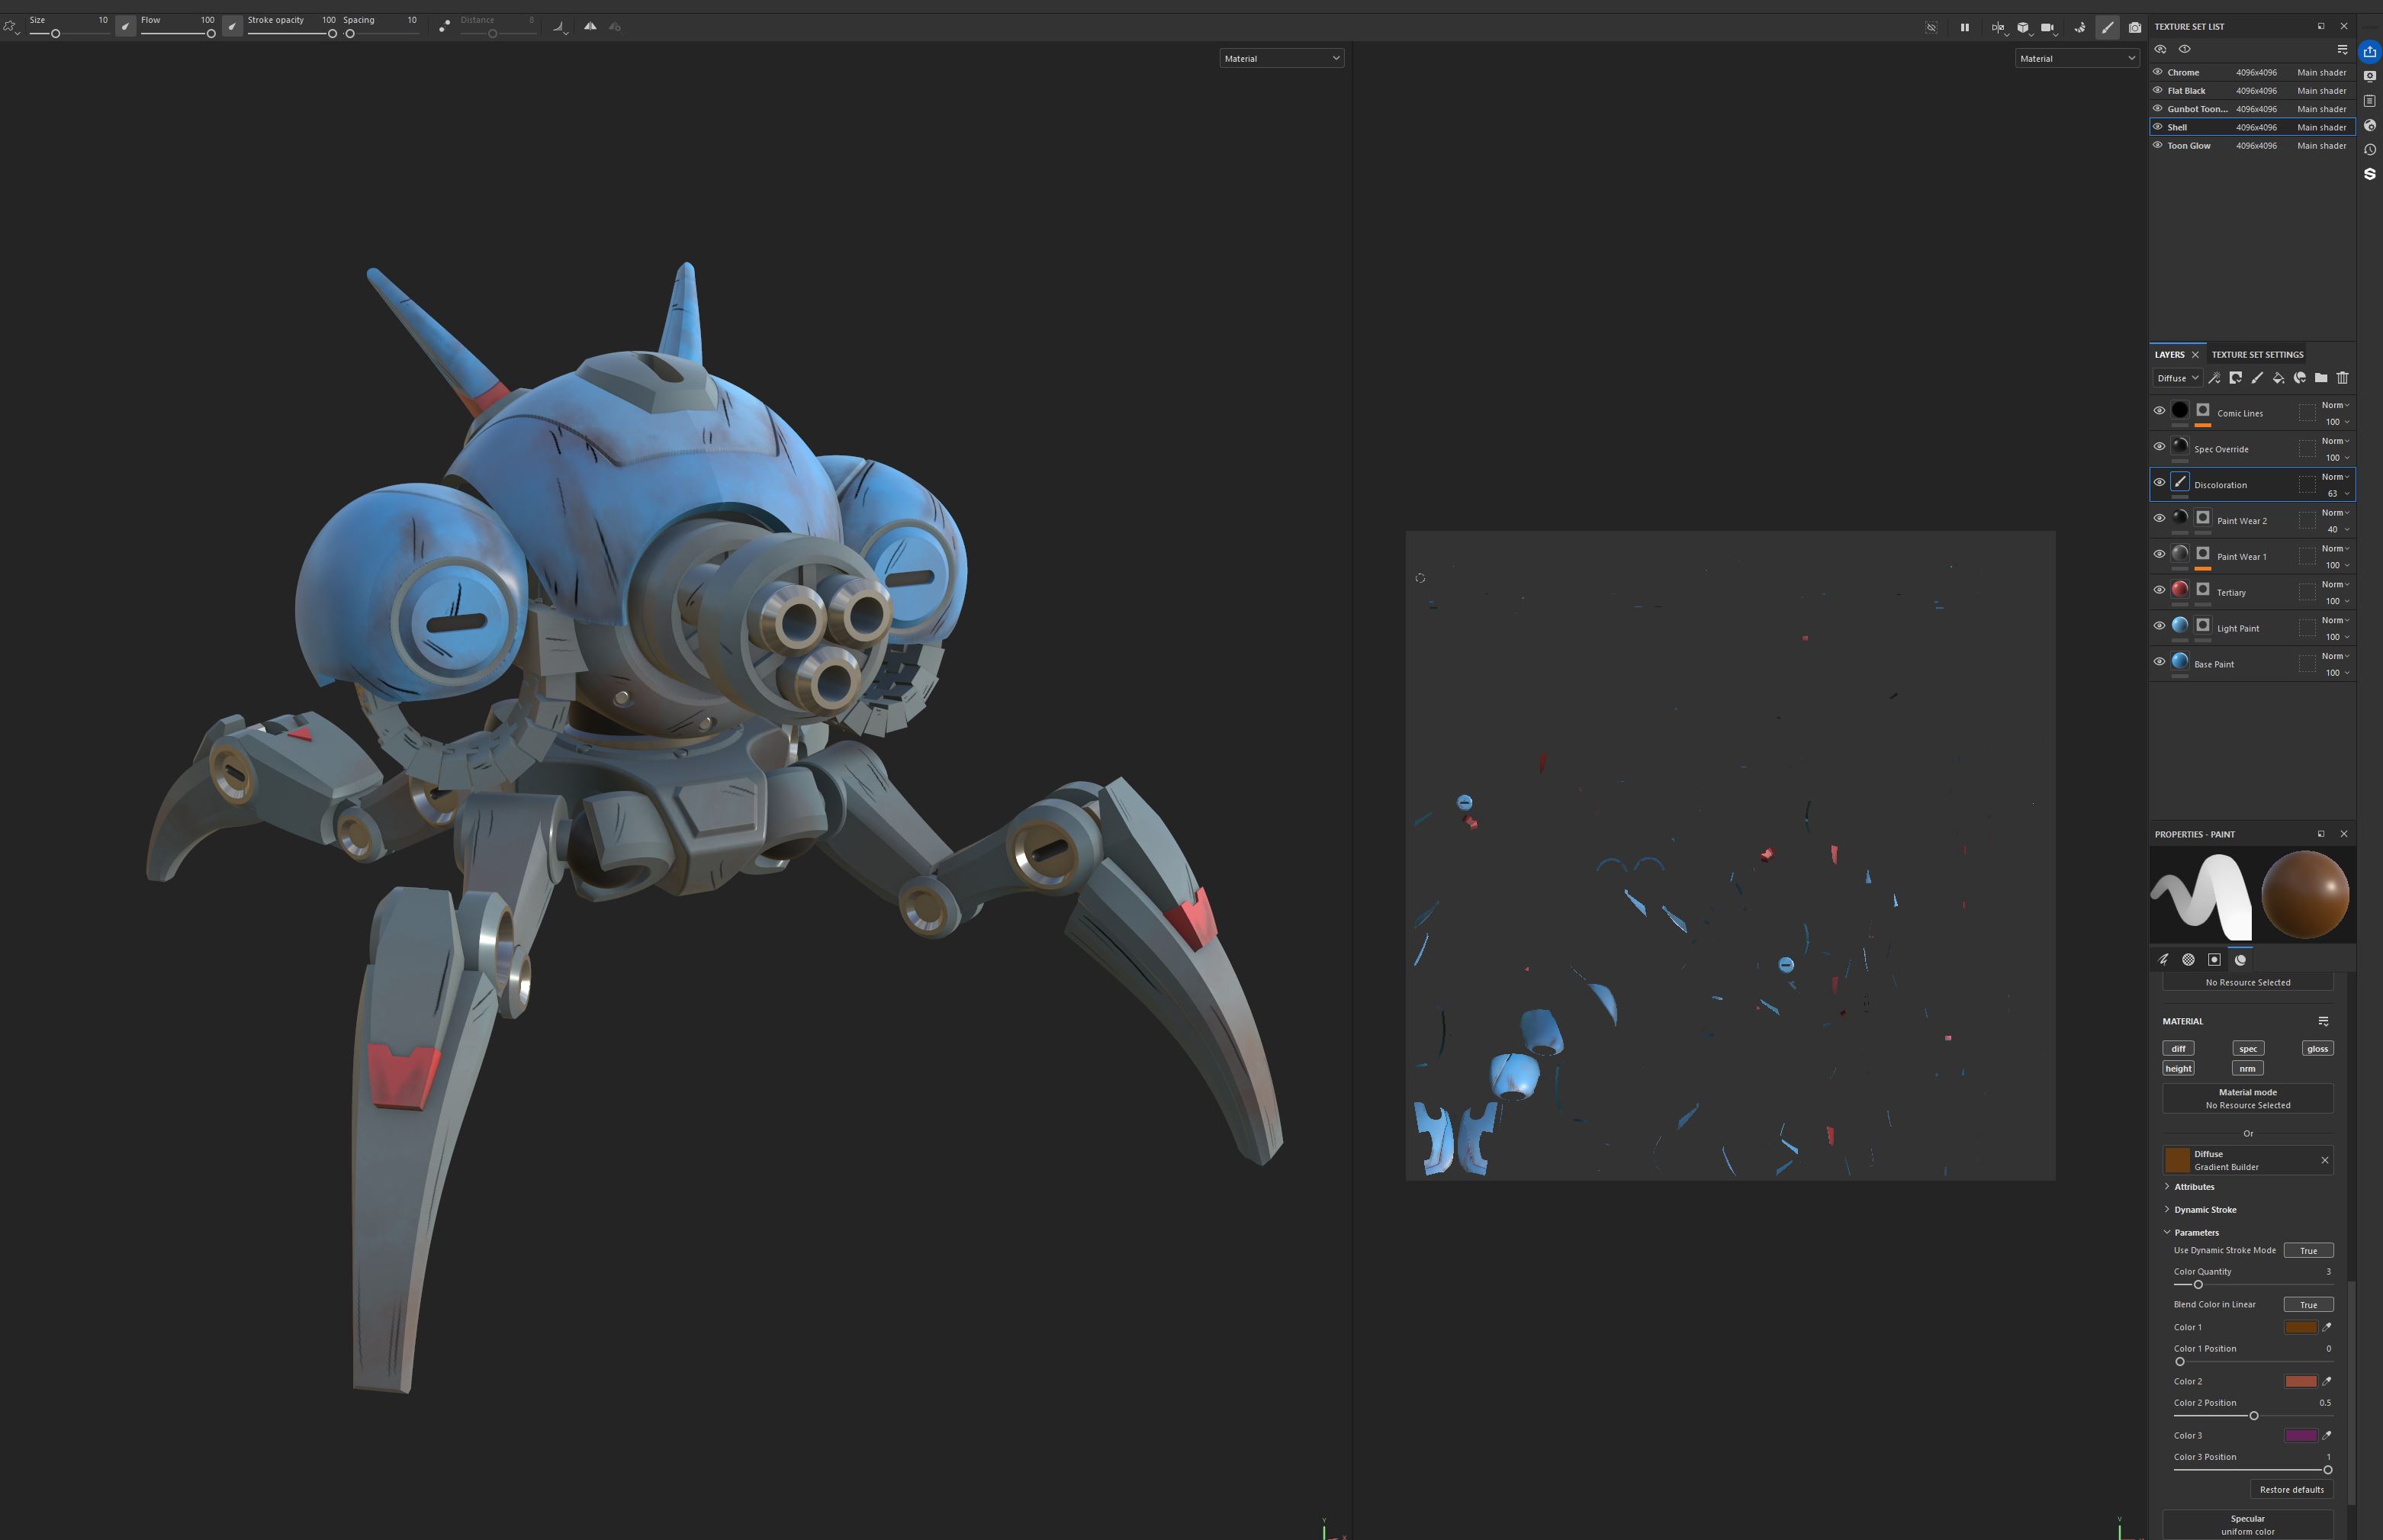
Prime & Paint
I’ve building kit models since before high school, mostly aircraft and sci-fi, if the clock wasn’t a hint. It’s not something I’m fantastic at, but as a hobby, I generally reserve the right to be just okay at things I enjoy for the sake of them (and so should you).


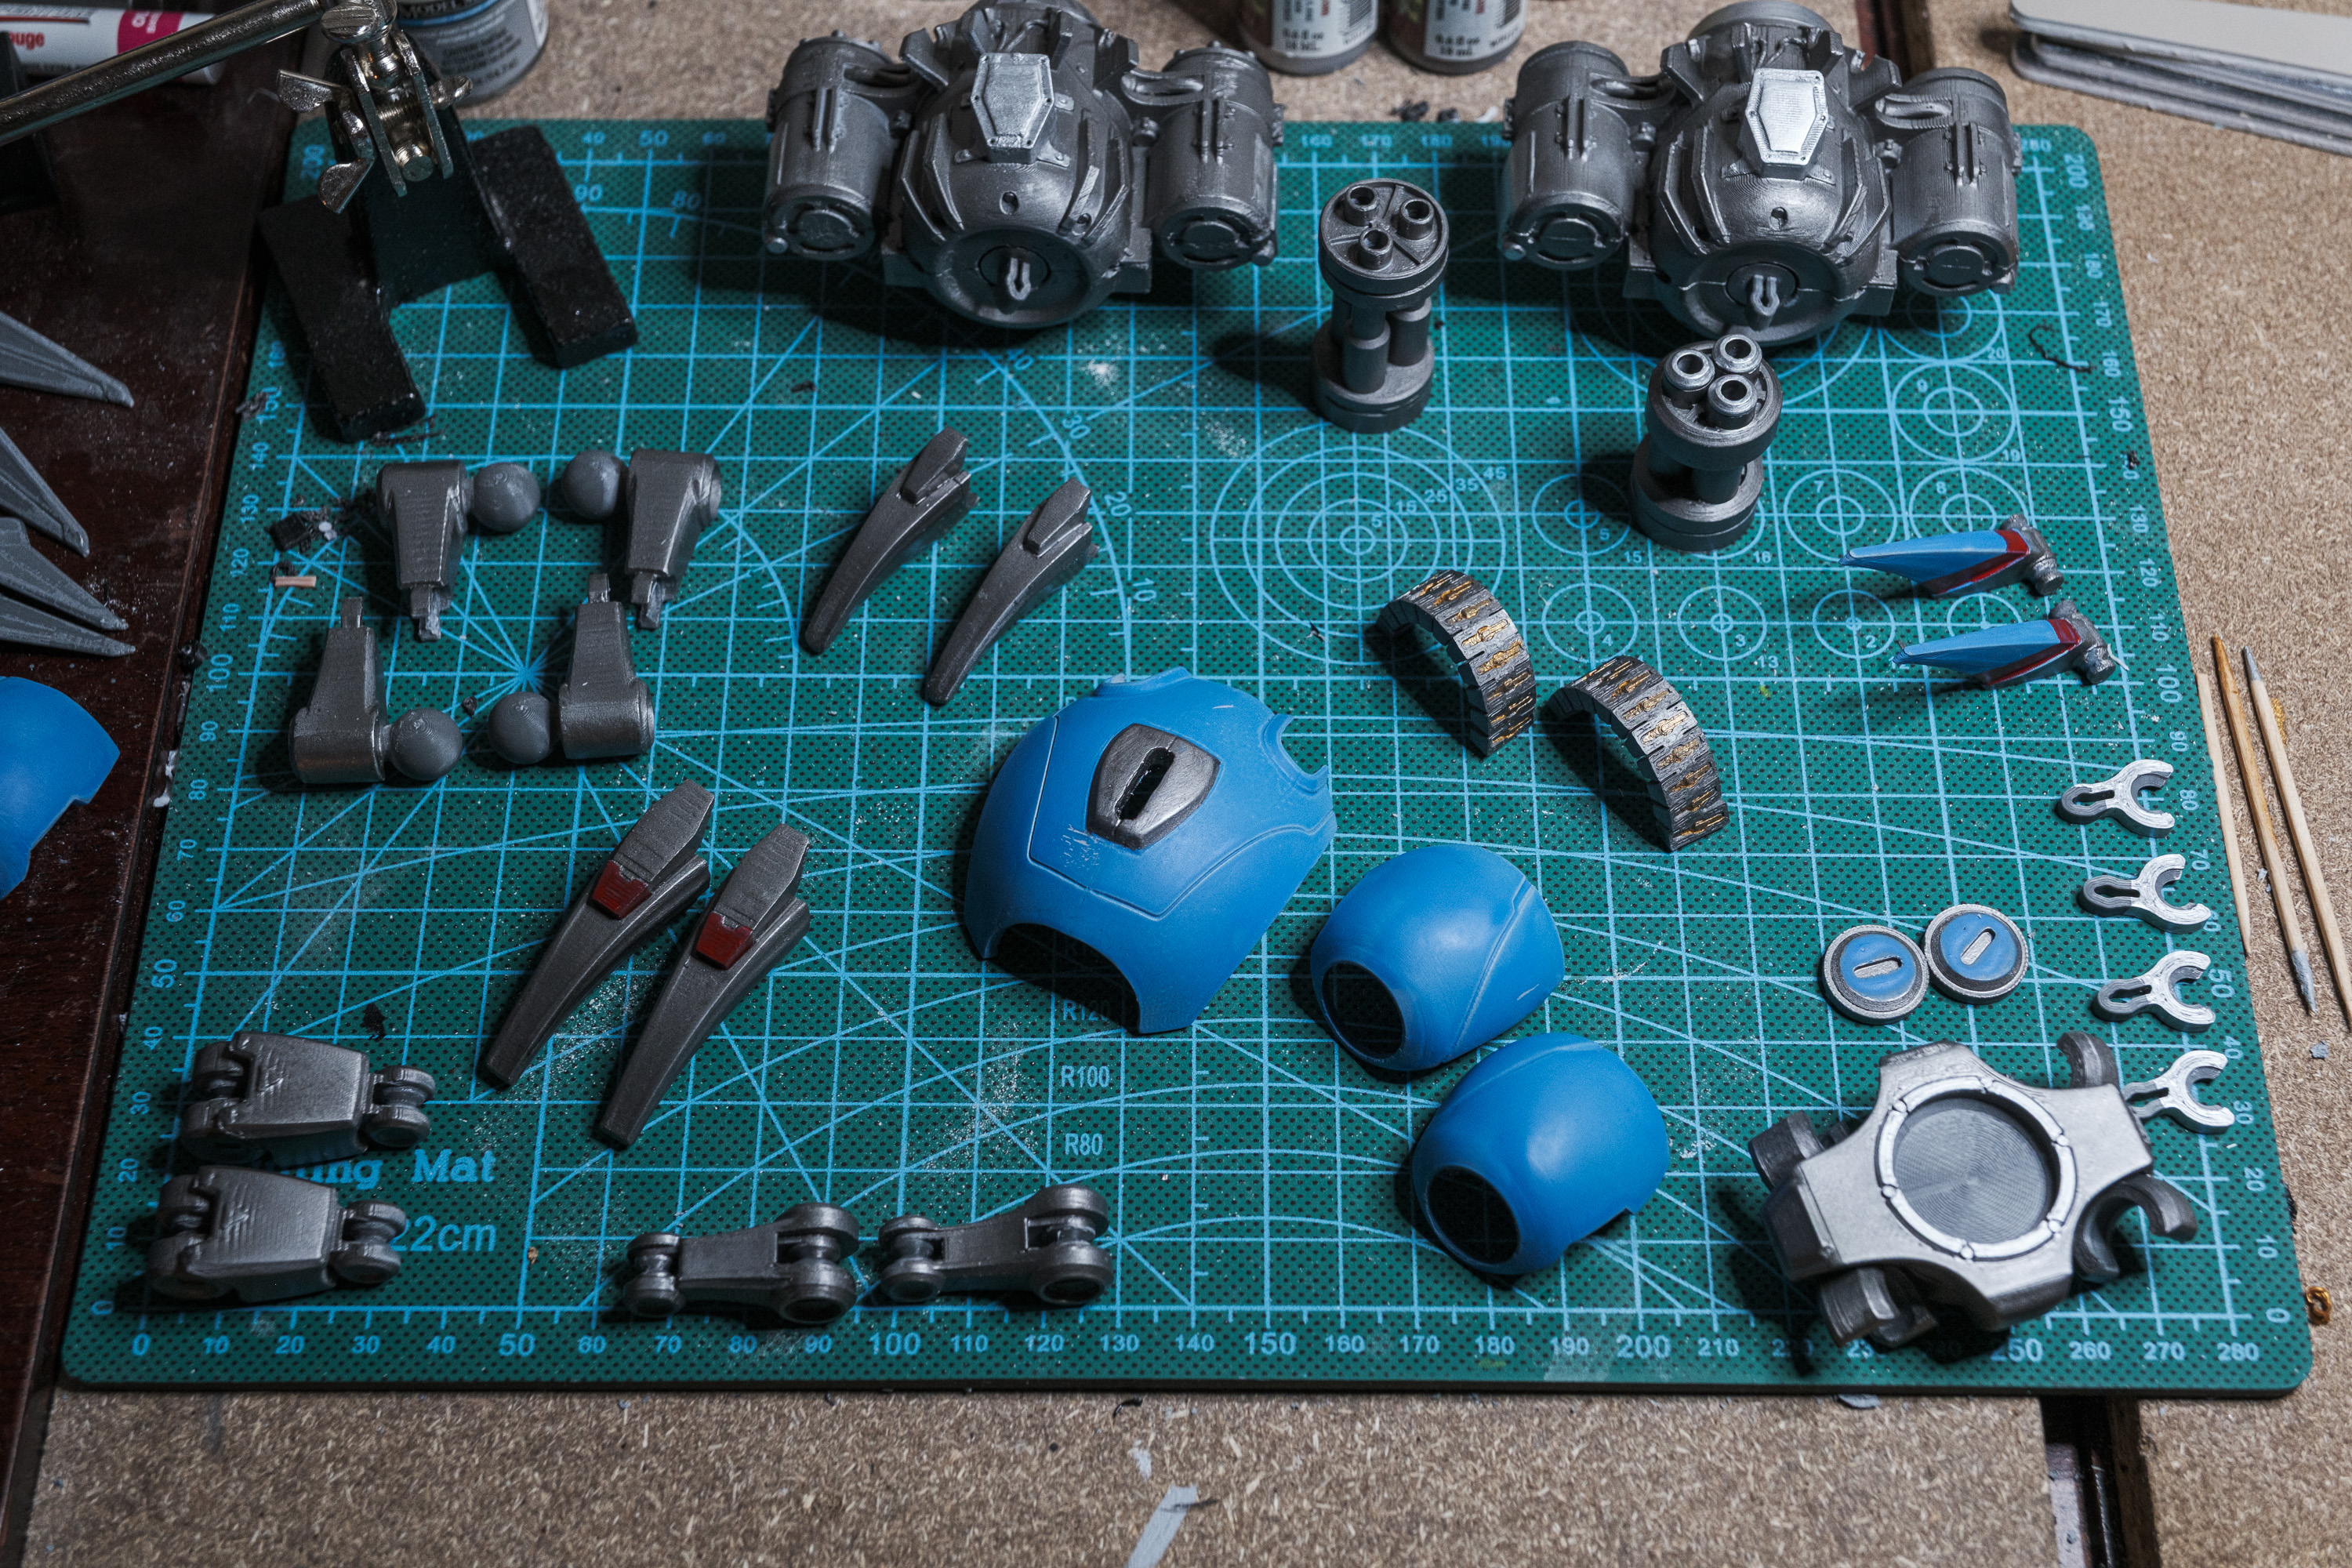
The most liberating thing about painting this kit was that, much like texturing a model I designed and unwrapped myself, I had a very clear vision of what I wanted to achieve, and even better, if I really screwed up, I could print replacement parts, even if that meant lost time if nothing else. Still no undo button though.
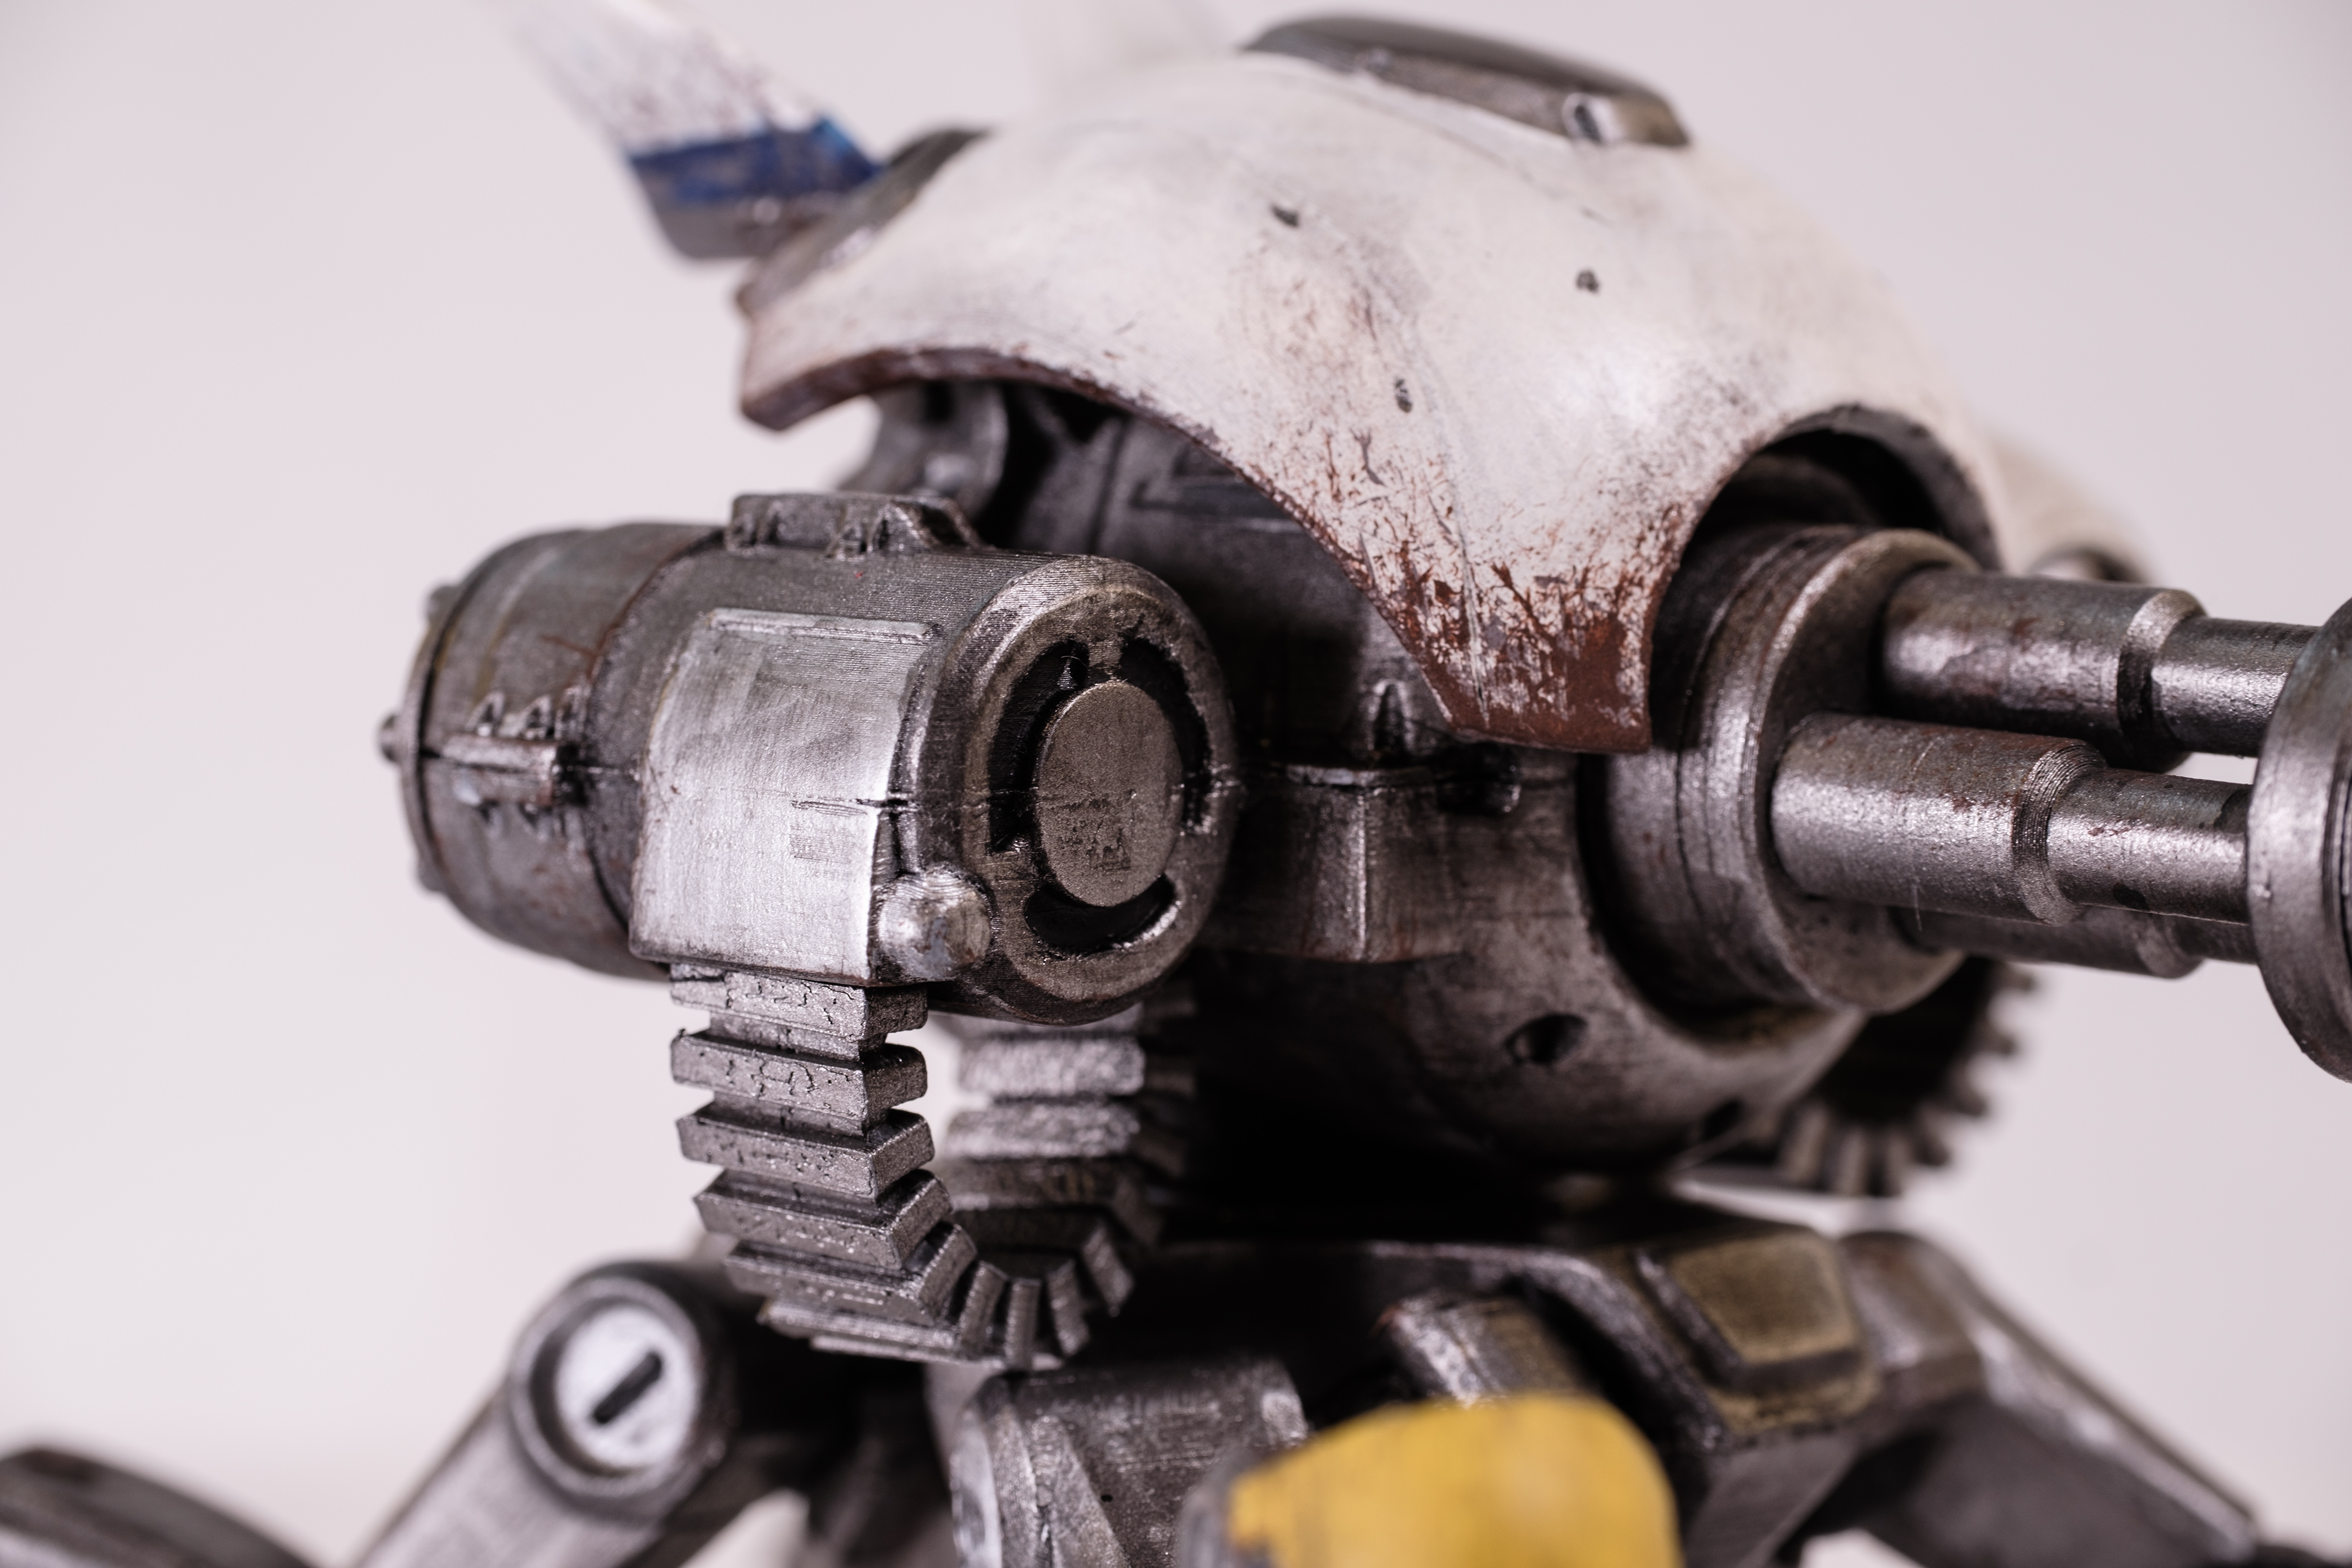
What I hadn’t really considered was the amount of work I’d need to put into sanding and prep. Well, I knew this was going to be the weakness of going with FDM, it just turned out to be the most tedious time sink.

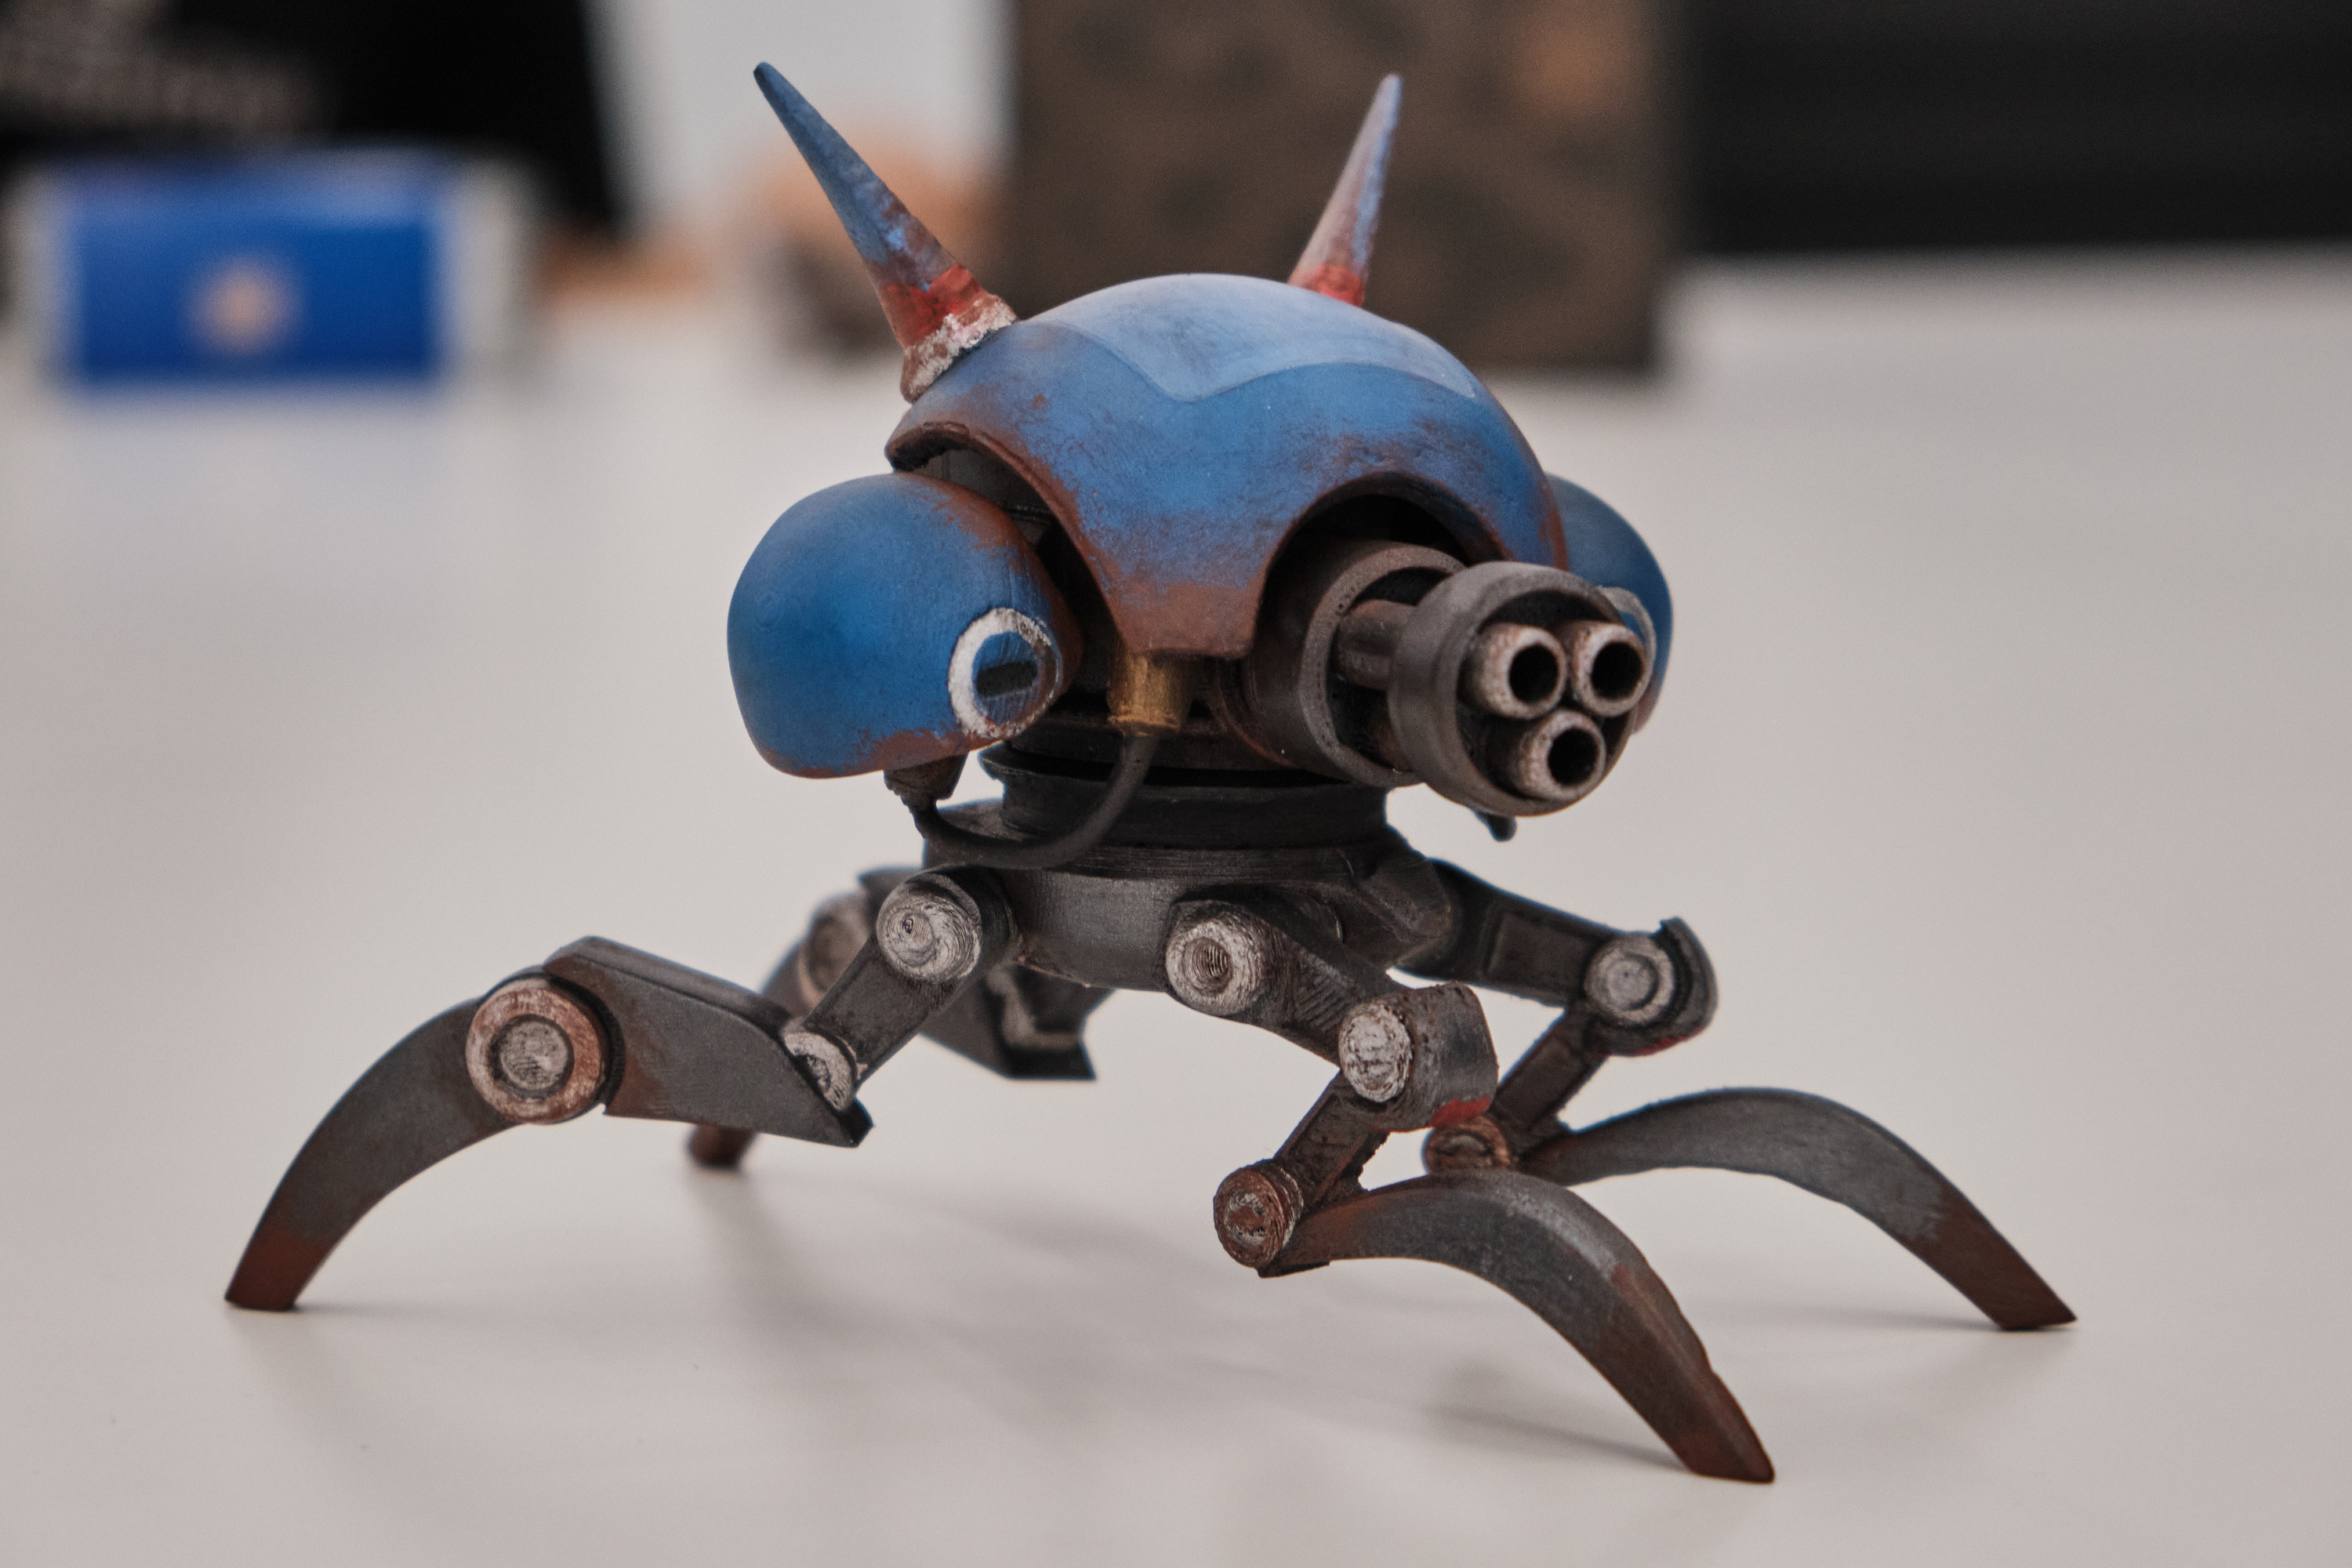
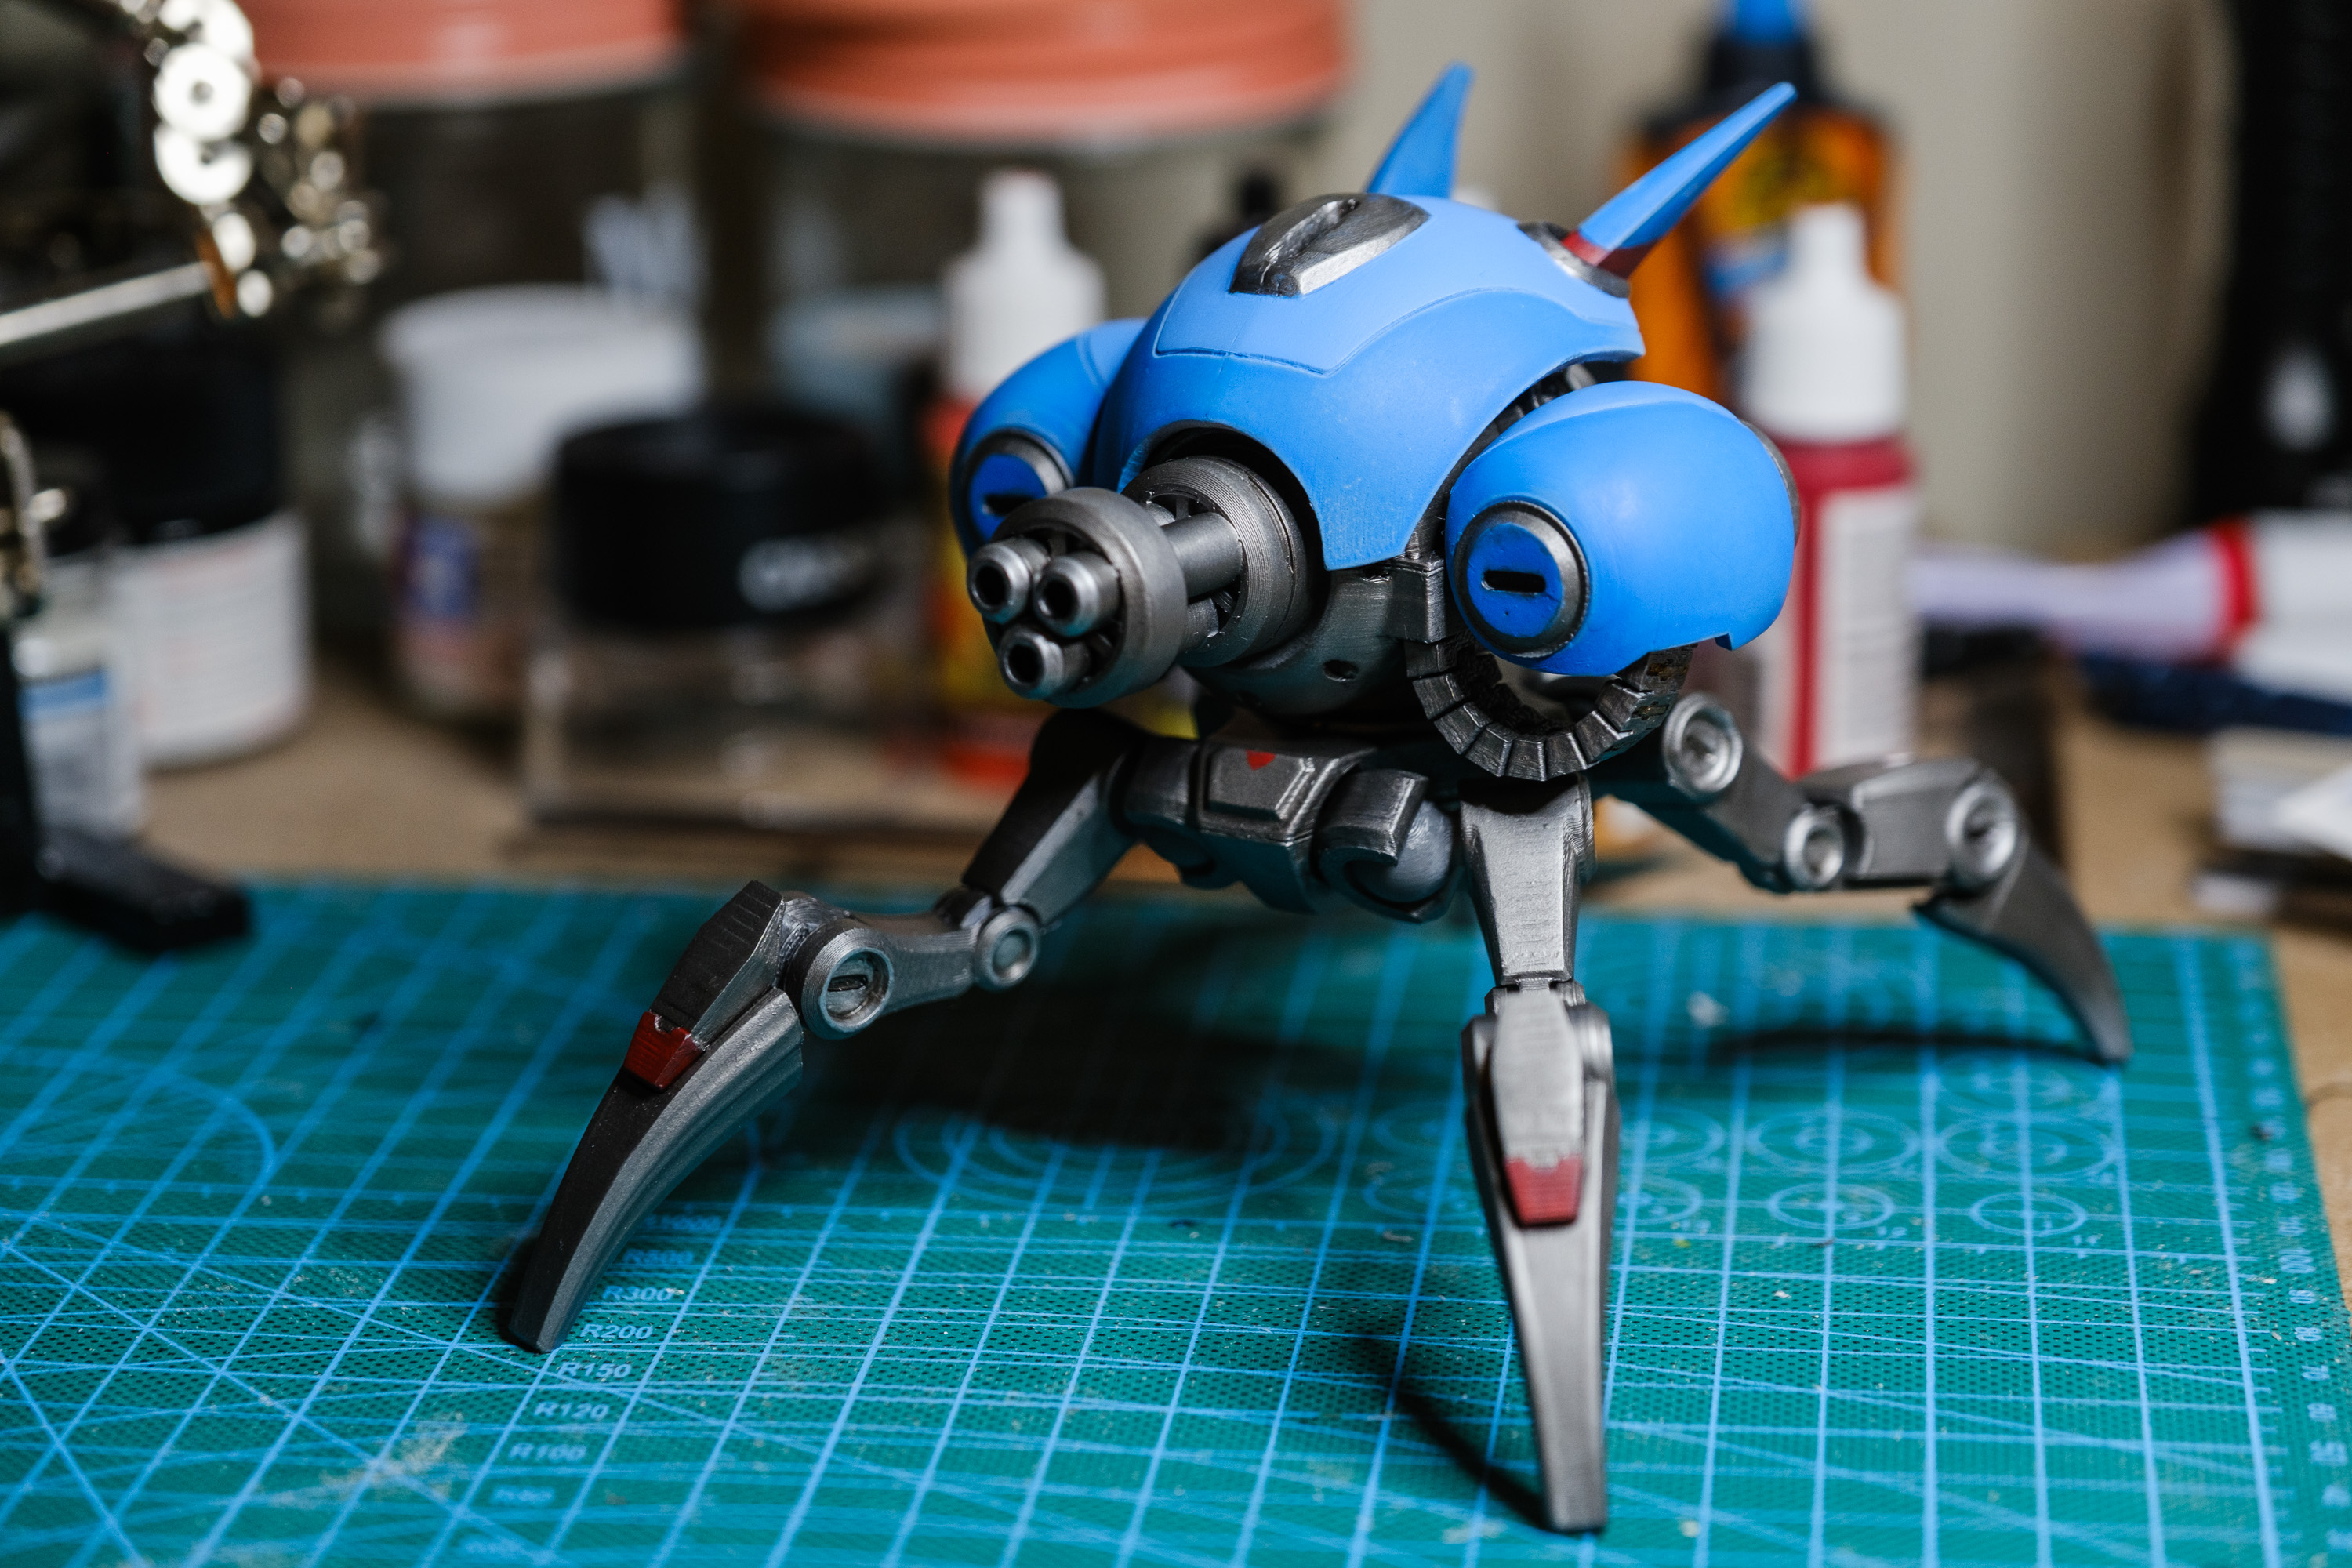
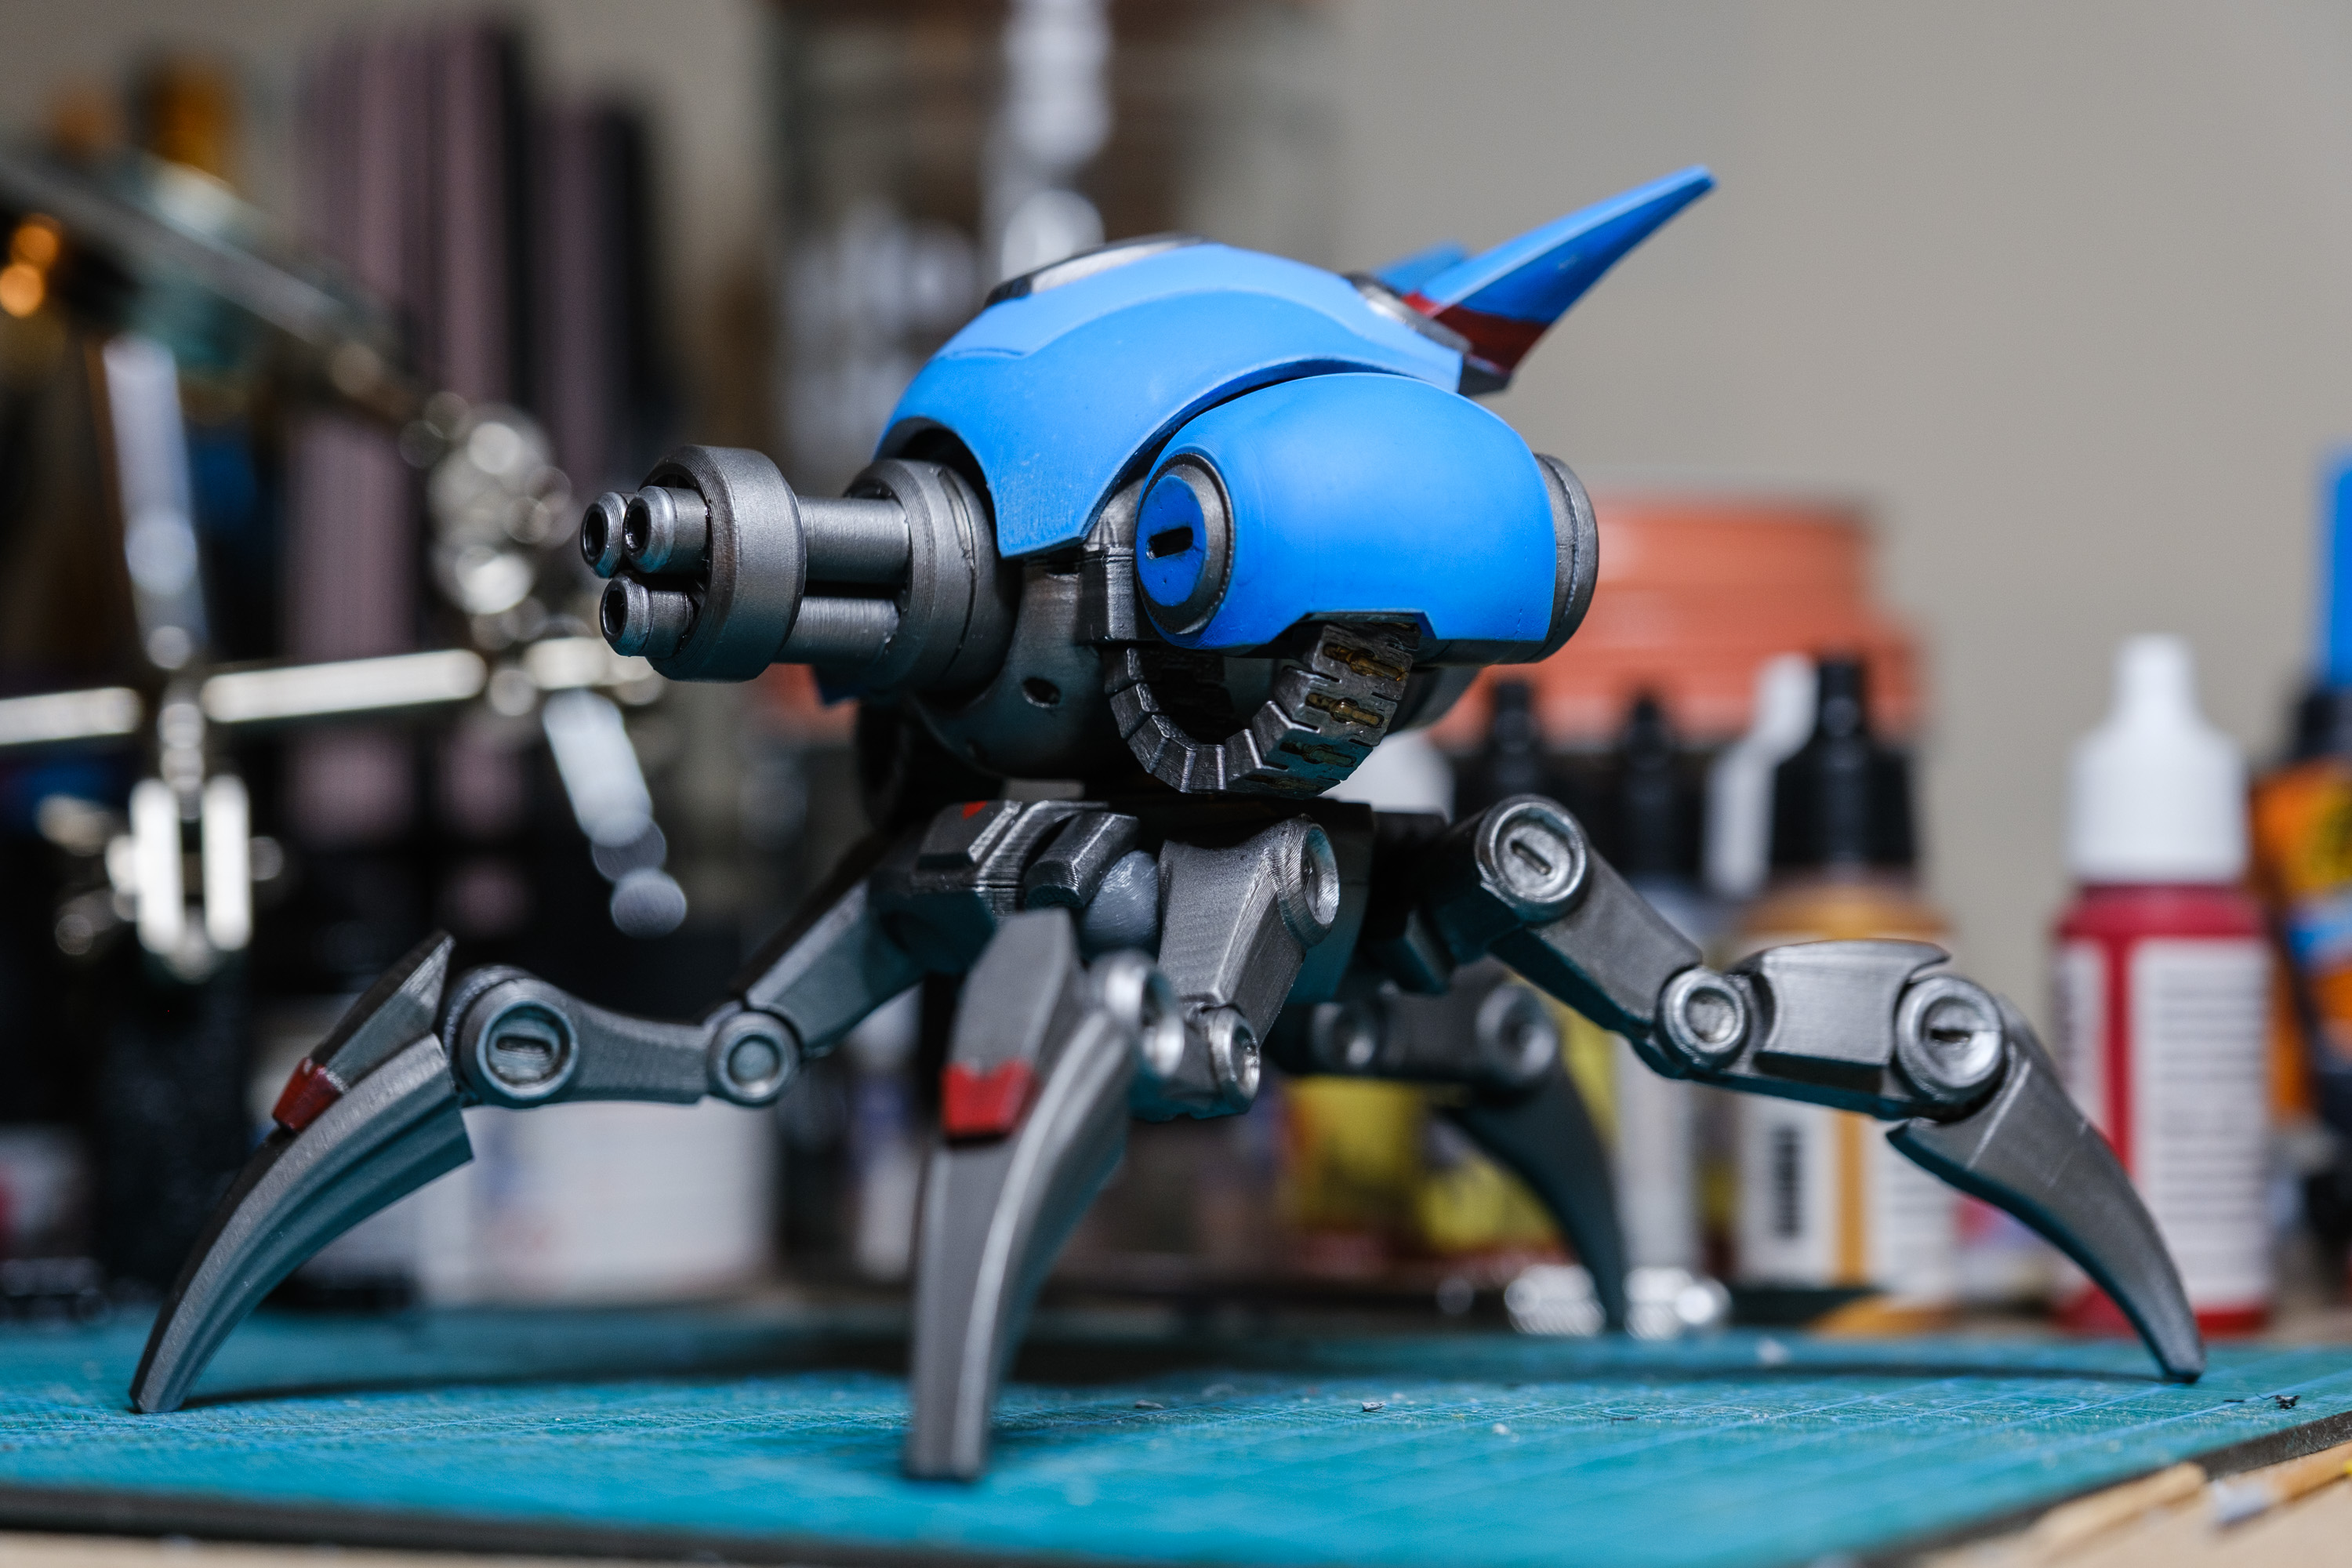
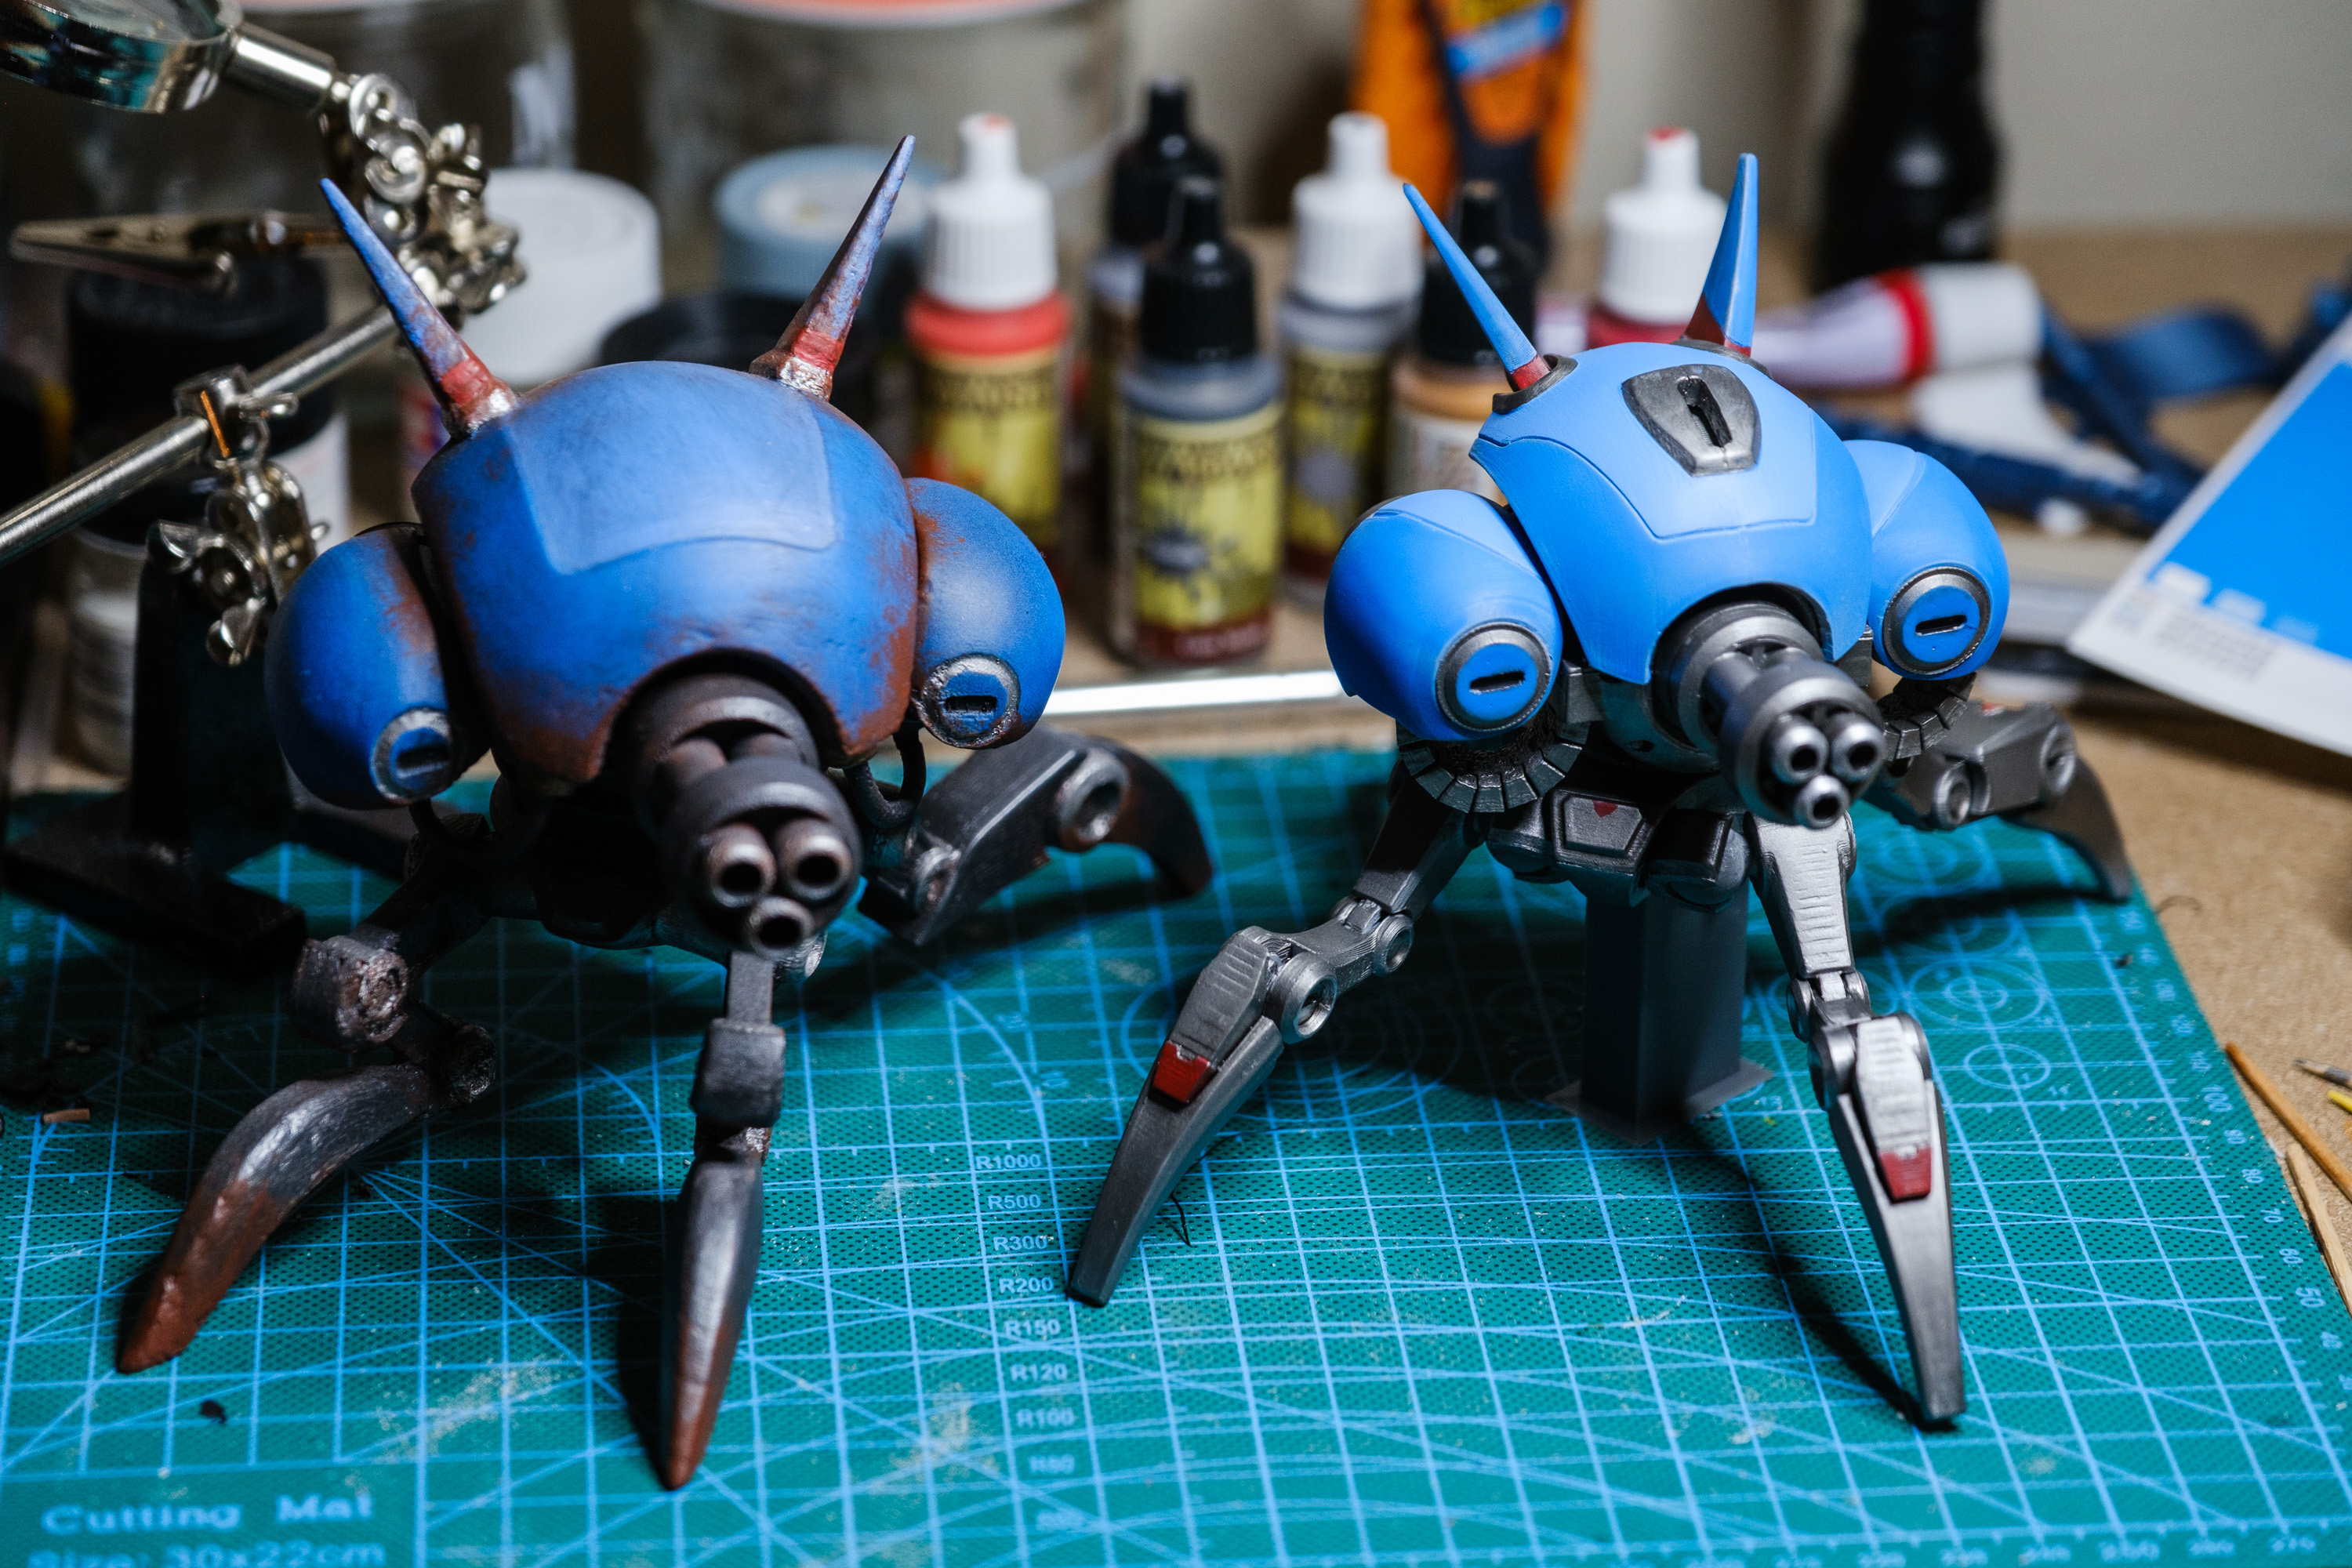
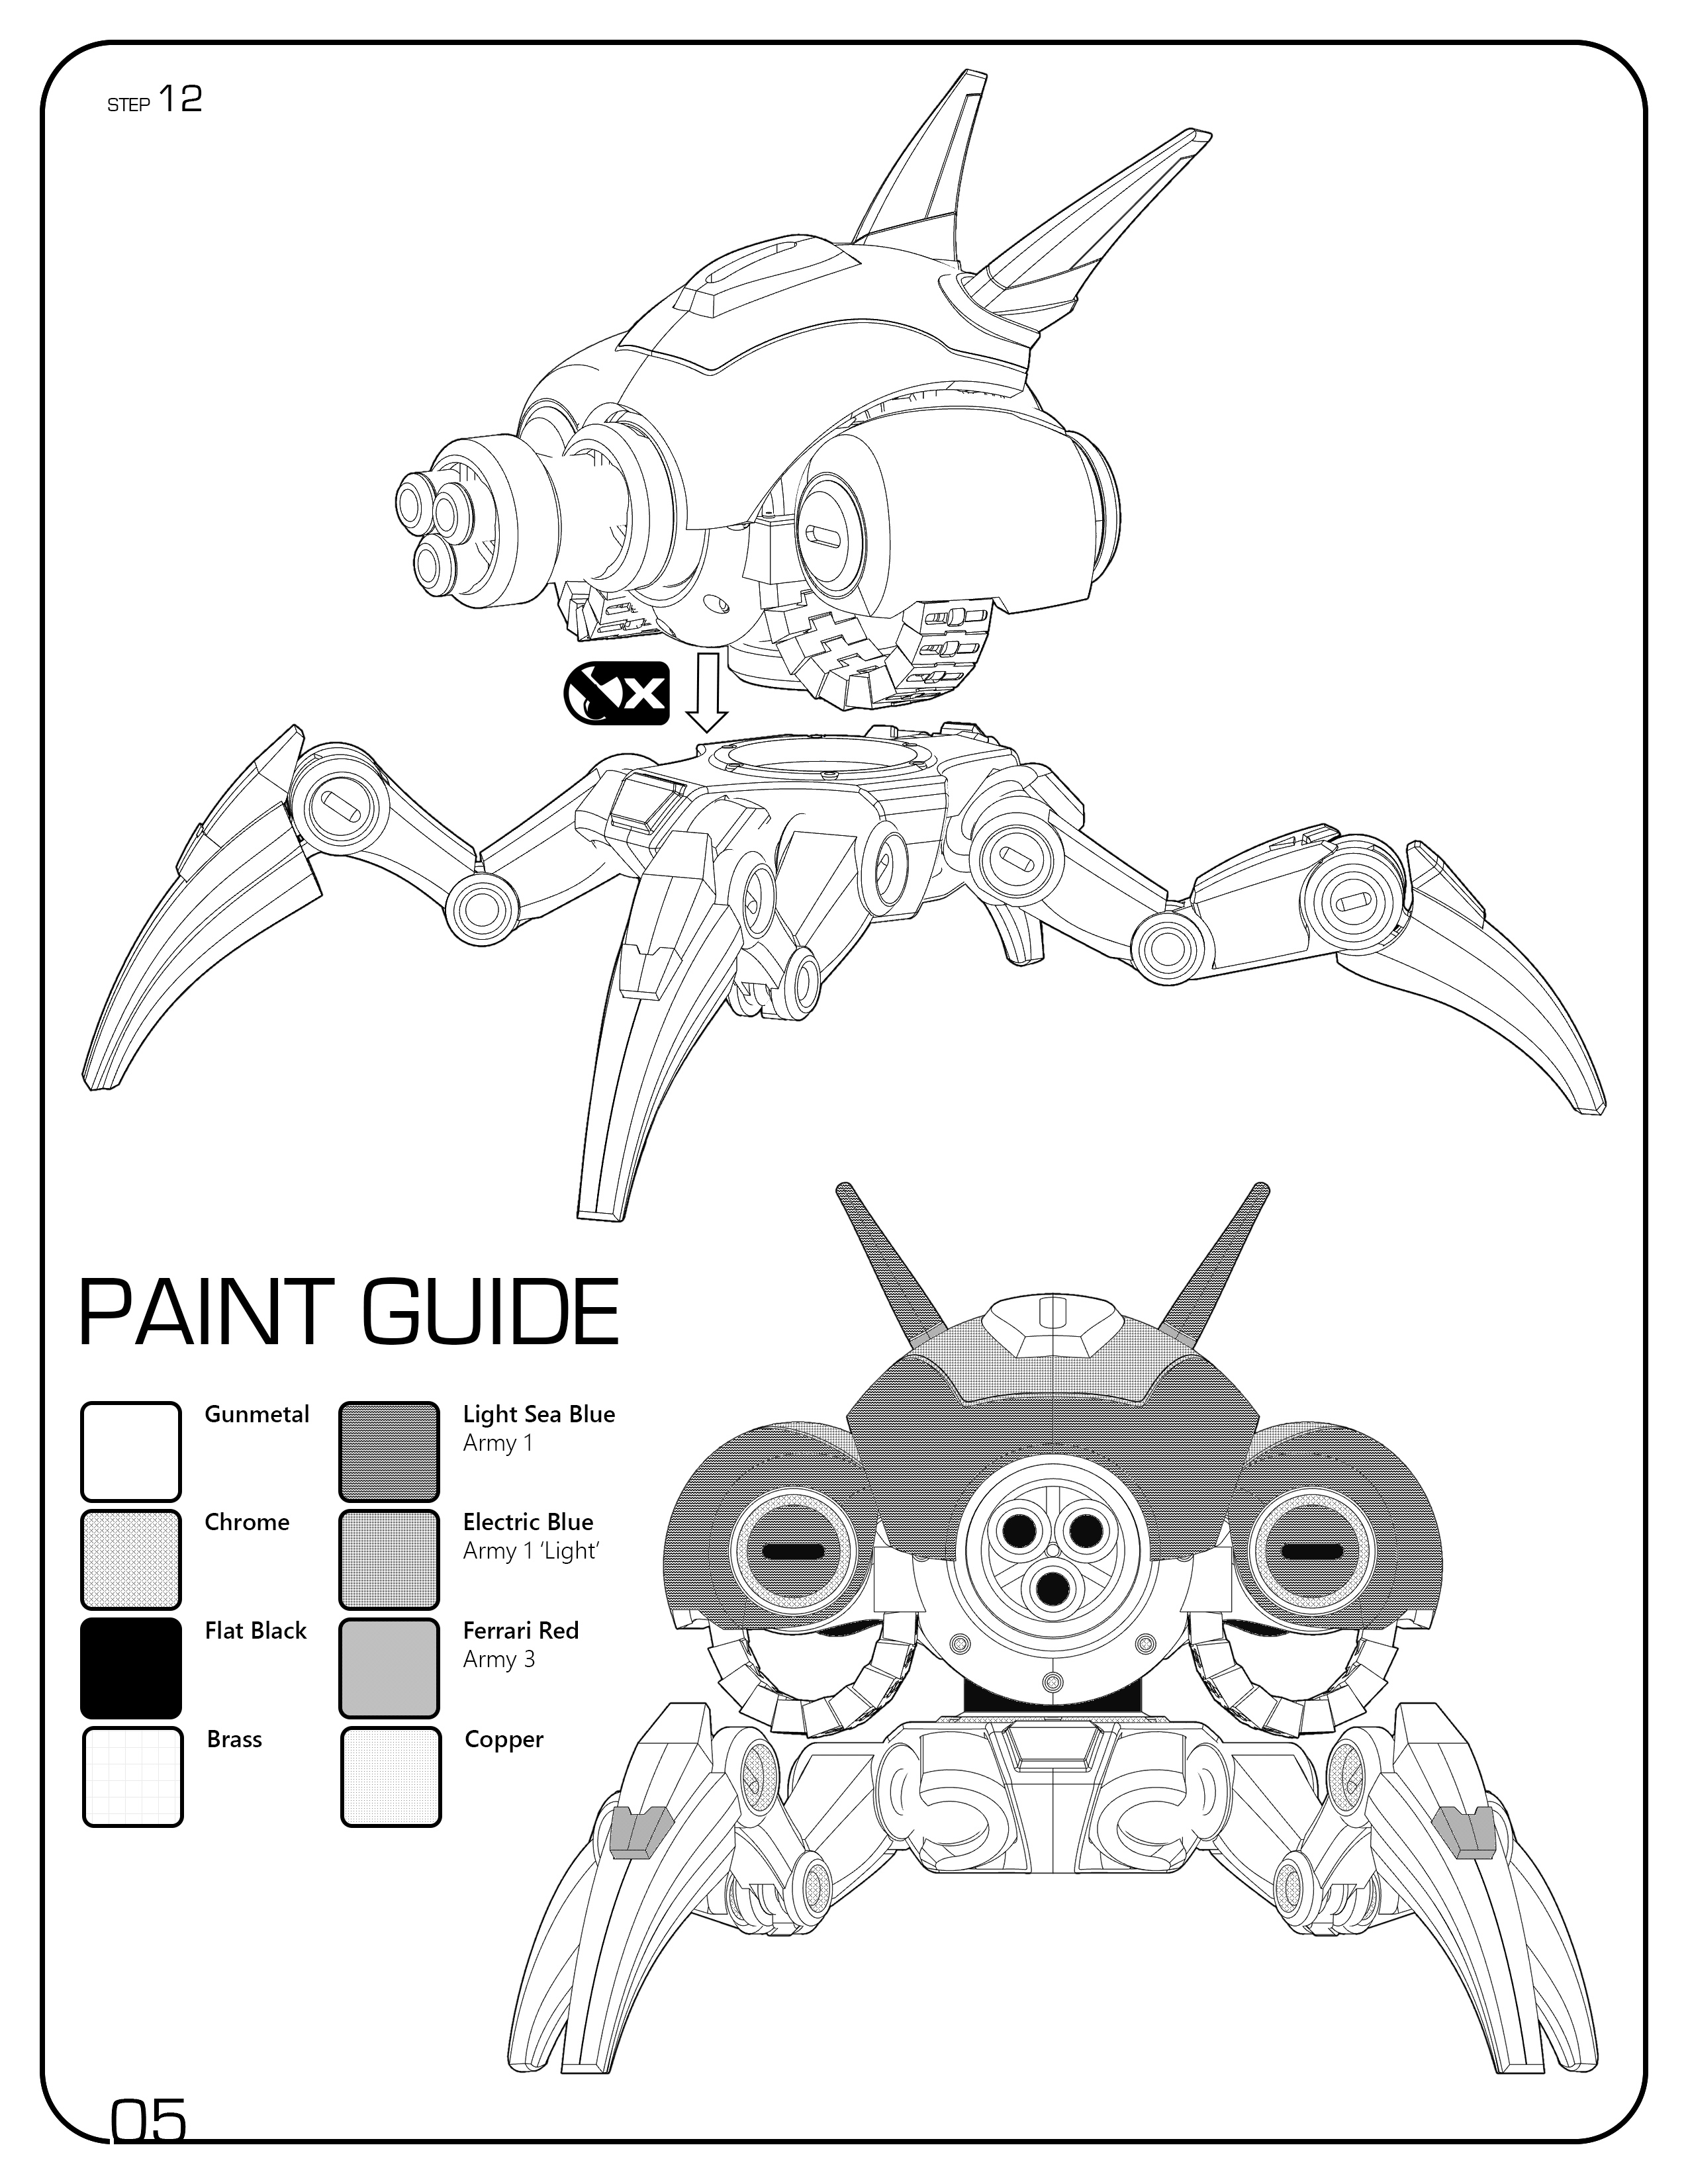
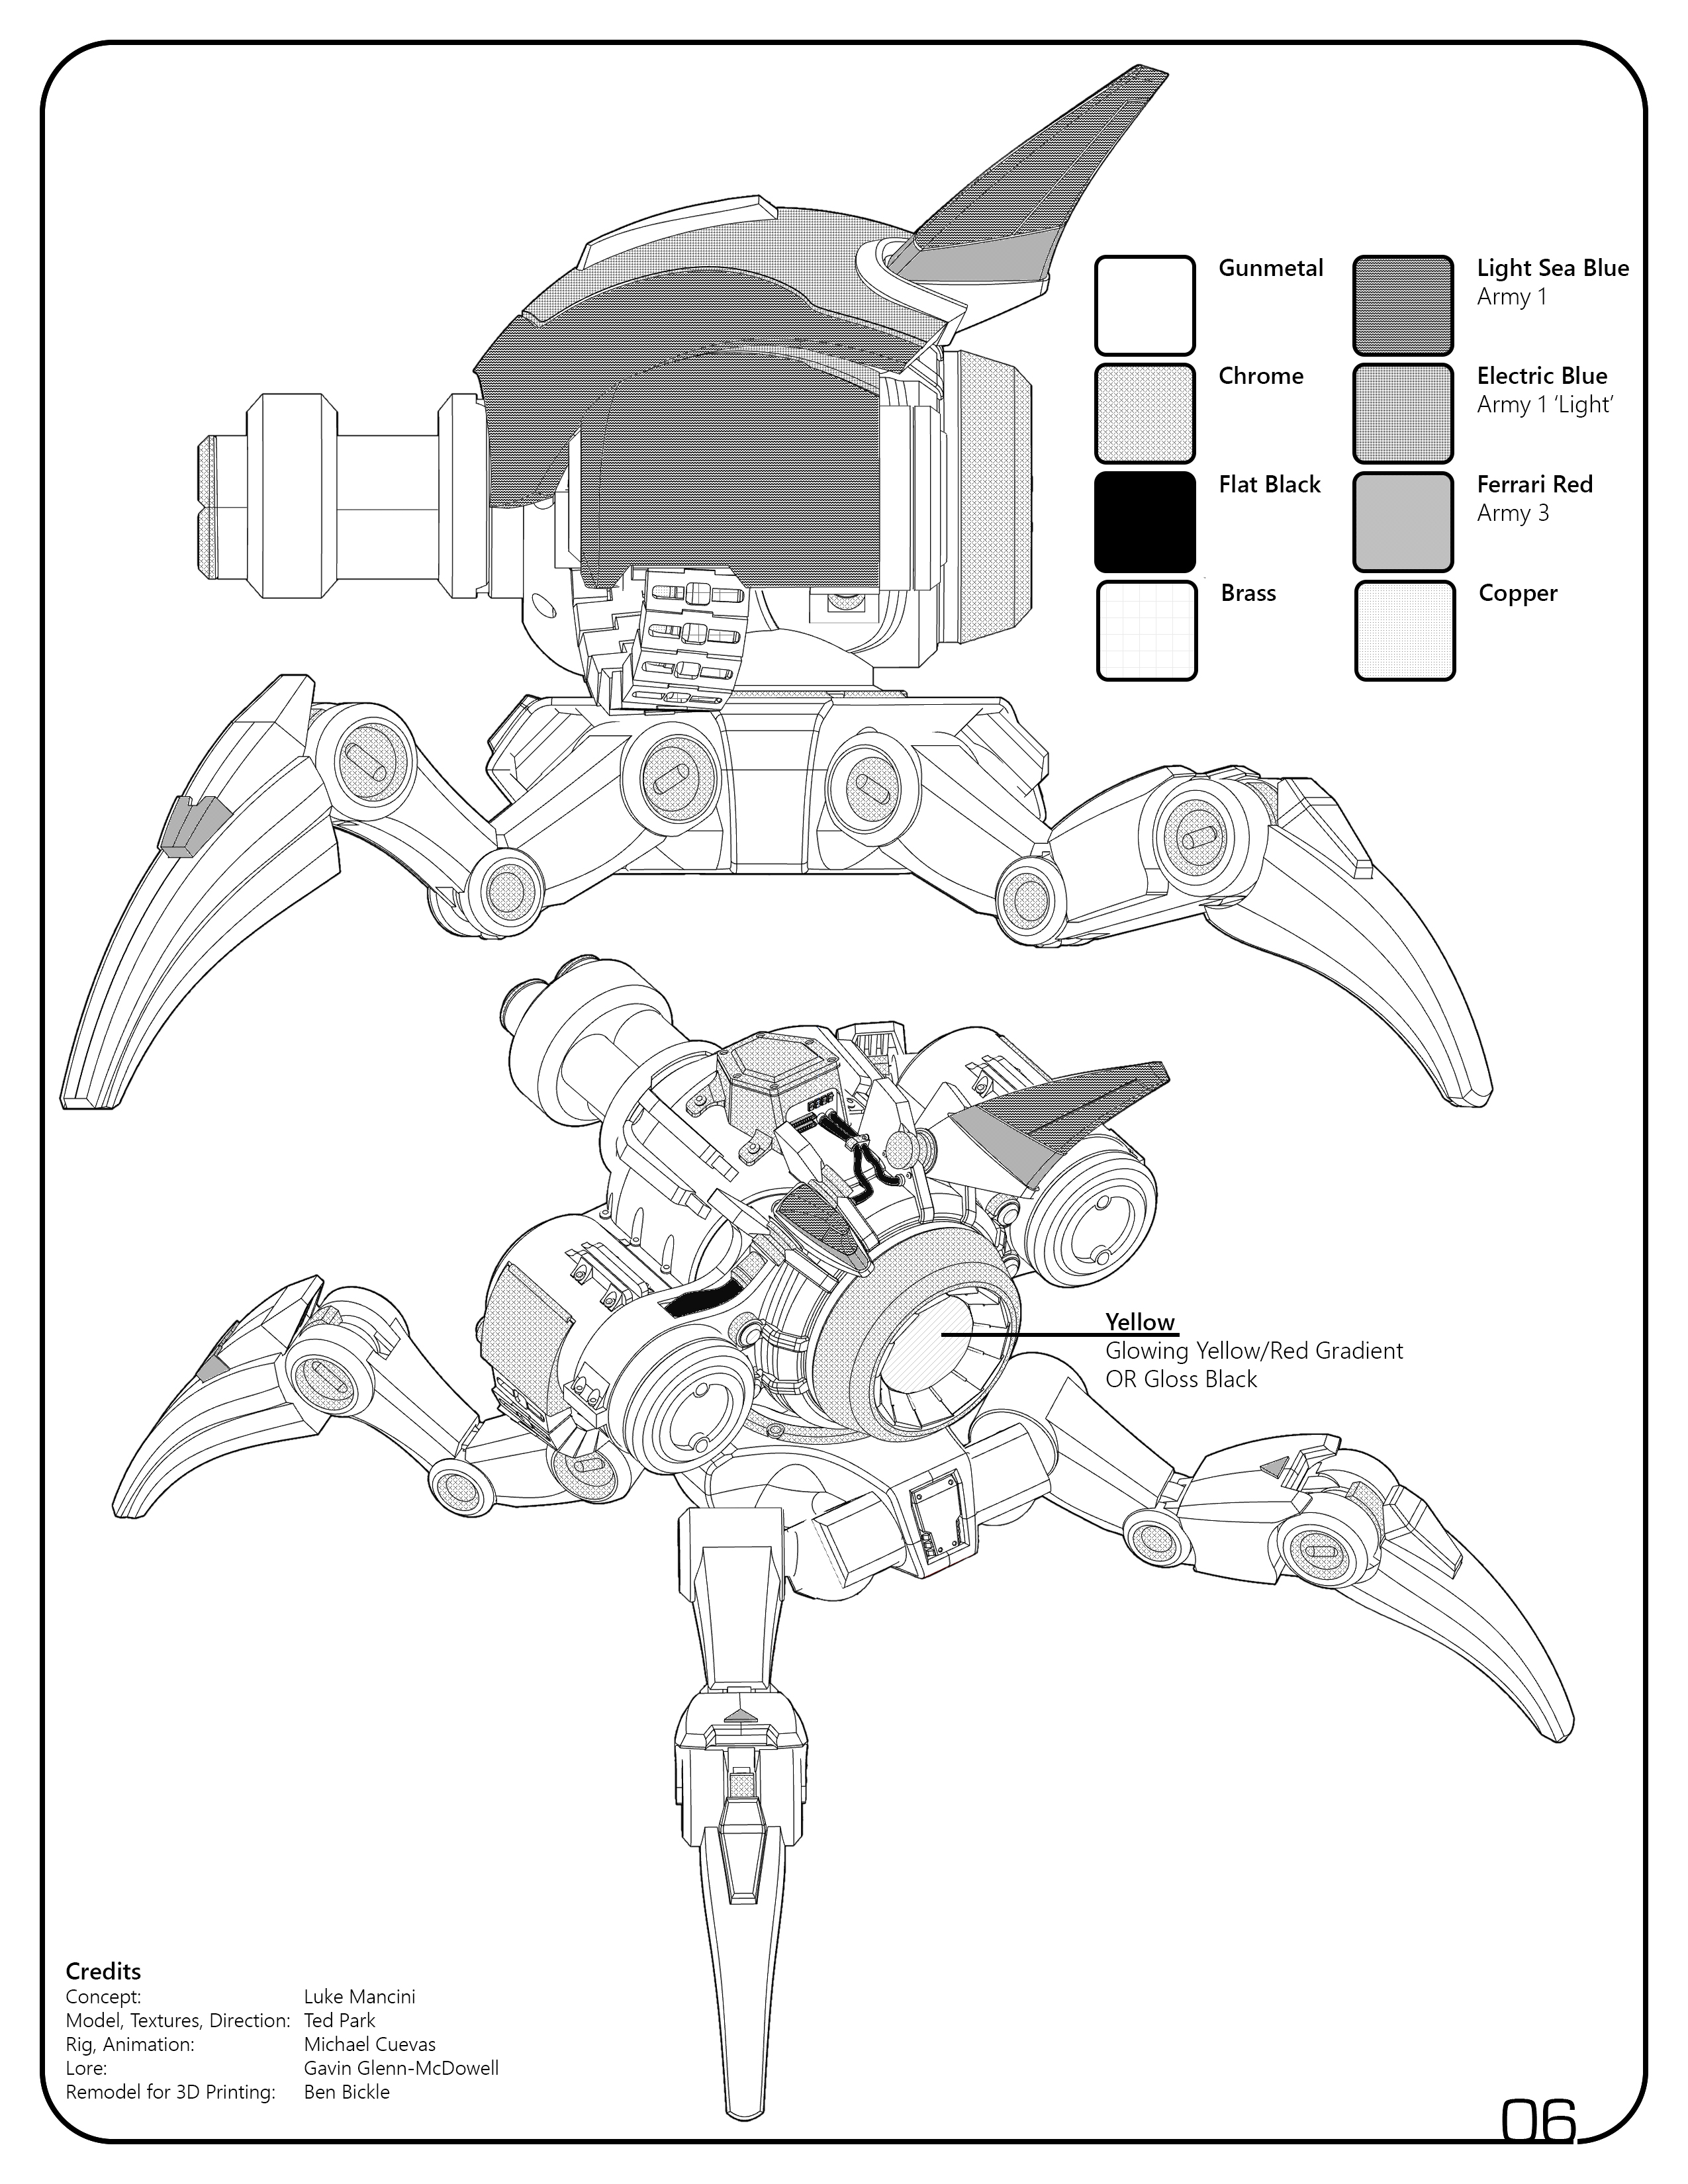
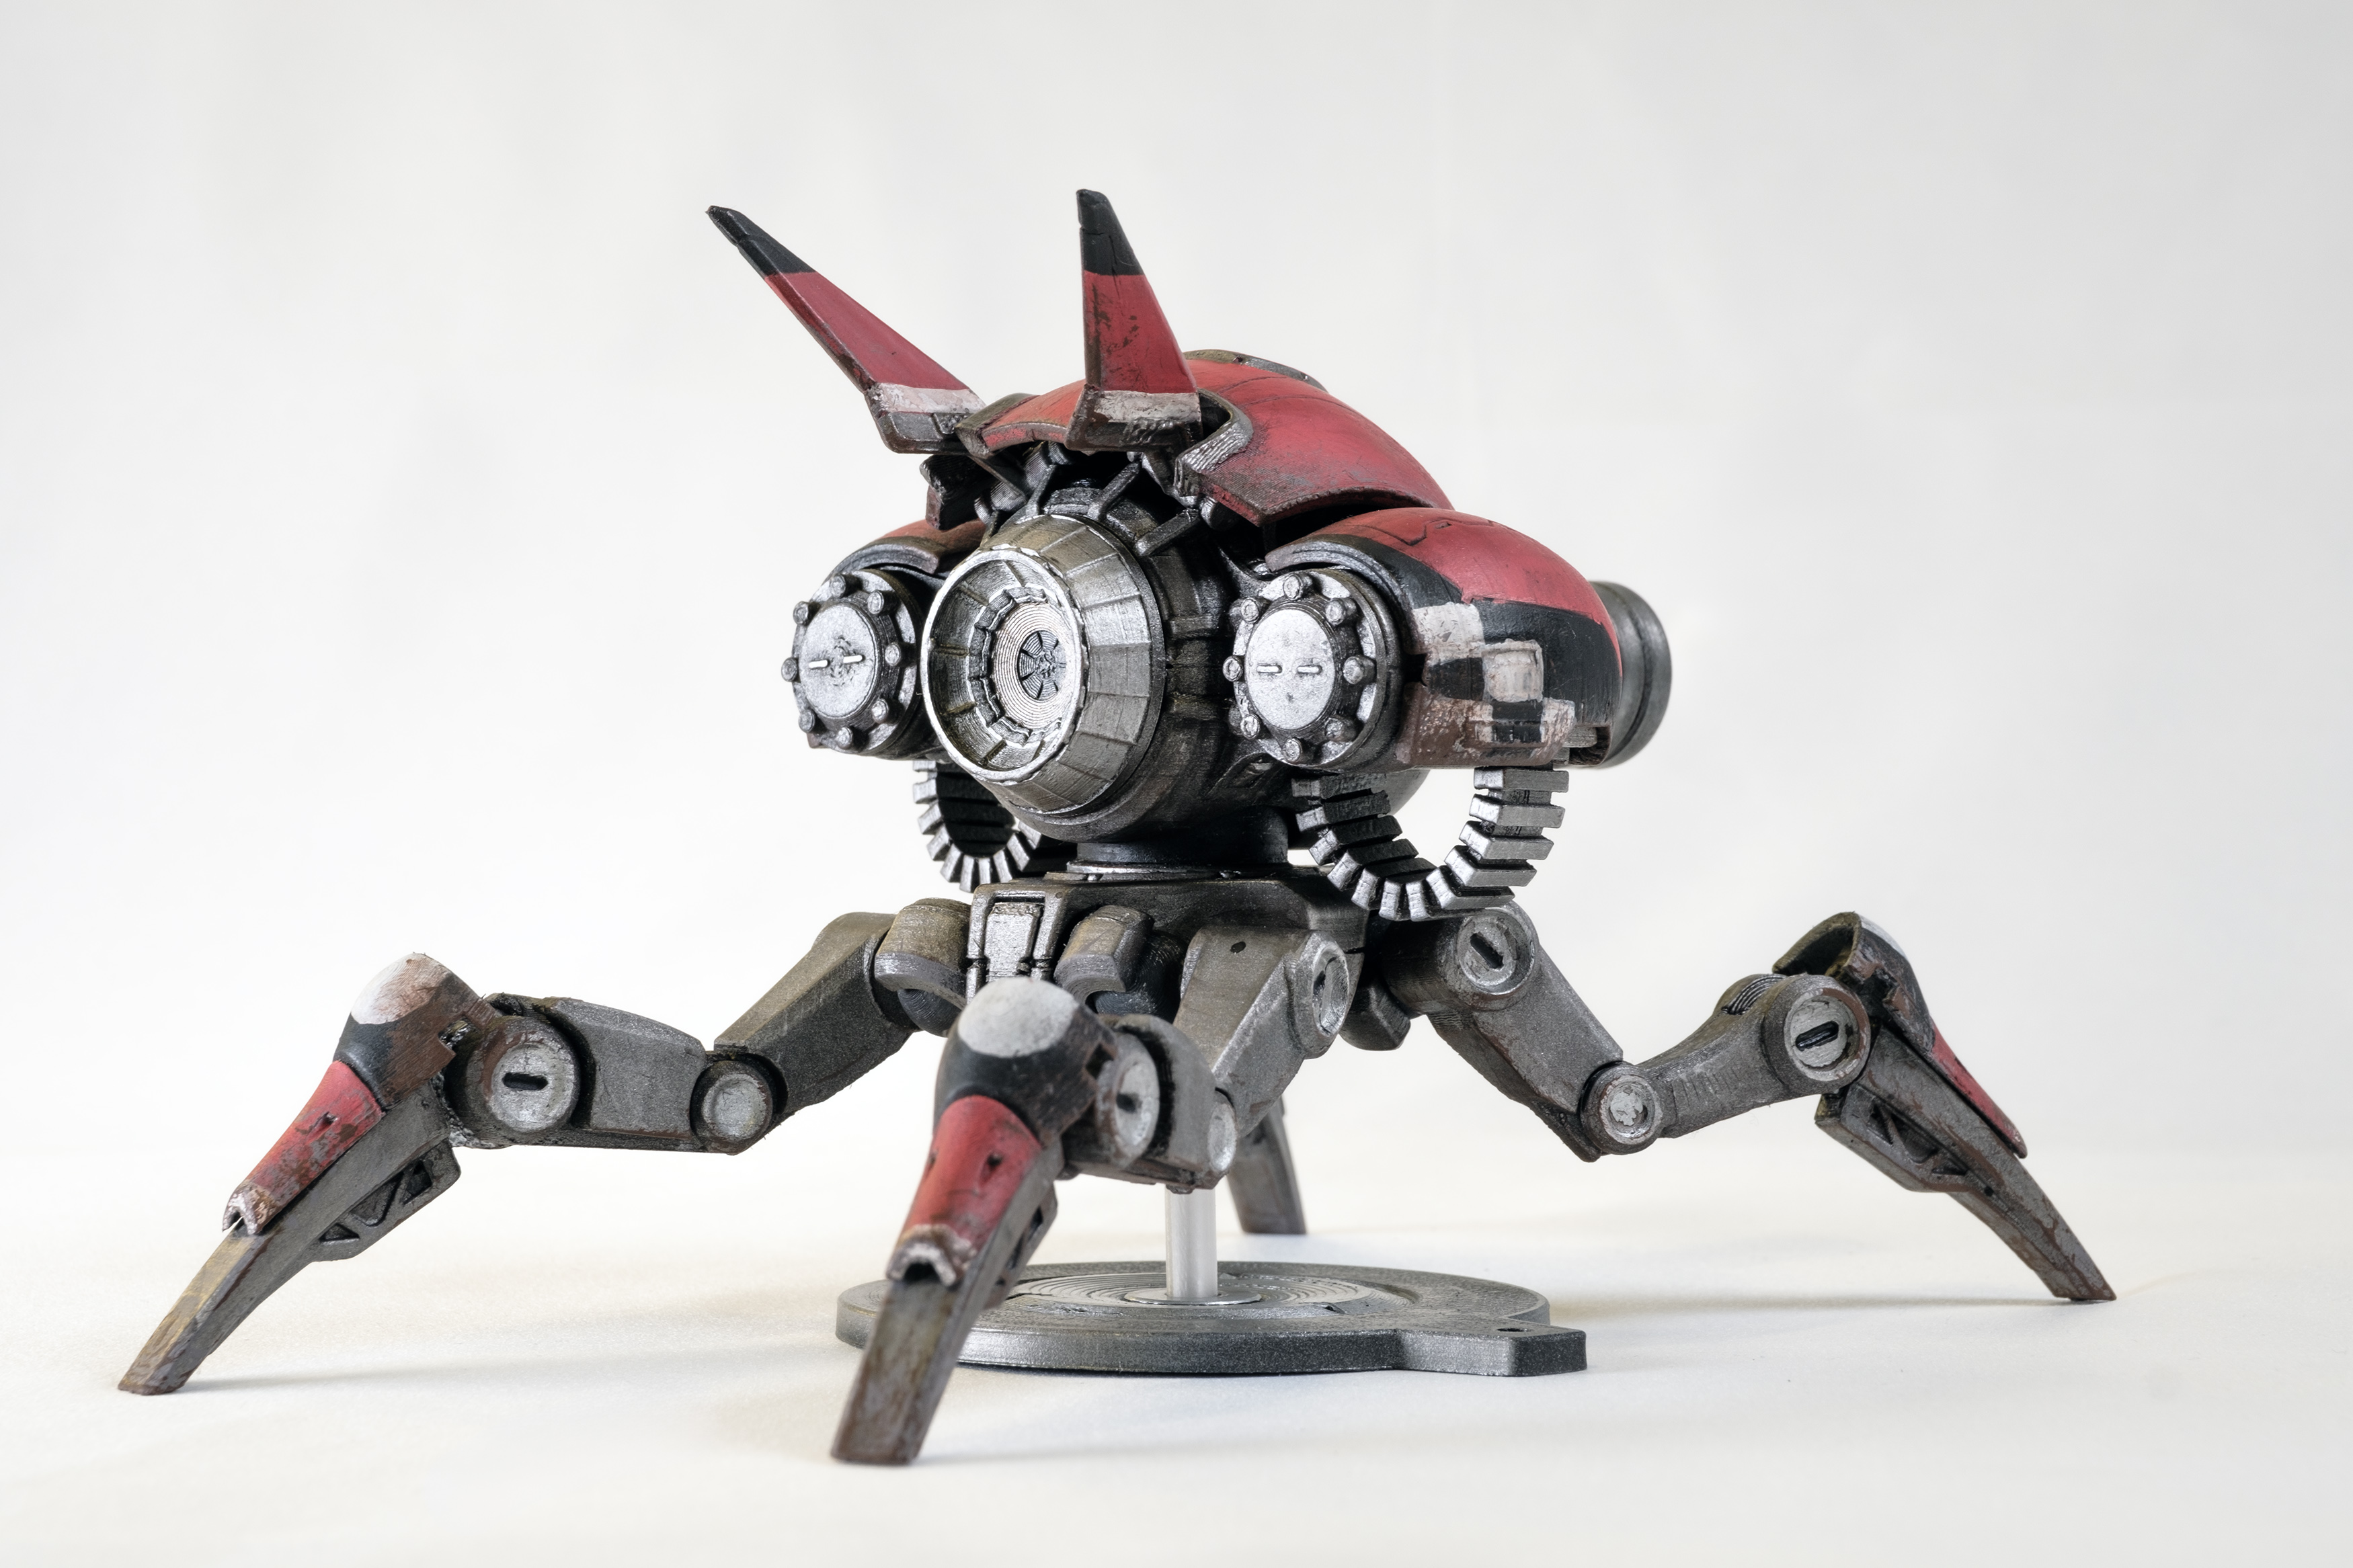
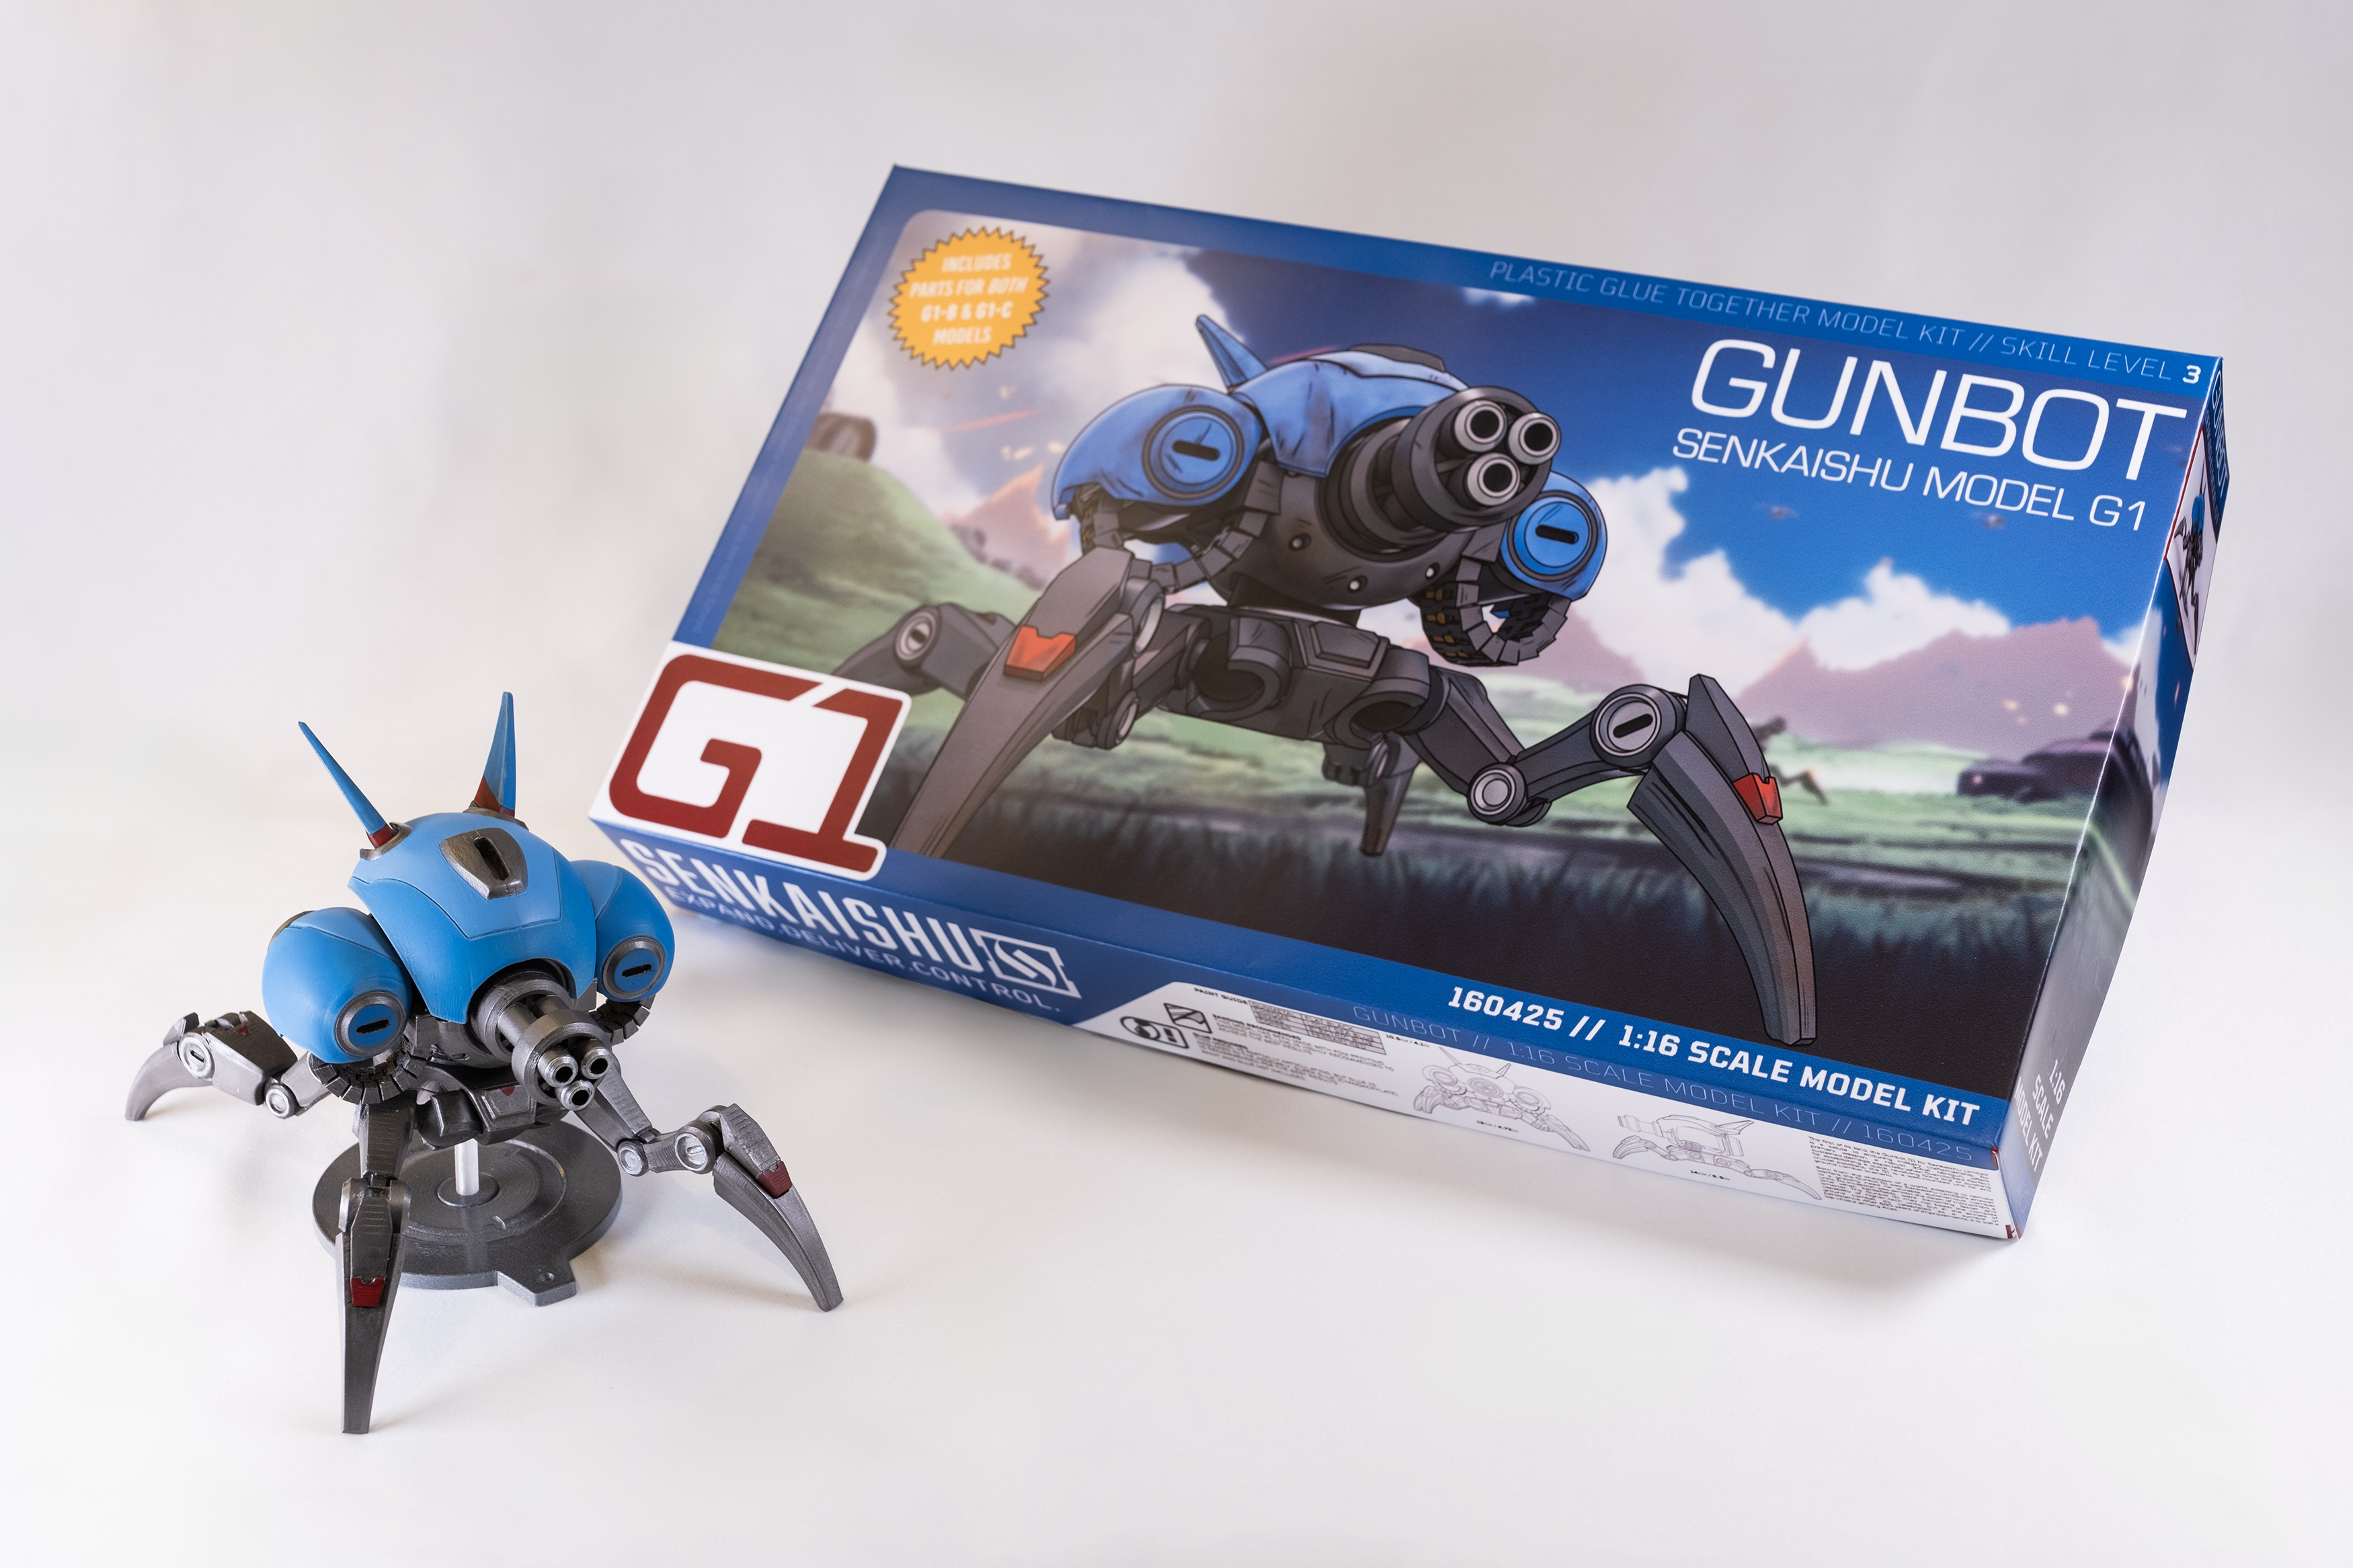
By the time I had a fully surfaced and primed Gunbot with its base colors I had spent… months to get to this moment, I was terrified to weather it! That’s usually where my paint work goes from ‘Okay’ to ‘Good’ or ‘Really Bad,’ so I settled for the first one being the ‘factory fresh’ model and making additional models based on the trailer appearances that would be fully weathered.


Cancellation
Just as I was finishing this on track for our next team meetup, the game was cancelled. There are things outside of your control in life, and at the end of the day, you just have to roll with the punches. For me, that meant packing this up, moving about an hour south, and ultimately putting things back together.
Once the dust had settled, I had one painted Gunbot and an assembly line of primed, half painted, partially sanded, and printed parts for two more.
Going for it Anyway
Well, if I’m going to get this half complete set of parts off my bench and all my time constraints are gone, what would be the ultimate presentation? Making it like a model kit. But not just the final result, the whole end to end experience. Let’s break down a ‘case study’ – a 30 Minute Missions kit.
What do we have?
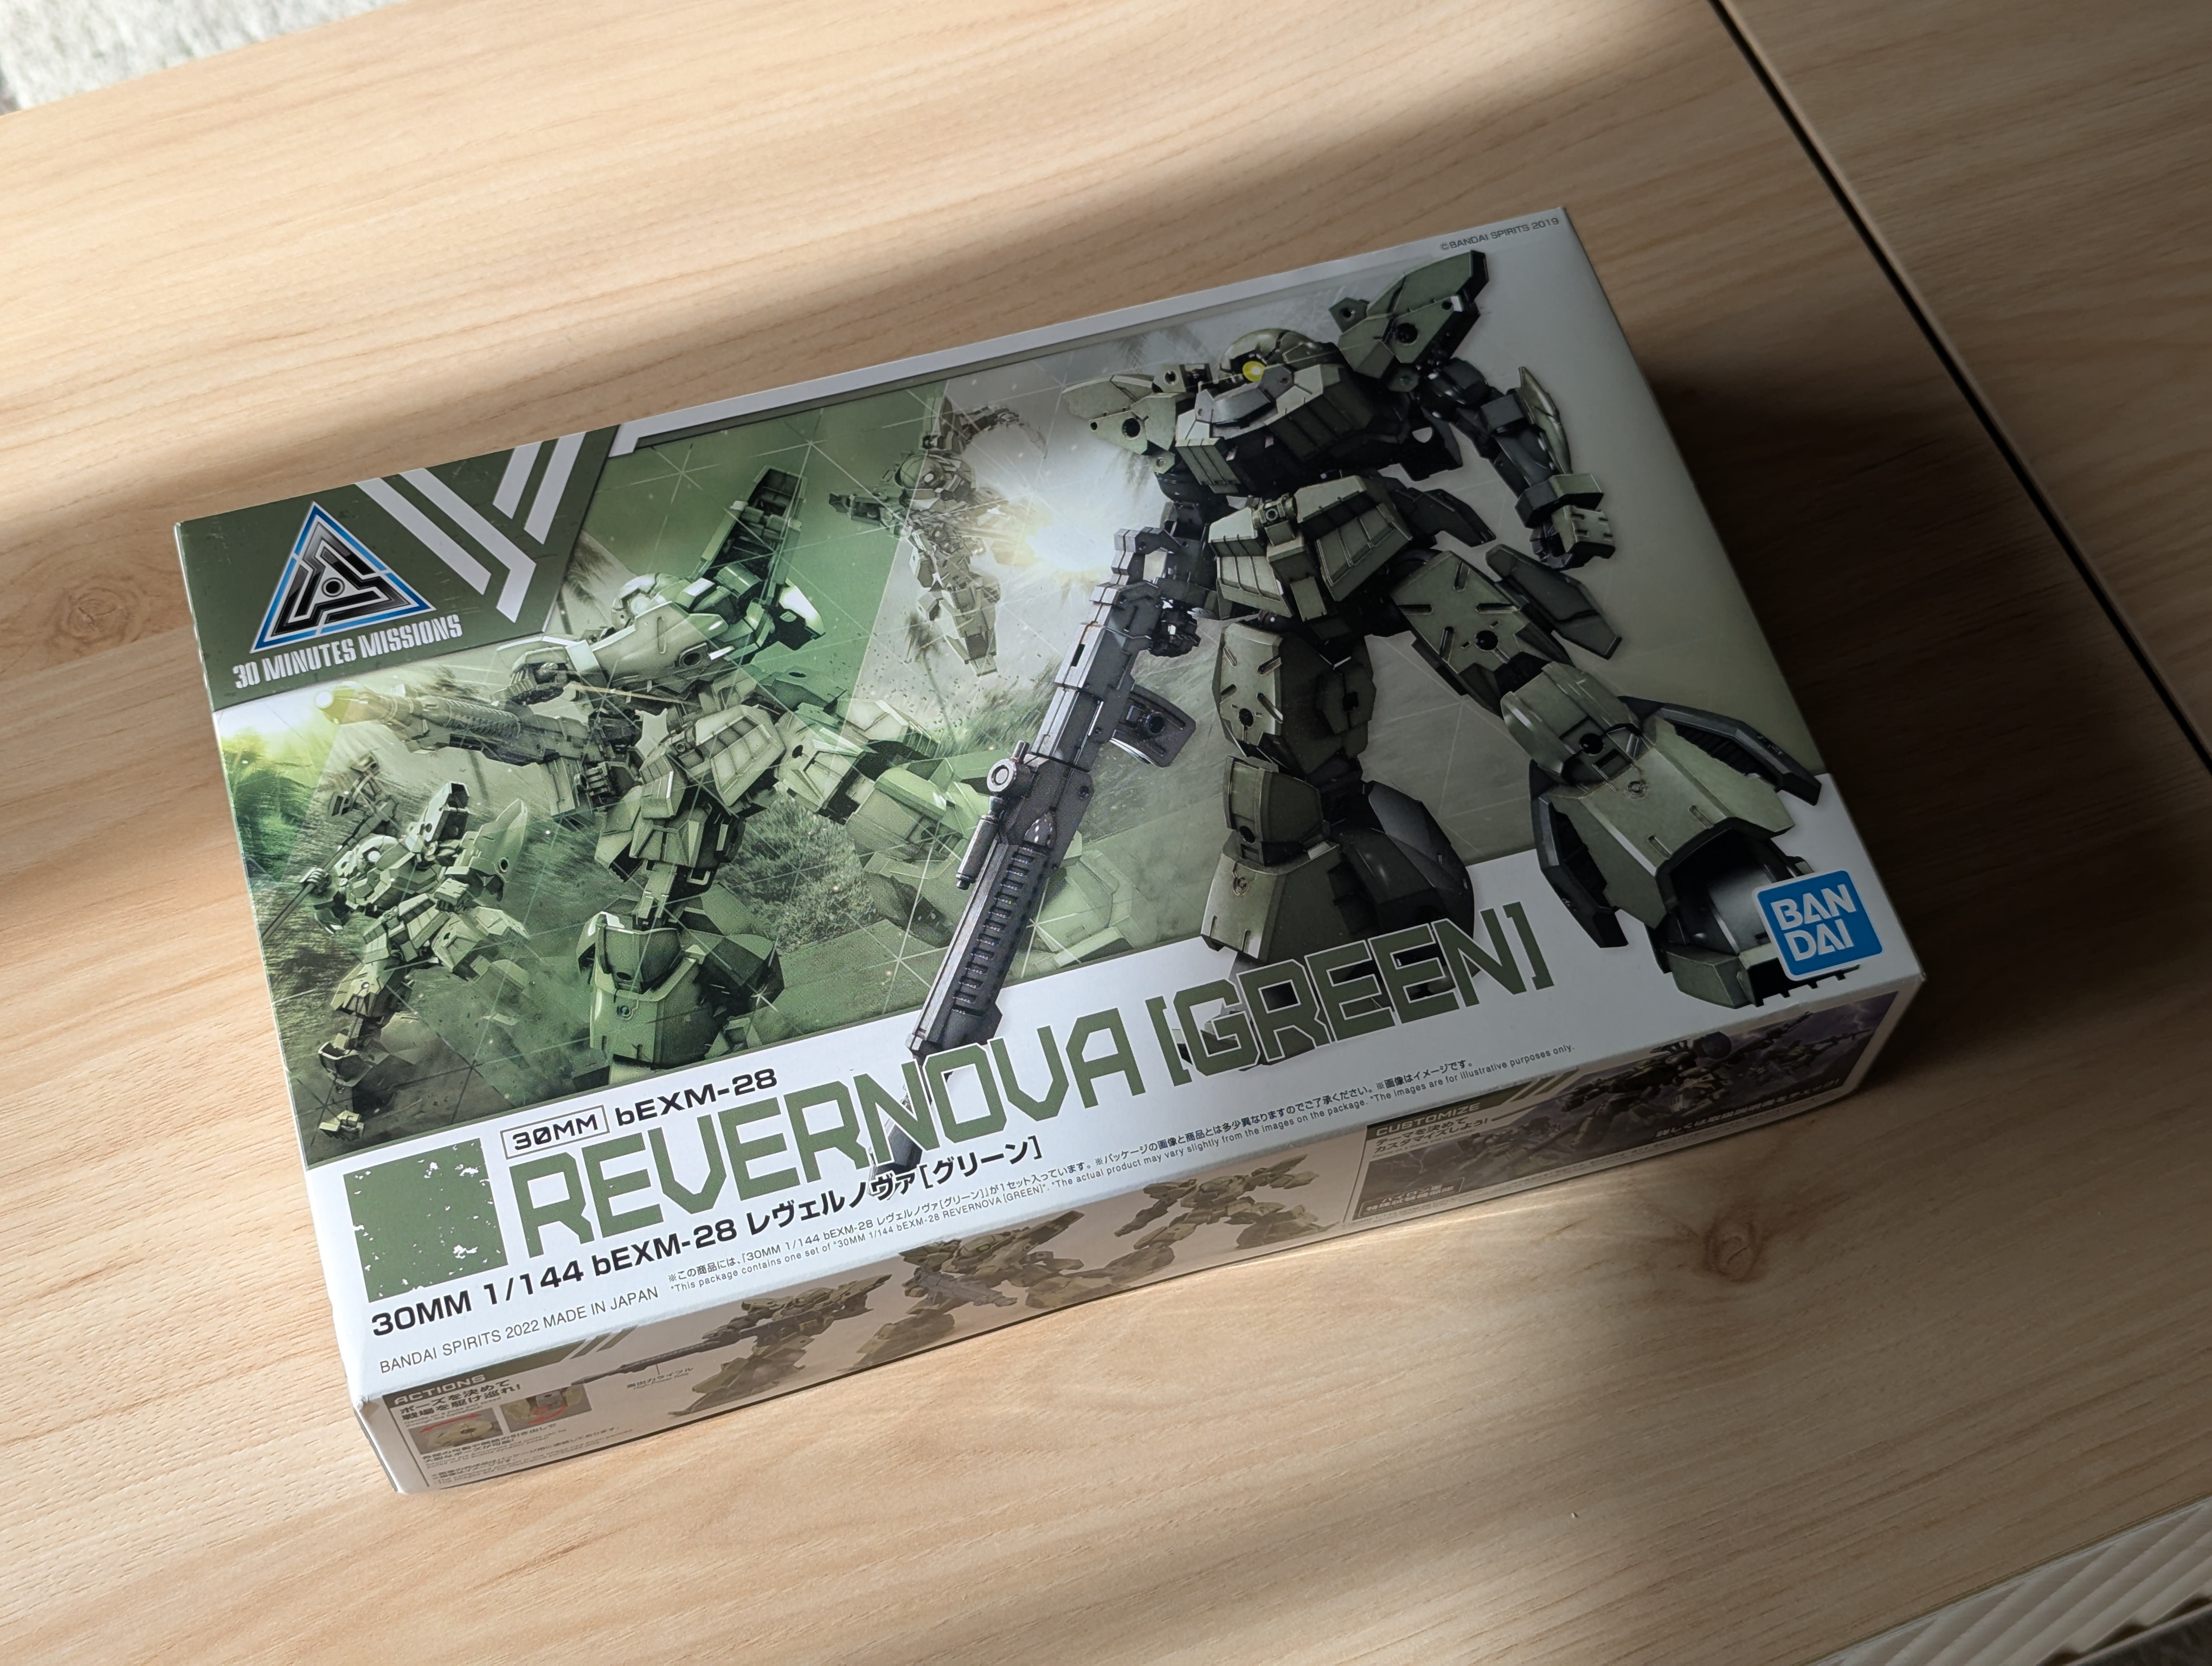

- A pretty flimsy box
- A box cover with visually dense graphic design
- Instruction manual
- Plastic parts on trees in individual heat sealed plastic bags
It would be crazy to do all of that, right? Yep. You probably know if you’re reading this that I did almost all of that anyway. Each of these was its own small challenge.
I skipped out on the trees – While I did some preliminary testing with modeling my own supports and connected cards for printing, I ultimately didn’t want to make the kit harder to print for the aesthetics of it looking injection molded. That, and it would have amounted to 20 or so more hours, maybe more, on a step I was done with. I just didn’t want to step so far back at this point.
Instructions, Please
I had actually started this one a little earlier in the design, when it became apparent that this was not going to be a simple build. I didn’t plan on treating it as an aesthetic case study on model kit instruction manuals, but that’s where the magic of ‘no deadlines’ comes in.

A lot of renders, and a lot of referencing old model kit manuals later, and I had 8 pages I could duplex print on my black and white laser printer that usually just prints my tax returns.

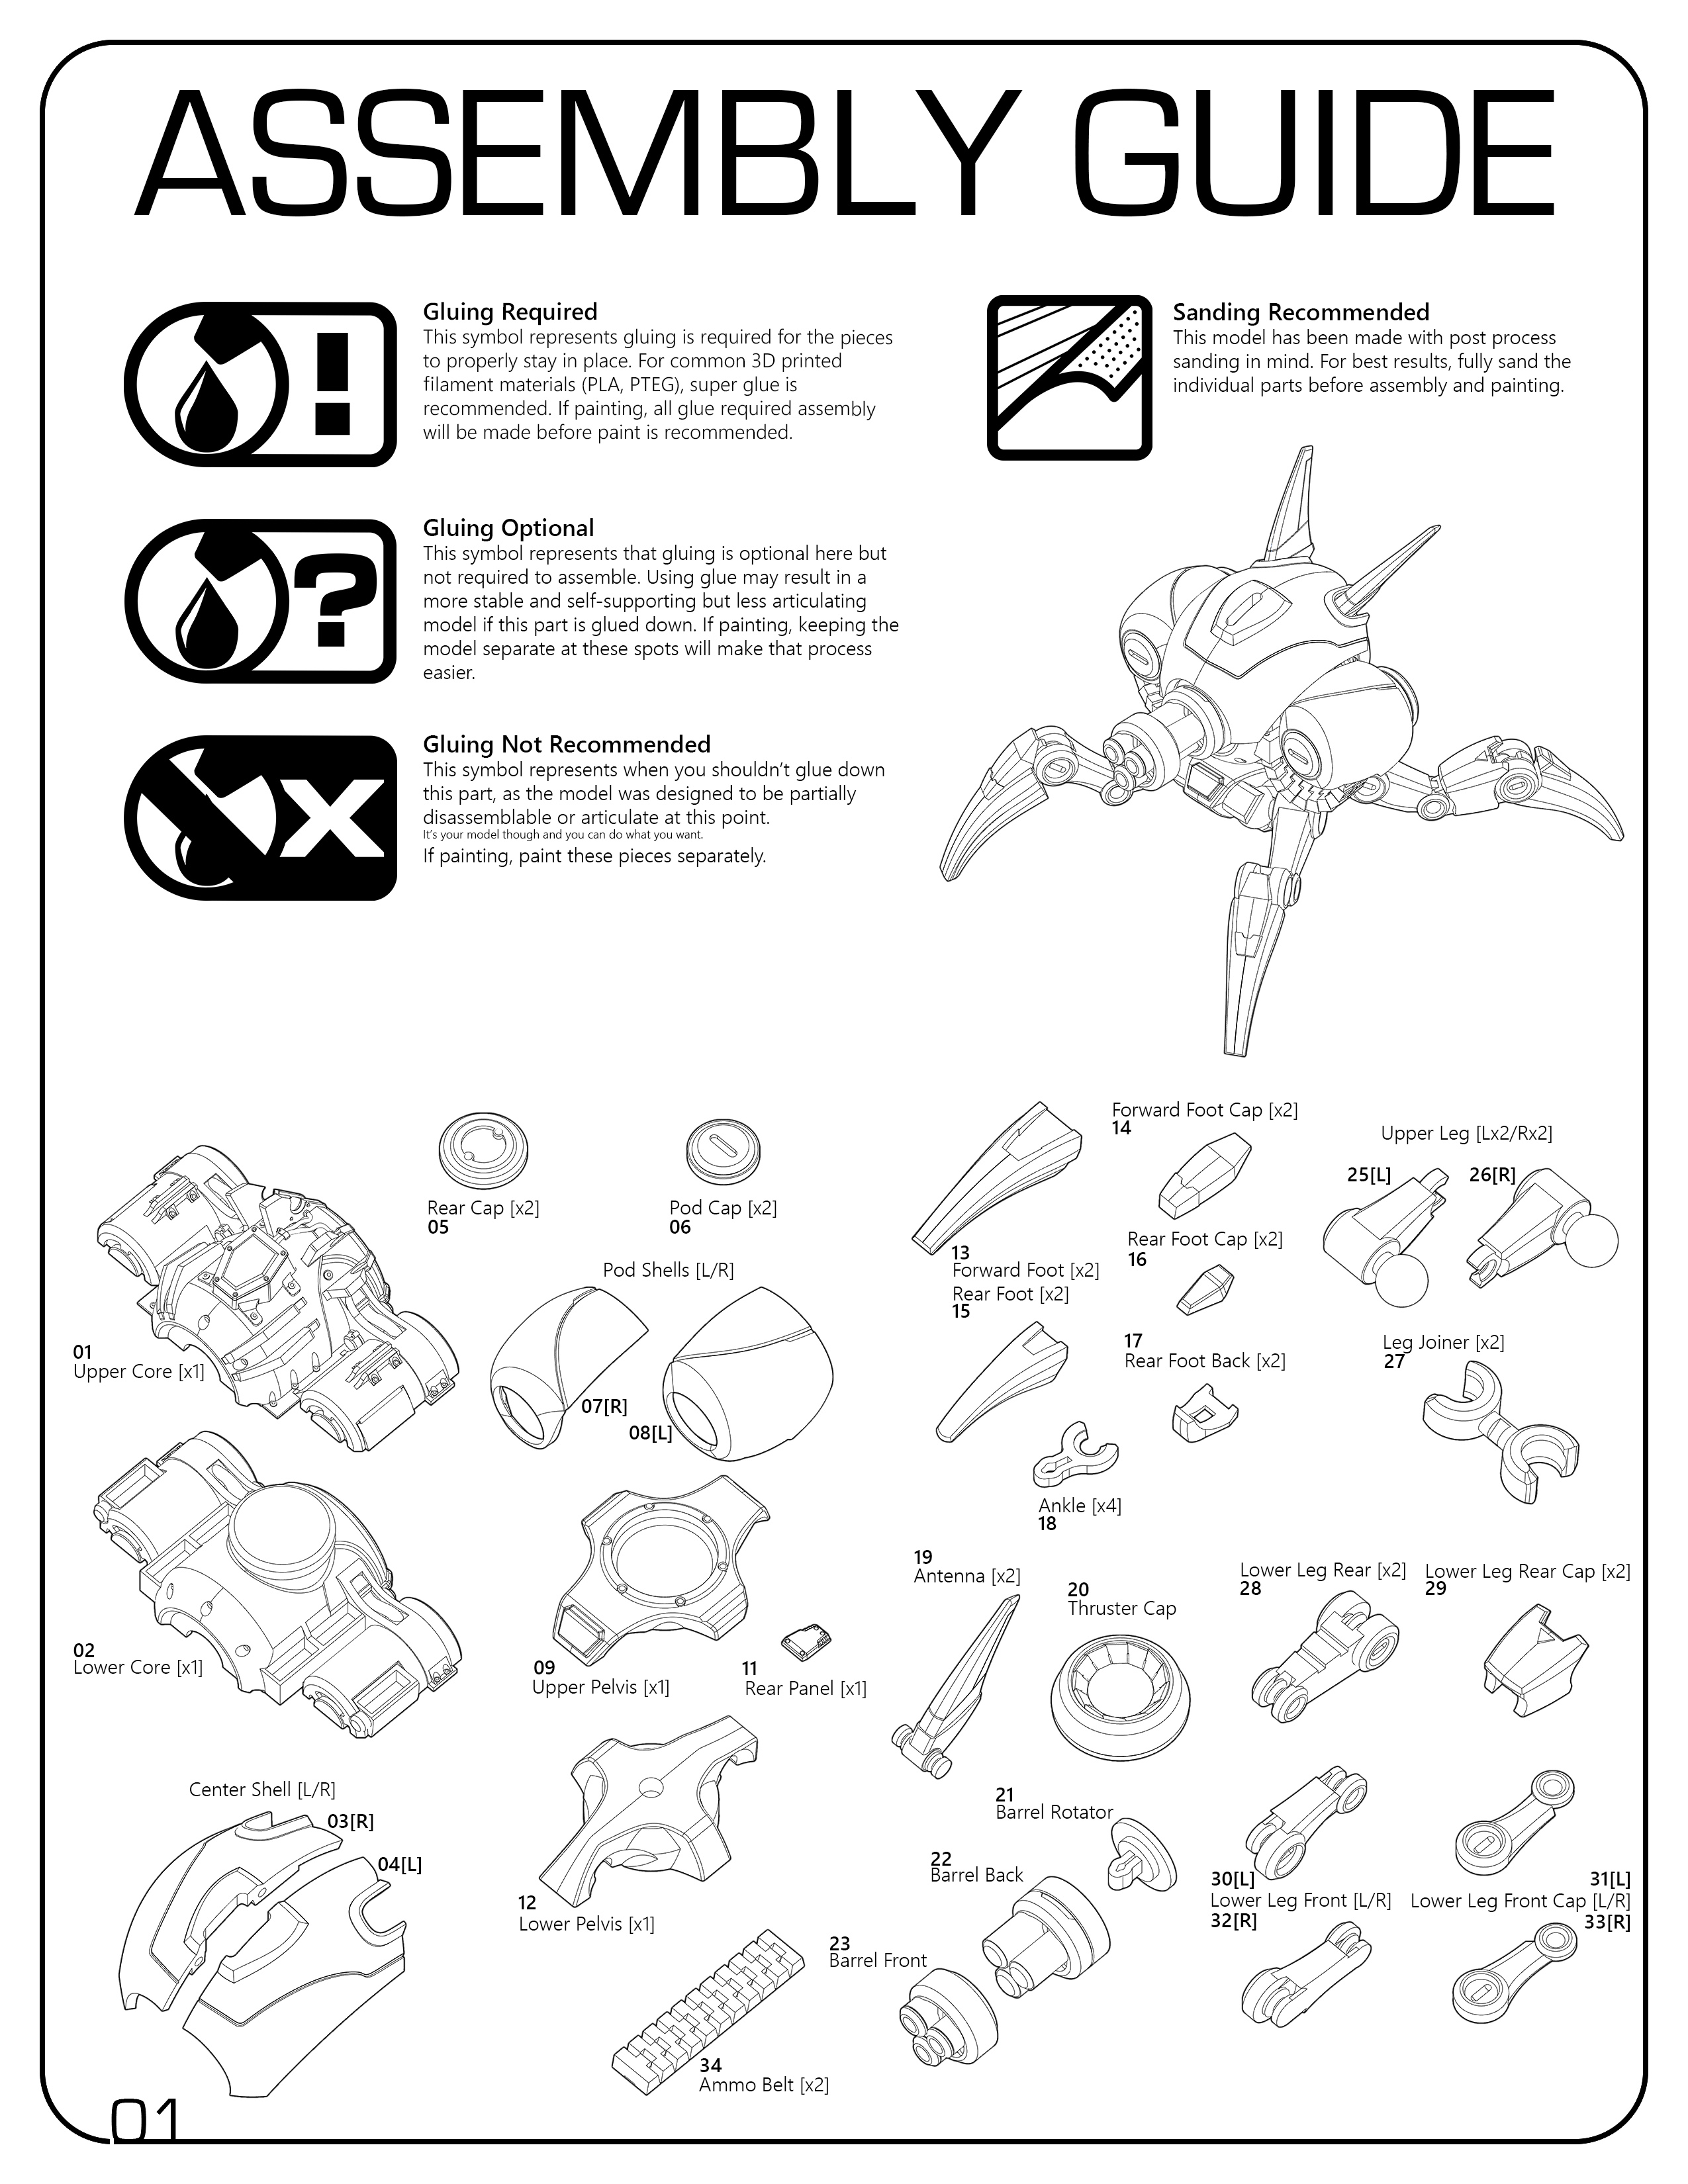


Is it the best instruction manual? No. is it on par with a 90’s Revel kit that requires a degree of telepathy with the designers and additional consultation with the box cover? Yeah, pretty much. Task failed successfully!
Jokes aside – and if you’re this far in, I’ll level with you, the number of people that end up building this kit will likely be in the single digits, so there’s a certain point where the game artist part of my brain kicked in and said ‘the aesthetics of this element outweigh the function.’
That’s not to say it’s non-functional – I’ve used it for reference when assembling my last Gunbot even – it’s just not something I’ve gotten a chance to spend iterations on iterations testing and revising for clarity. I understand it, but I made the kit. If this project was really getting released, I would have put this through a battery of closed testing and feedback before a wider release.
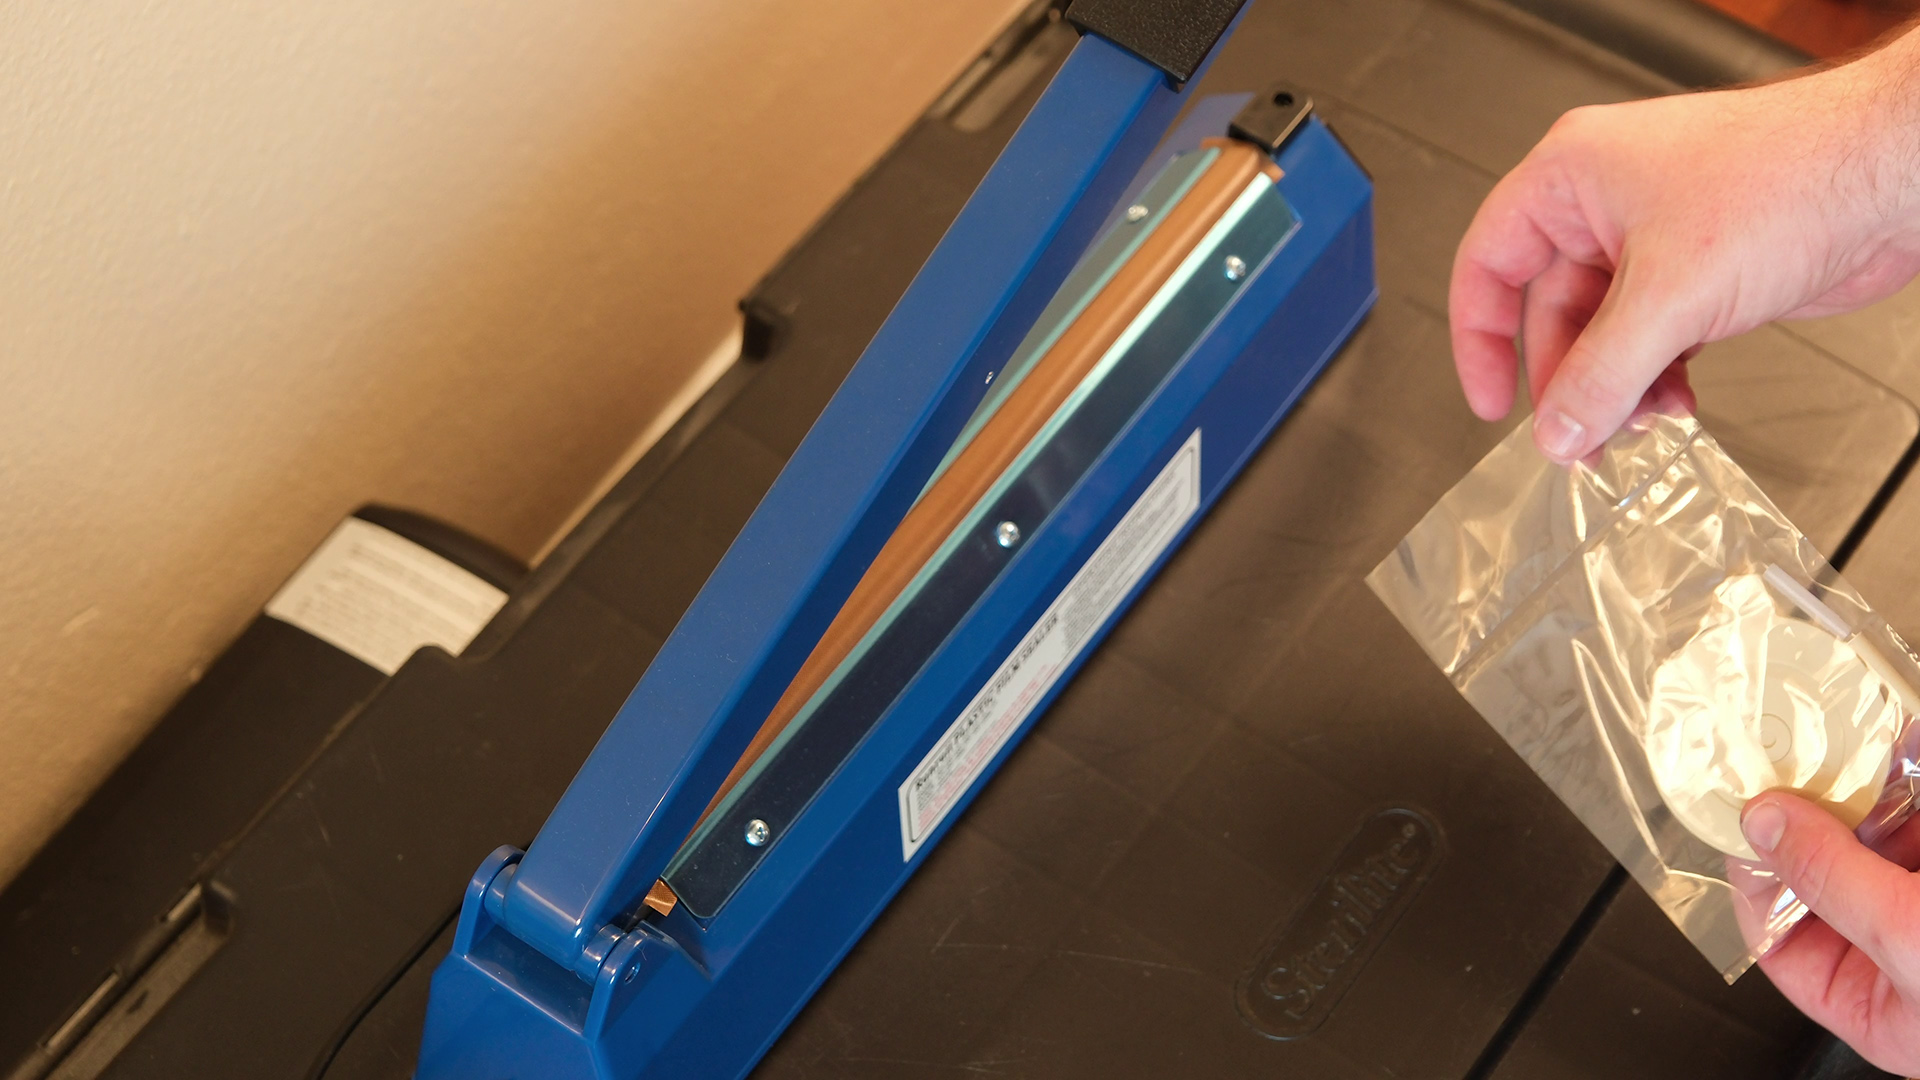
Bags for Days
I’m just gonna say this – I bought a heat sealer and bags for this project. I hope I find another use for this thing at some point in the future. I guess if I pivot to making baked goods if this whole gamedev thing doesn’t pan out I’m covered for packaging.
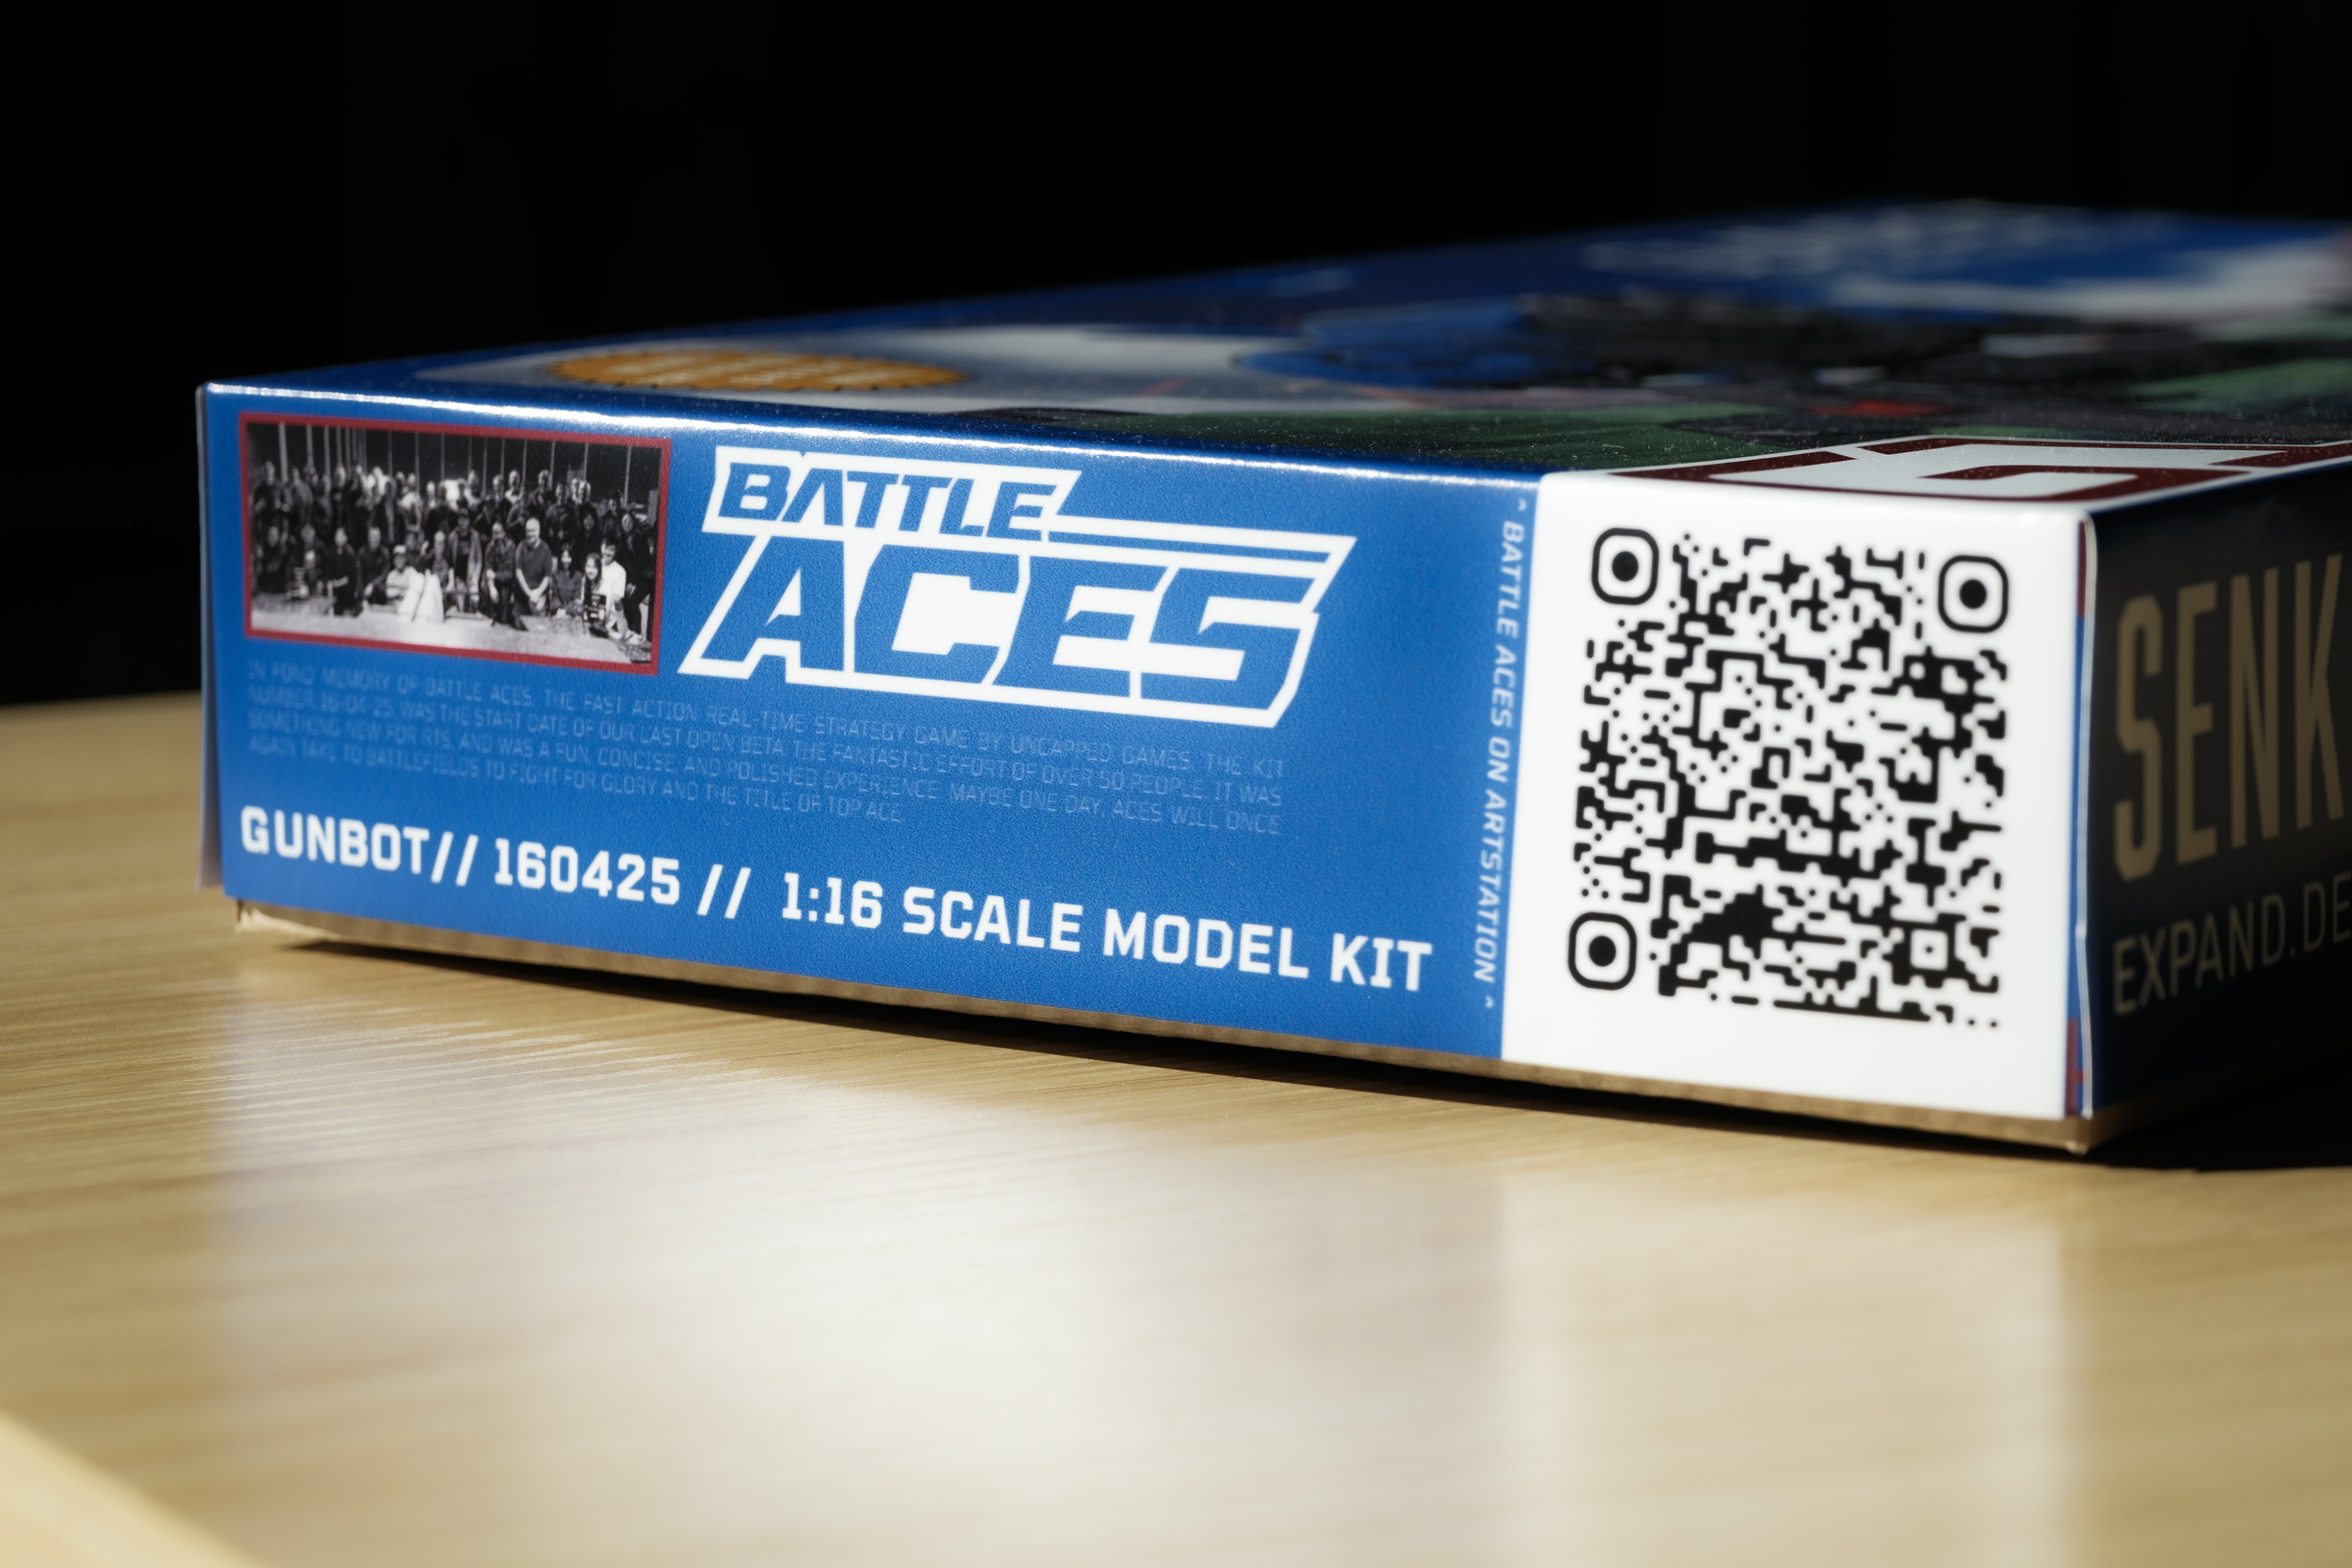
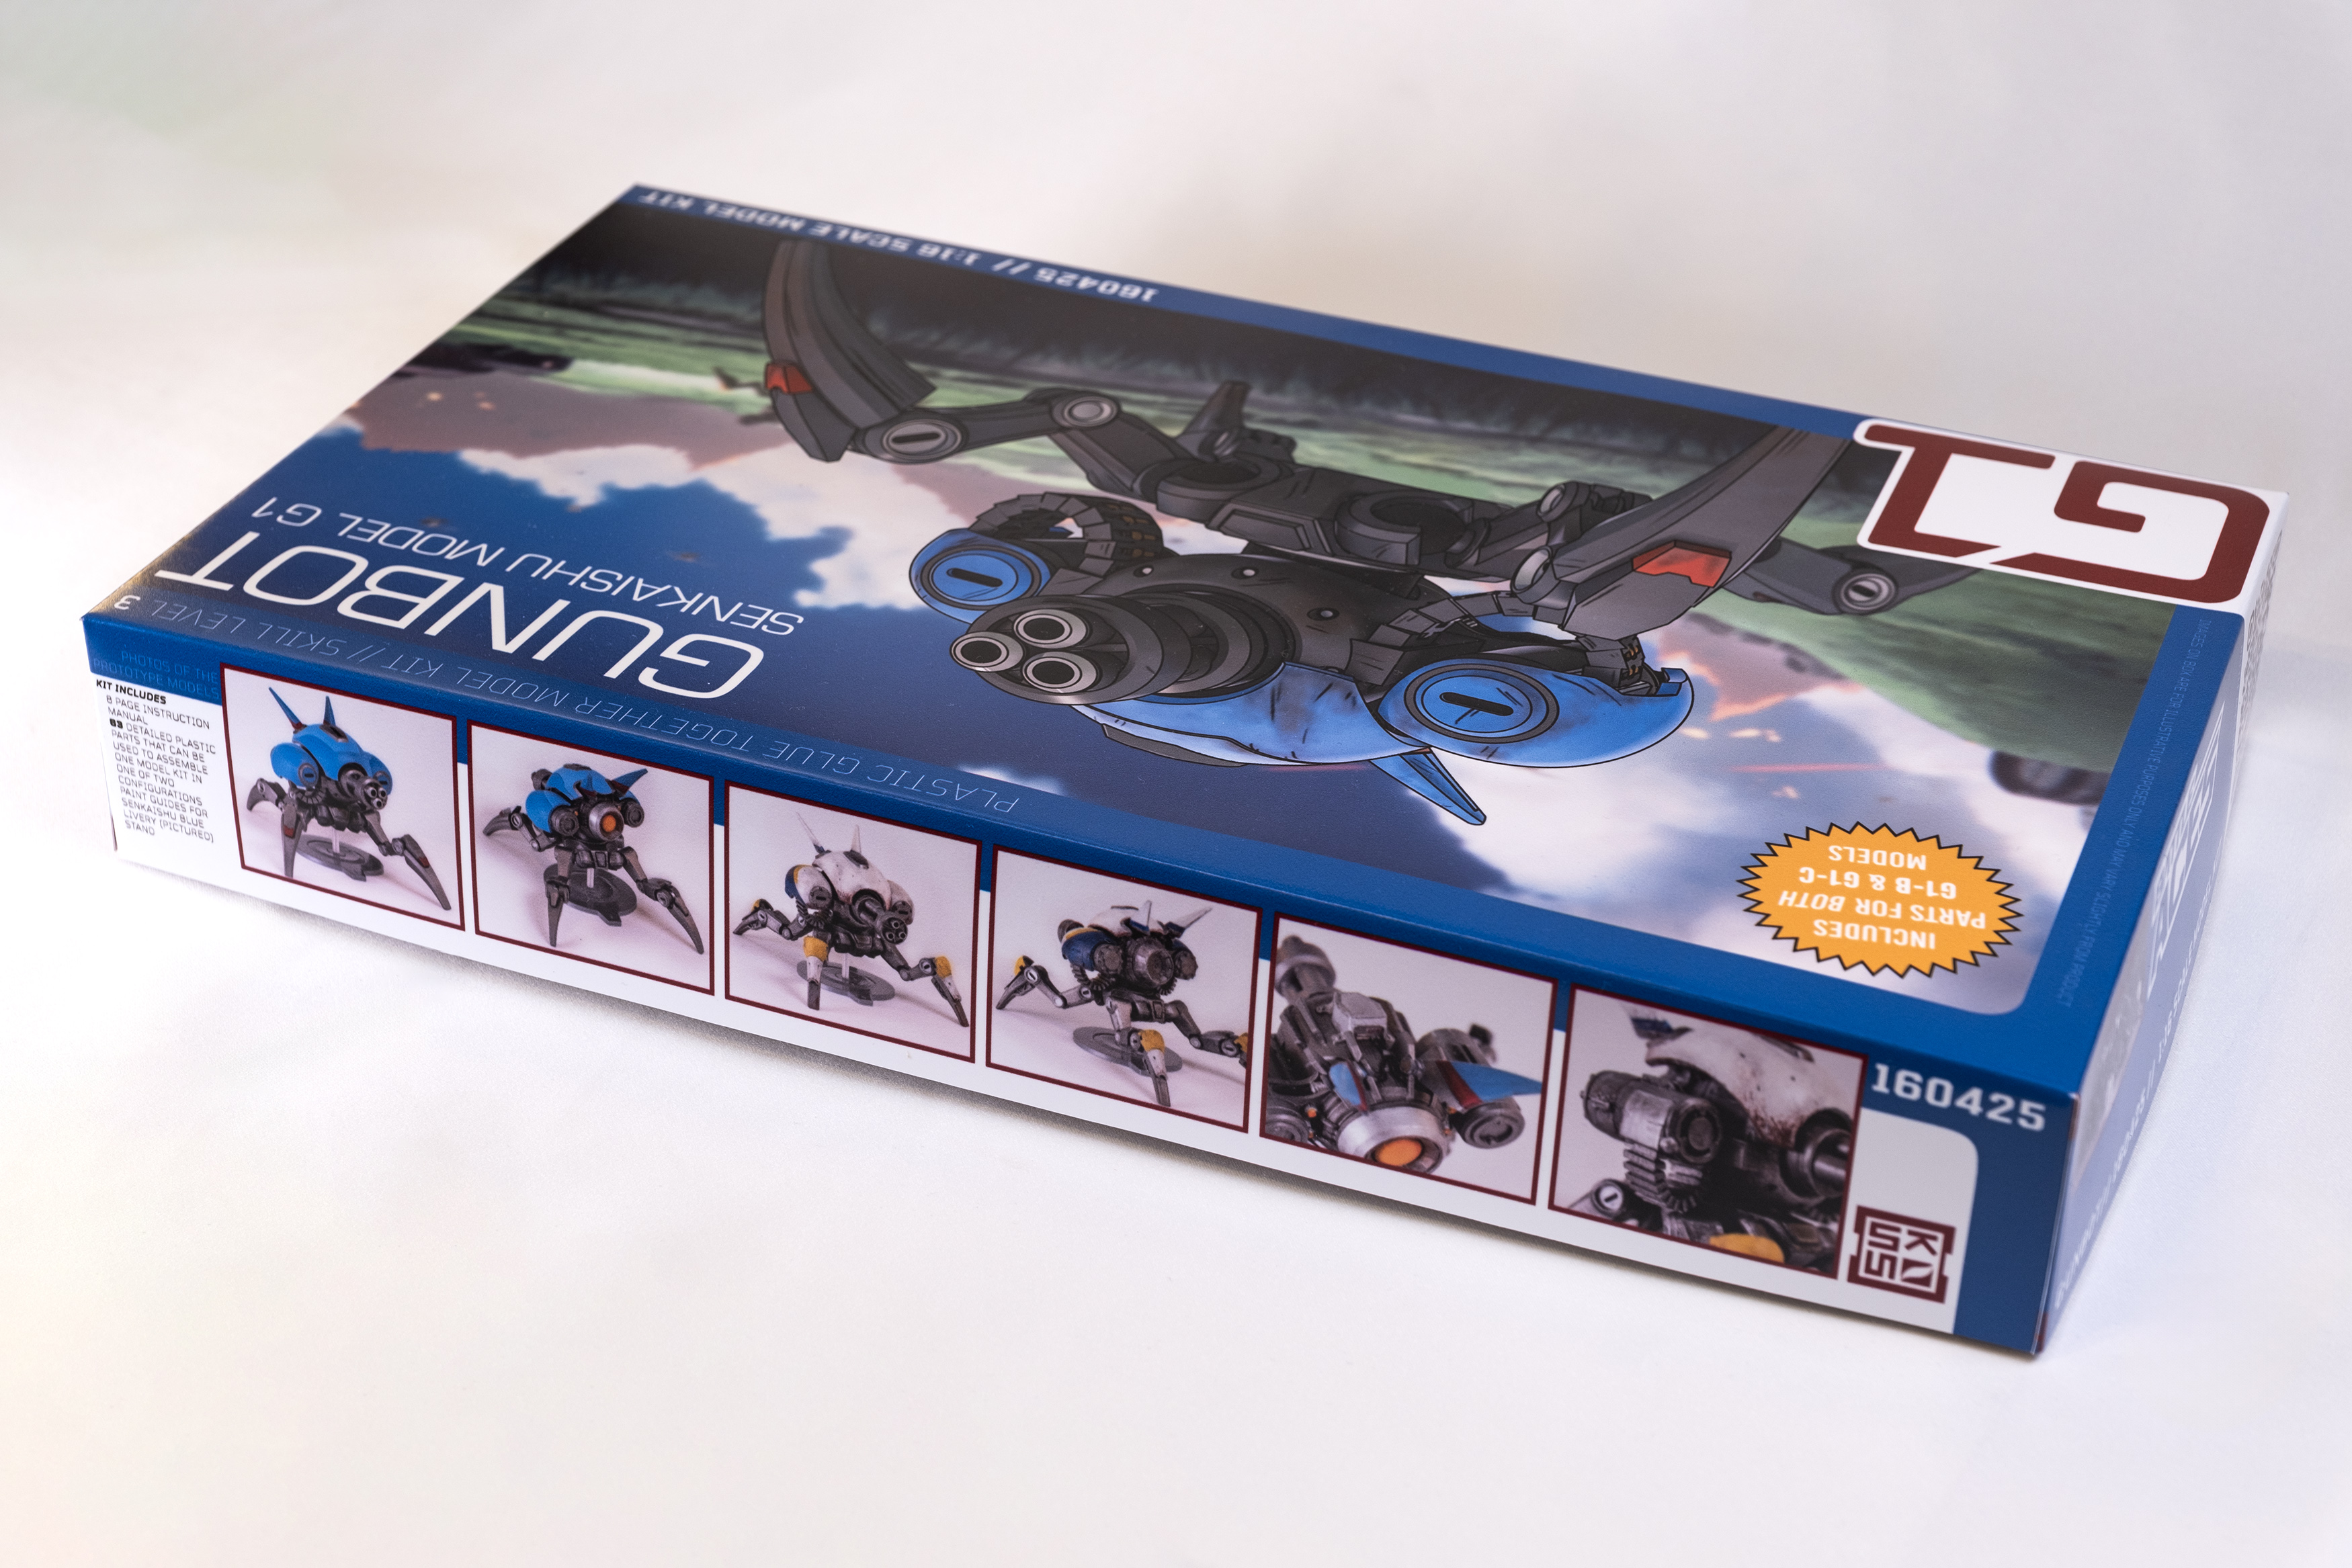
Box Cover
With the contents of the box finally out of the way, the last hurdle was the box itself. I didn’t expect to source vendors and learn terms like ‘kraft’ and ‘kimi board’ as part of this project, but here we are. Despite researching vendors and talking to one for a few weeks, I ended up going with simple poster board printing and cutting kraft paper by hand given the low volume and no intent to actually sell a product – the problem is, what I wanted was just too low quality for what most vendors had.
Cover design
Deciding to pint on a small poster board, I opened Photoshop, put down some guidelines, roughed out some basic ideas, and dug in my closet to look at some of the model kit boxes I had on hand.
After some back and forth, I decided the box cover would basically be:
- Mostly ‘in universe’ – as in this is a scale model kit of a piece of military hardware, like you buying a model of an M1 Abrams or F-22 Raptor.
- Not have a model kit faux brand (e.g. Band-Dye, Reveal), instead using the manufacturer brand. My thinking here is the manufacturers, if whey were making model kits like this, would use this as marketing for their products, with the target market being the people who work with the hardware already. This is also a thing in the real world. A kit for Aces, in both narrative and meta-textual sense.
- The main cover image should be rendered, but ideally the Senkaishu design. While the cinematic’s Corona gunbot is fantastic, in lore, it’s Senkaishu’s rival company. All that was pretty fast and loose ingame, but no way that’d make it to the cover of their marketing materials.
- Design the elements with the implication this could be one of a set, like Senkaishu has a run of all their models and you just picked this one off the shelf. The lowly Gunbot, tried and true.
Toon Rendering
I debated my options for the main cover image – for the background, I pulled a still from the trailer, and I explored maybe recoloring the gunbot in the trailer as well, but I ultimately decided against it for two reasons – first, while I could serviceably do the recolor, I didn’t think I’d get the highest quality render for print.
Second, and more important, the cinematic model isn’t the mainline gunbot that’s actually in the box. While there are parts that let you make something close, this design is really built around the ingame model we had – I intentionally made the instruction manual with the ingame parts, the cinematic elements are a ‘bonus’ and I wanted to reflect that.
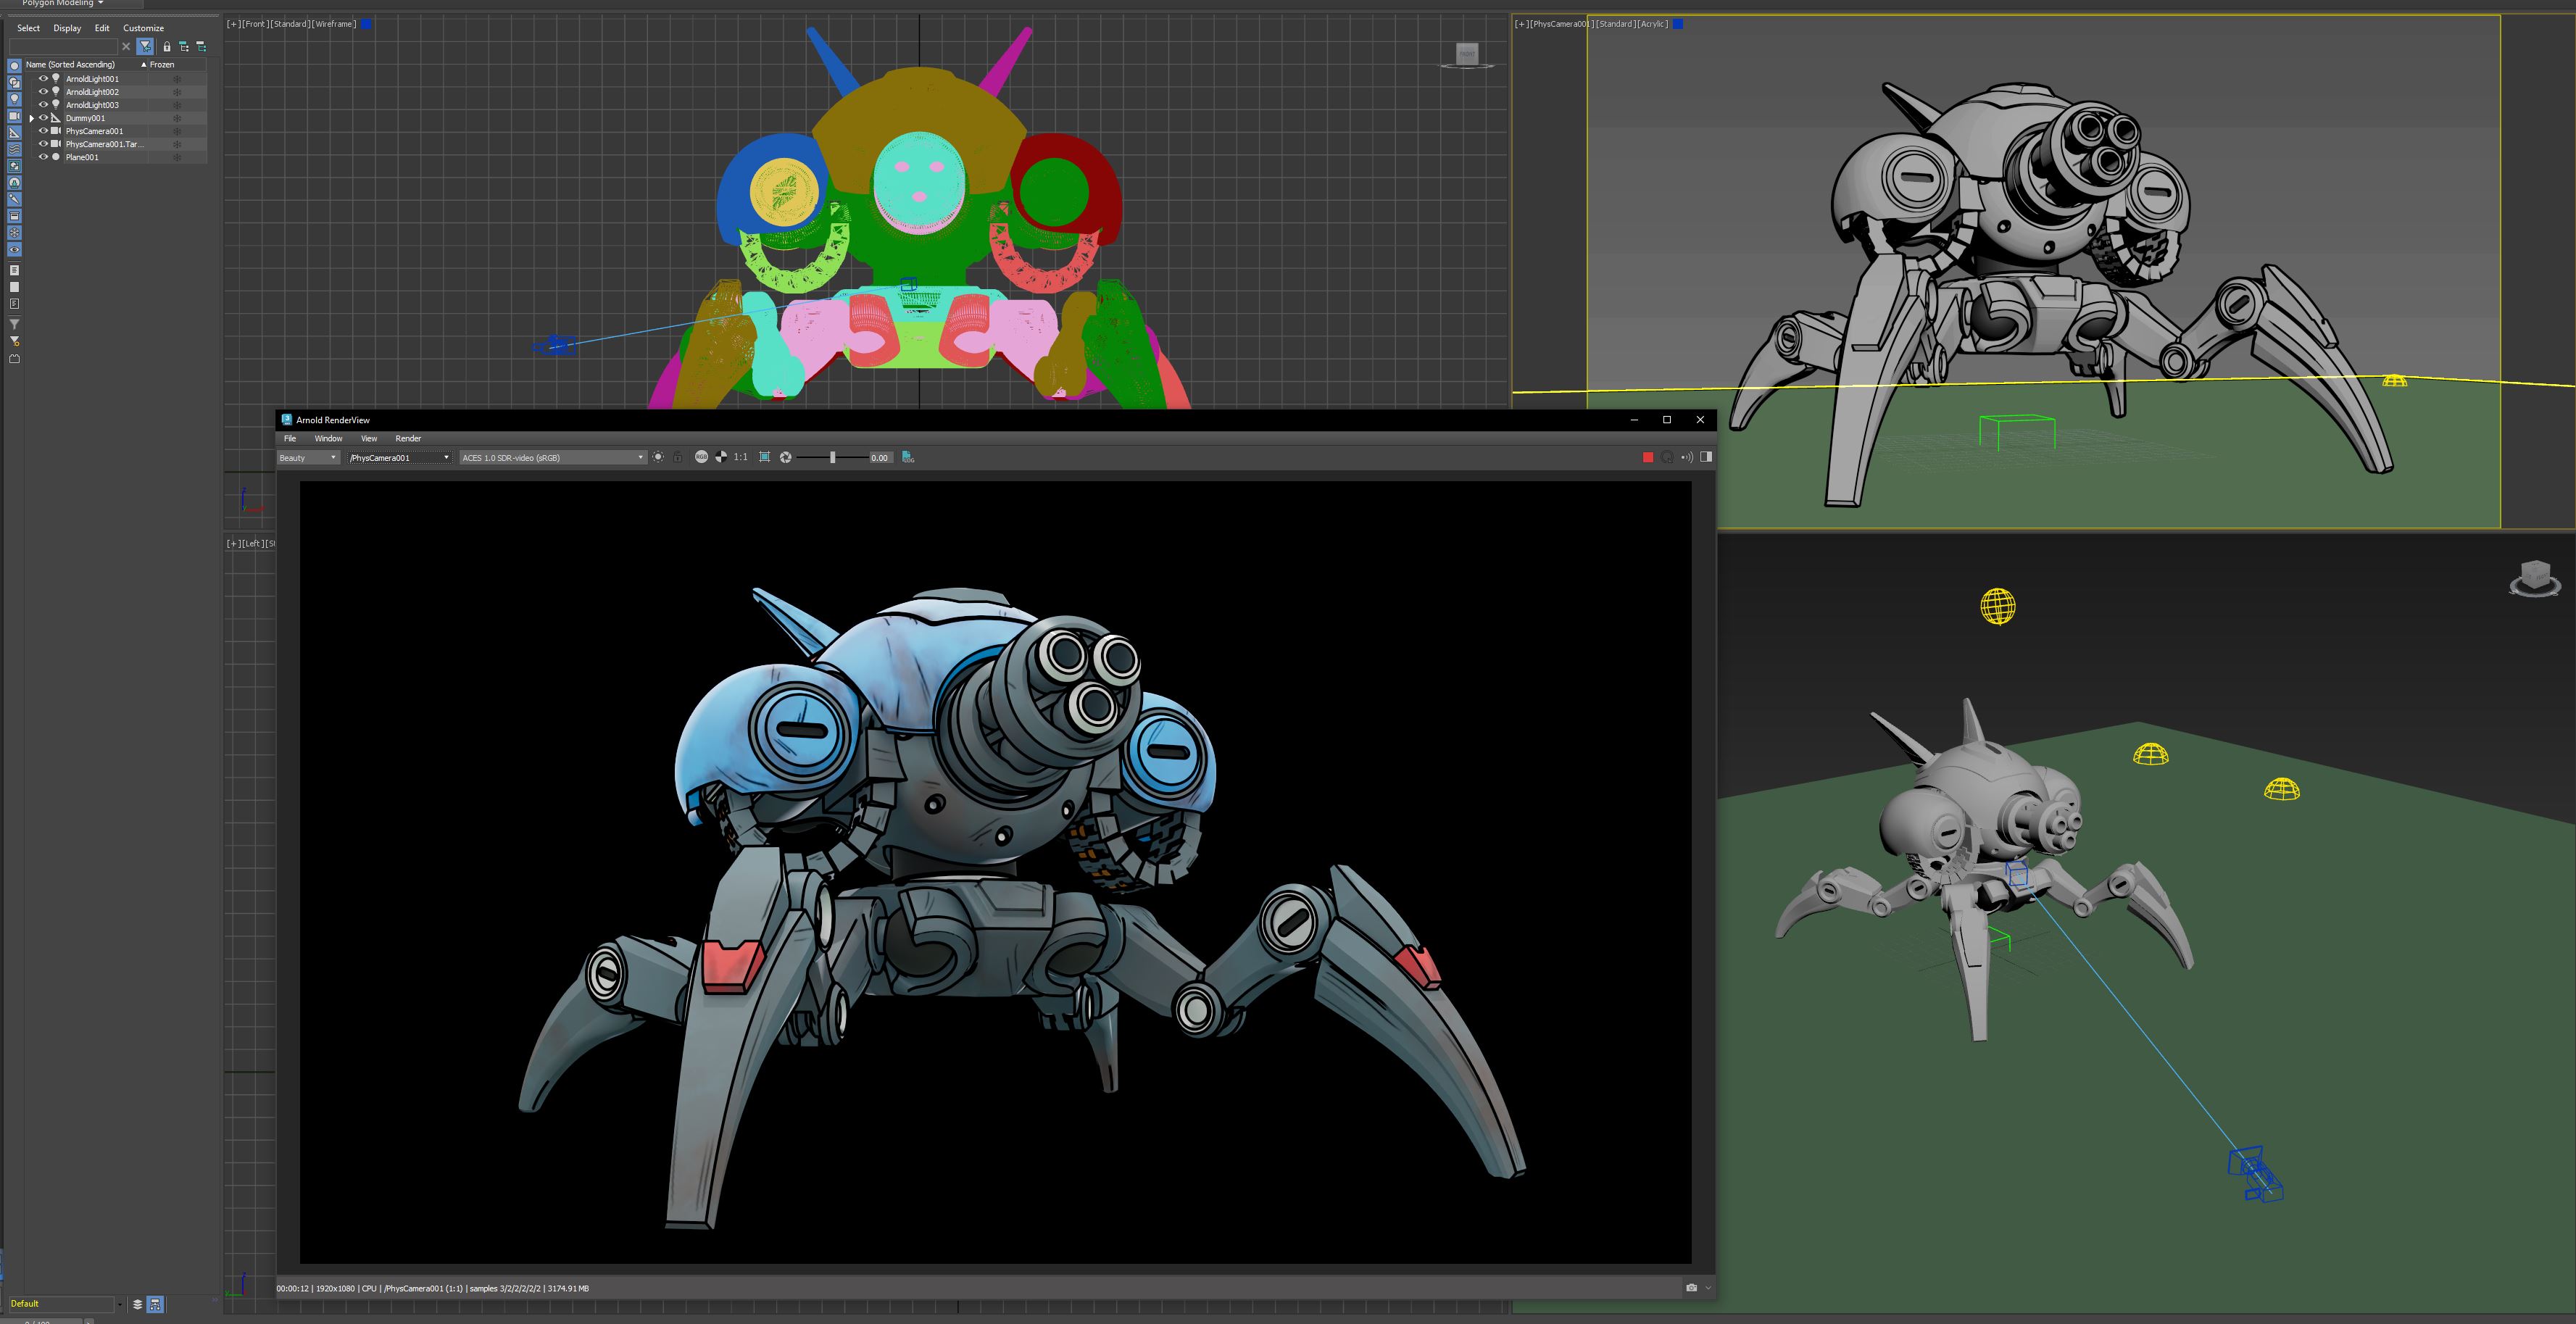
I have 3dsMax, which has Arnold, which is a renderer that I have some familiarity with. While I’ve been using this project as a vector to try new things, it wasn’t gonna be the one for me to uncork blender rendering, not when a web search yielded evidence that Arnold does in fact have a toon renderer!

It’s not well documented, and what little there is is built around Maya’s hypershade, which, honestly, probably more familiar with at this point then Max’s material system, but I managed to find, like one youtube video going over the toon rendering in Arnold in Max26.
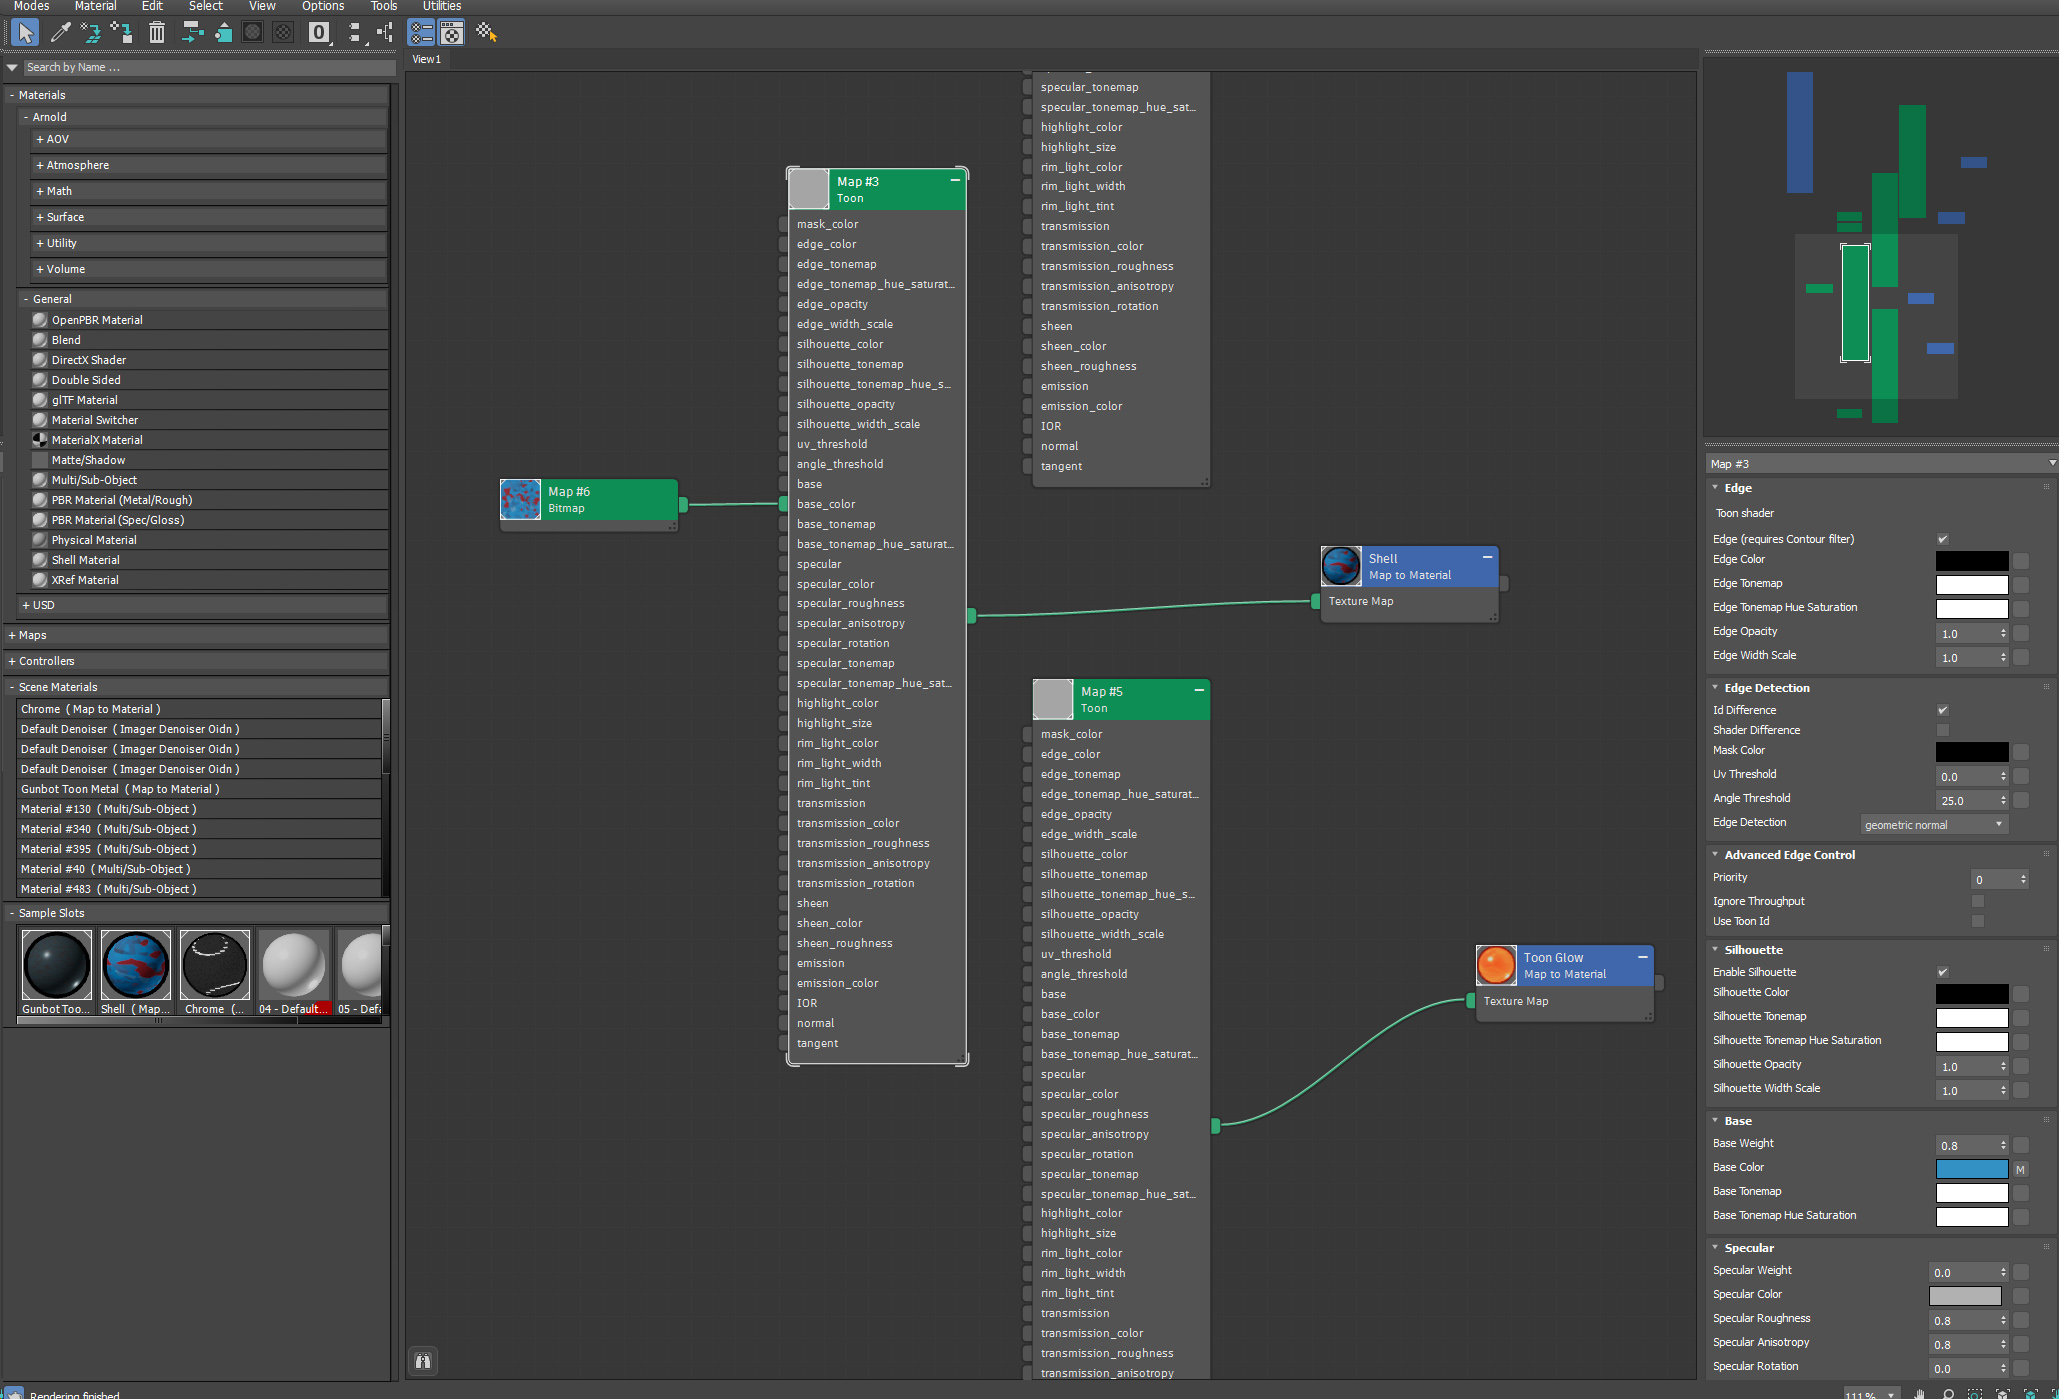
After promising initial results, I decided to go for it and dig in a bit with it to see if I couldn’t get a little juice.
Just couldn’t avoid tech art. Couldn’t avoid unwrapping. Don’t do what I did. Unwrap your models properly. I catch you doing this and pointing to me as an excuse I will come for you. >:(
While not necessary, I did explore the shader’s capabilities and wired up a glow effect for the thruster. Since Arnold is all raytraced and stuff, the chrome finish catches the light and it emisses onto nearly surfaces. I was even able to change the color of the edge lines to a dark red to imply even more heat – pretty cool stuff.
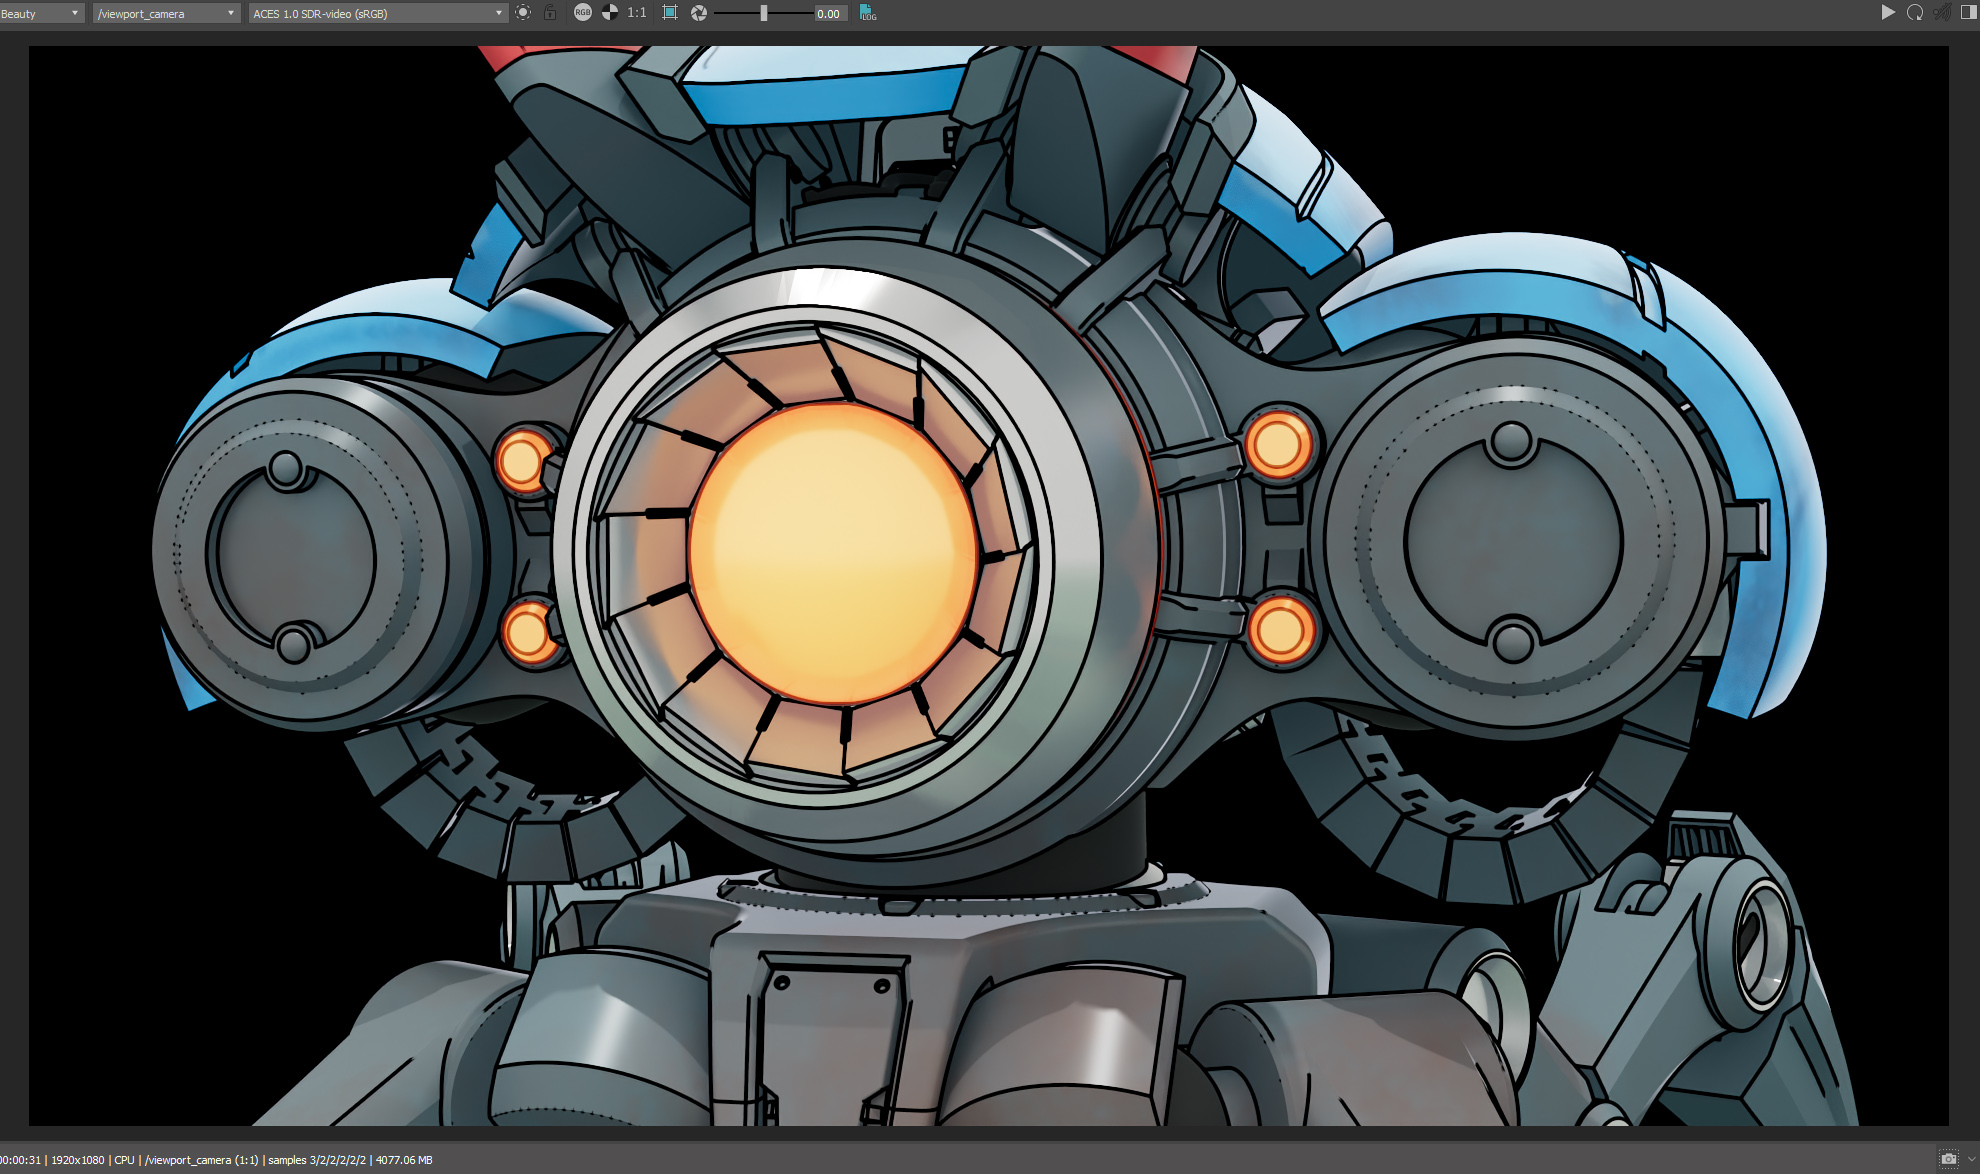
While I didn’t get a 100% match to the work The Line did, I’m pretty happy with the results I got with a few nights of messing around. I did my final render to a 4k EXR and did a final grade and balance in camera raw on Photoshop’s side. With that side quest complete, I just needed to photograph my painted models!
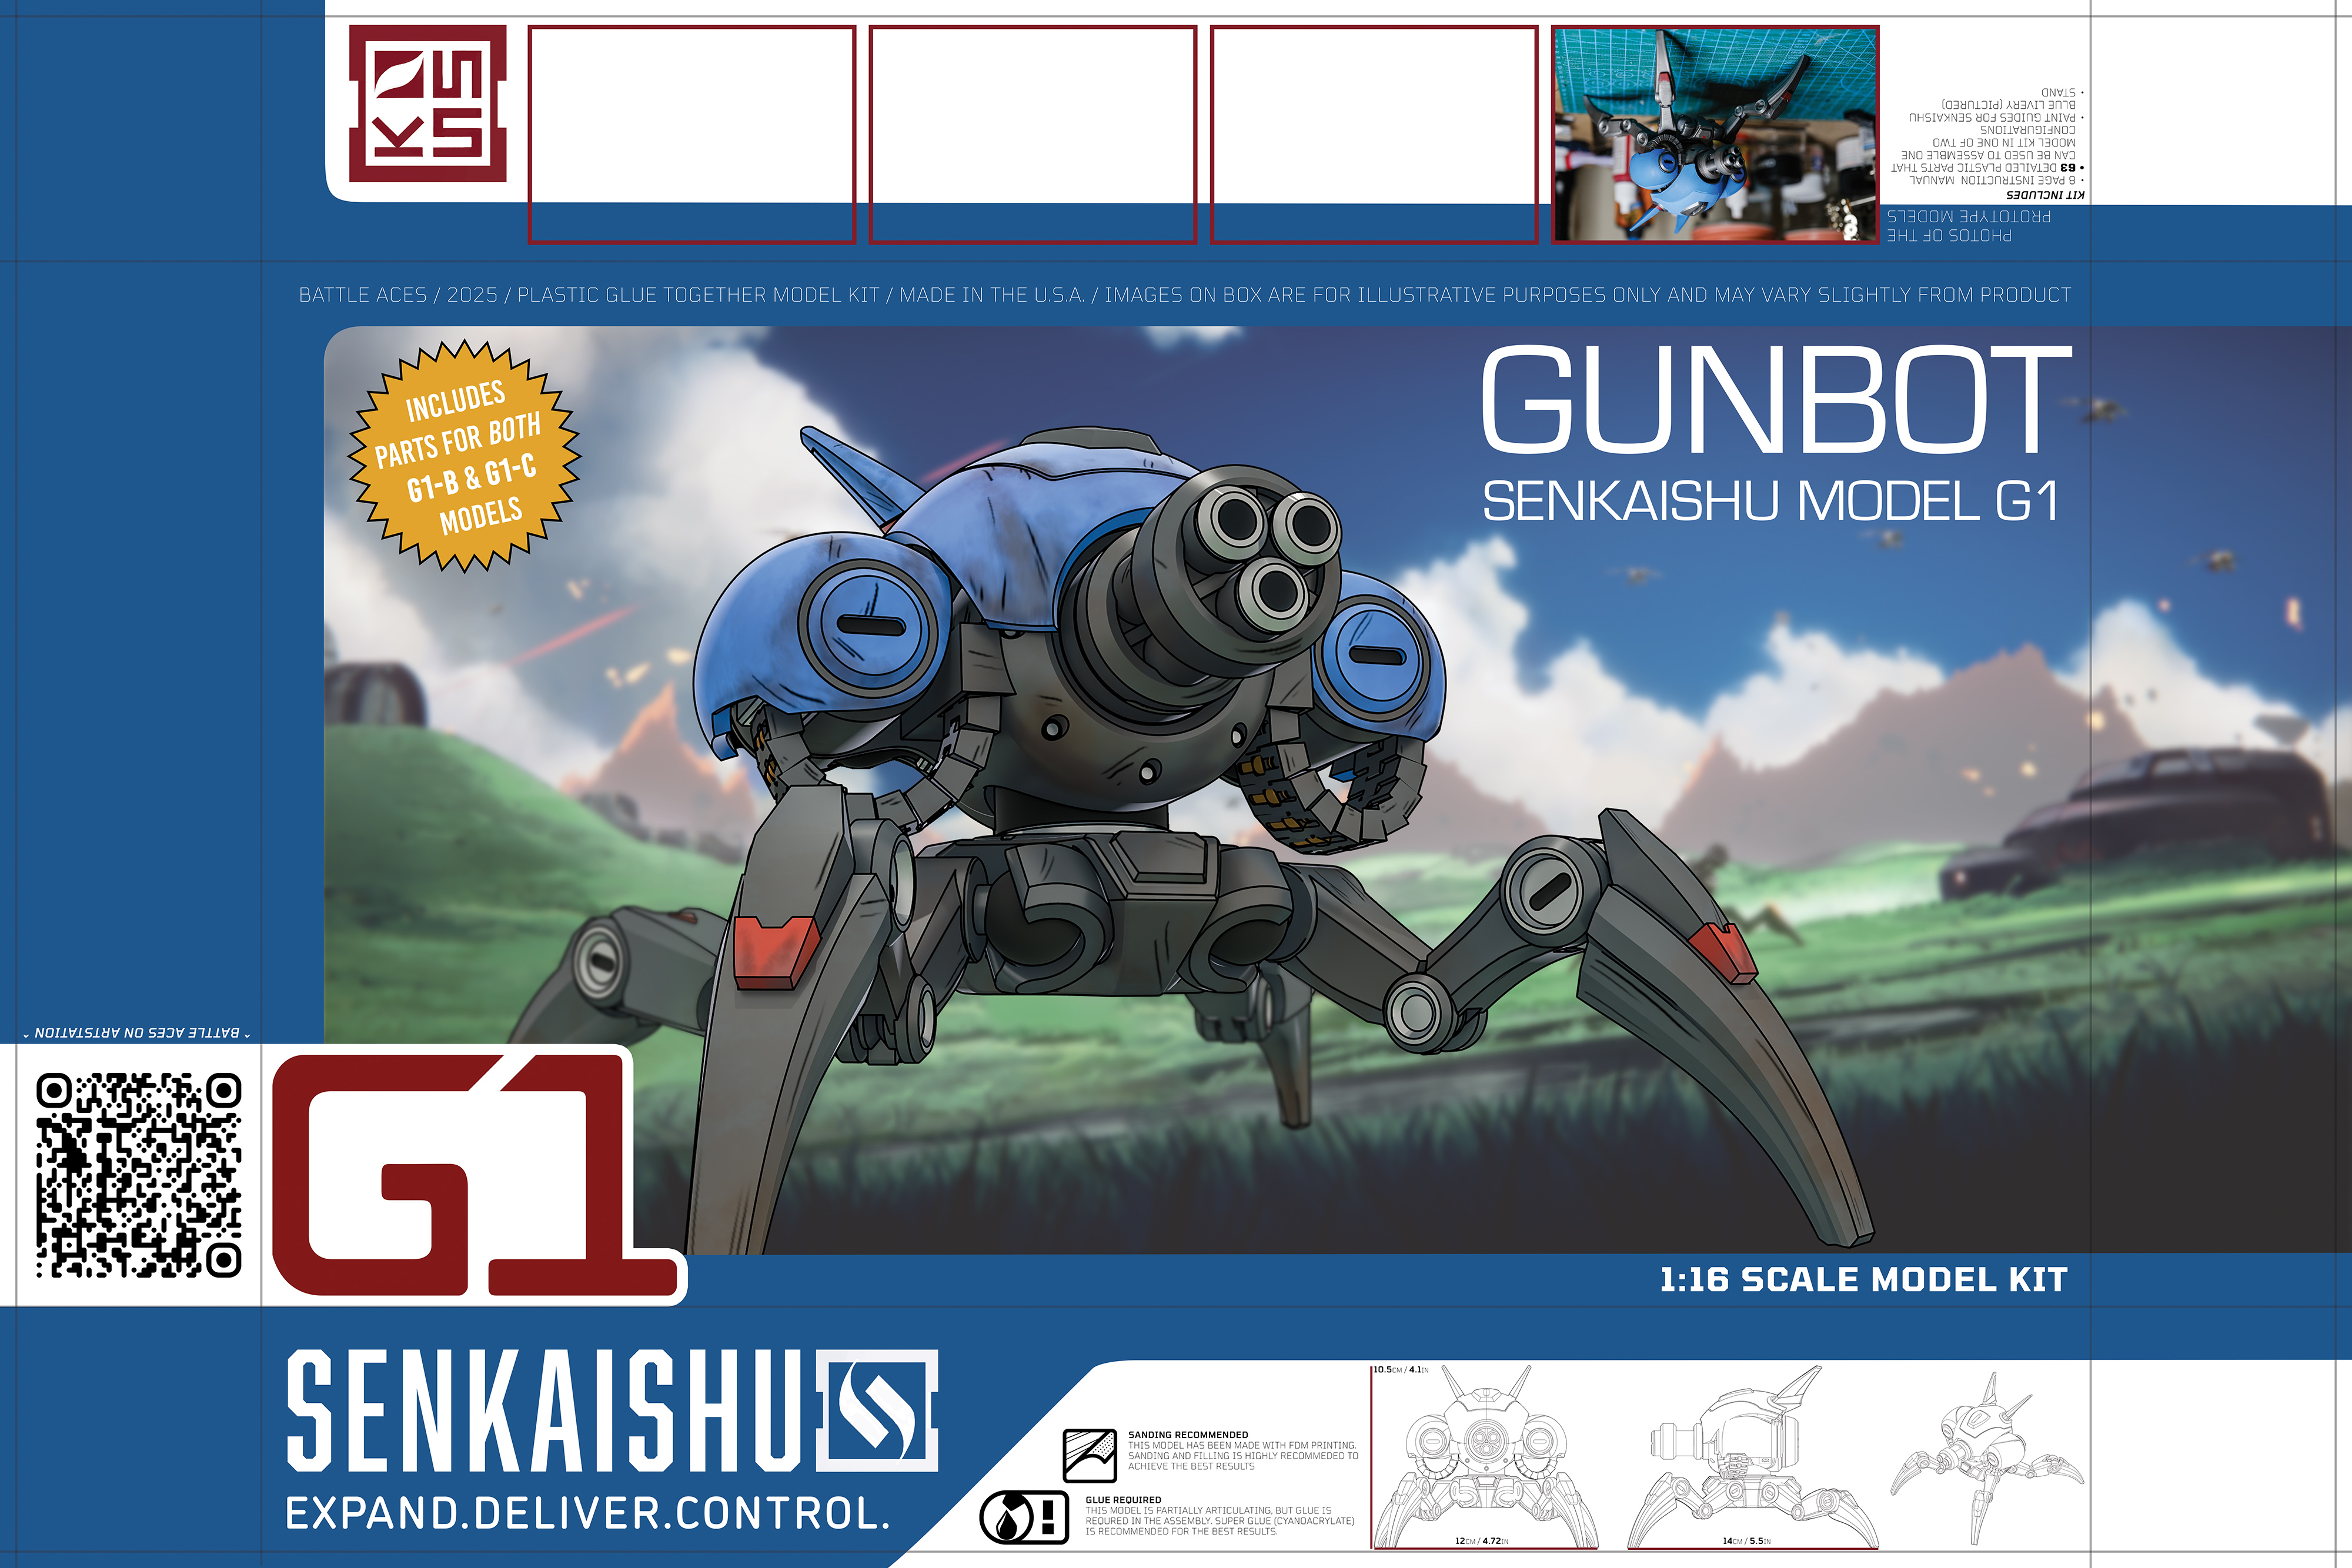
Photo Shop
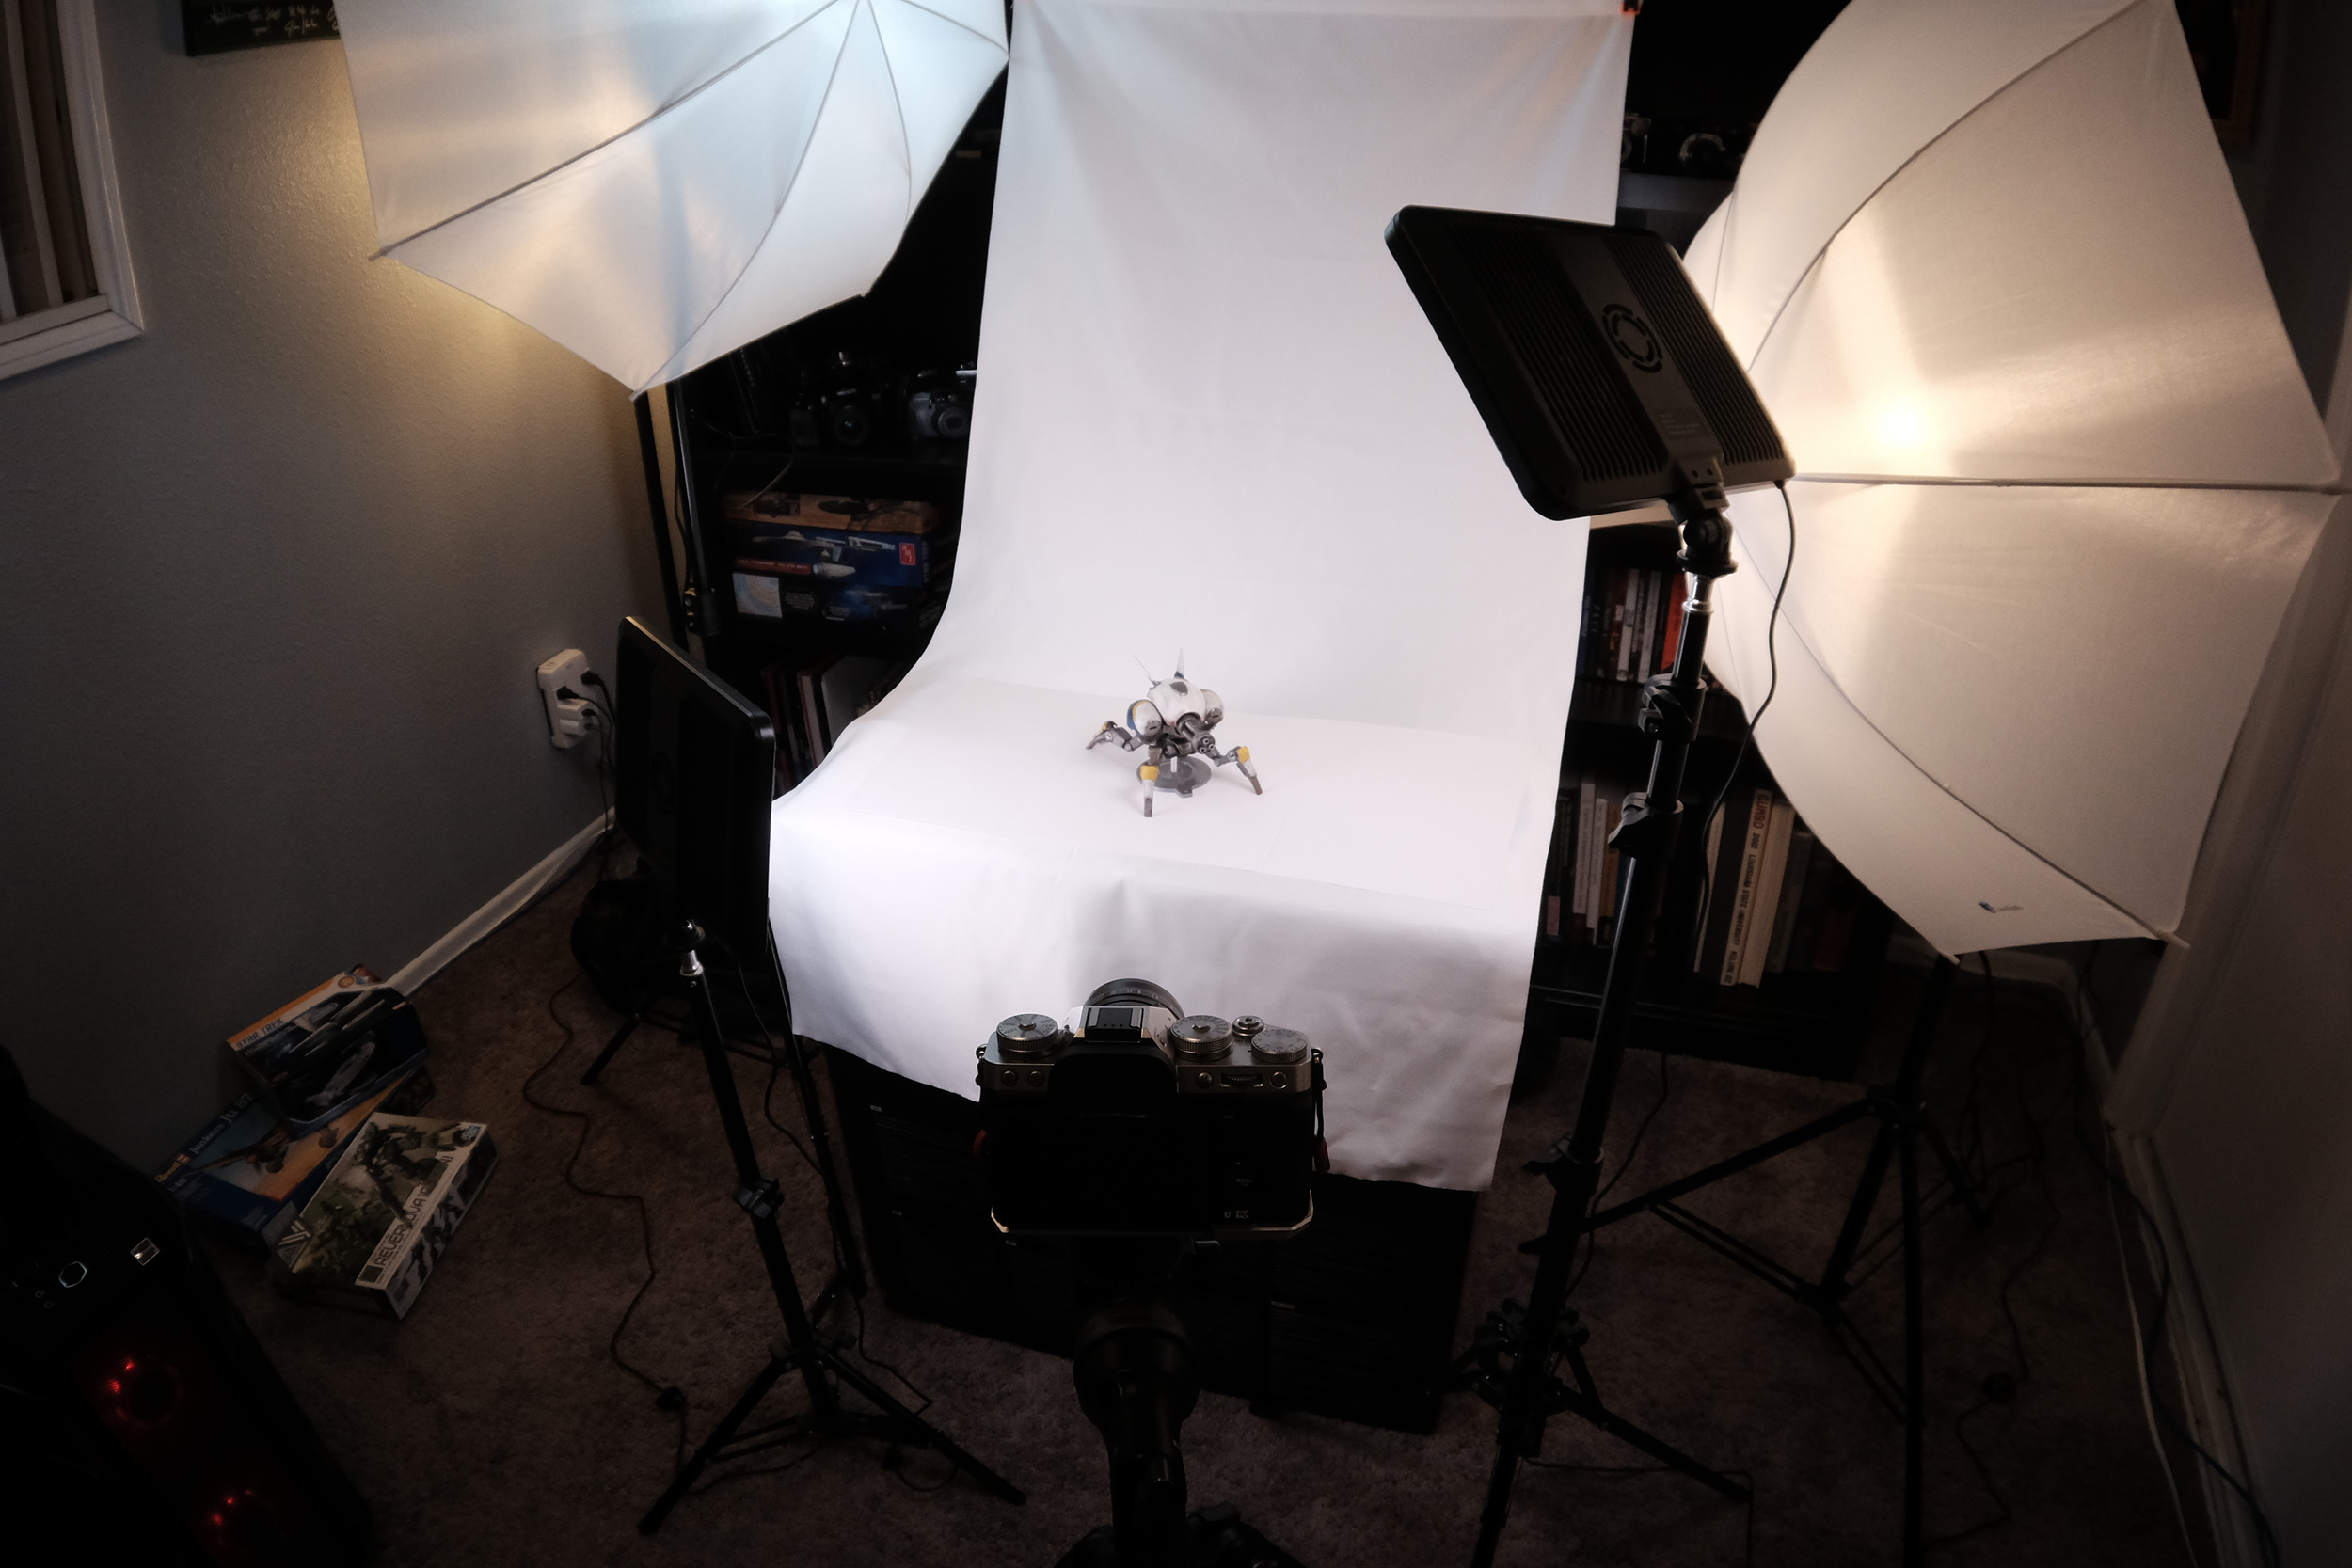
Any good box cover of a model kit has photos of the completed model on it, and I was not going to miss this opportunity to do the same.
I’m actually pretty good at photography, it’s been a running hobby for about 15 years or so, you can even find me talking about it on previous posts in this blog. Probably, if I’m gonna pin another multi-page diatribe like this in a future post, it’ll touch a lot more on that aspect of my hobbies.
That said, product photography isn’t something I do a ton of, so I put together an adhoc light rig with what I had and spent some time in Photoshop really cleaning up the mess in post.


It was time to merge it all together on the box. I decided this would be the ‘extra rare’ dual kit, with parts for both models, so I did a little sticker that slightly clashes with the aesthetics.
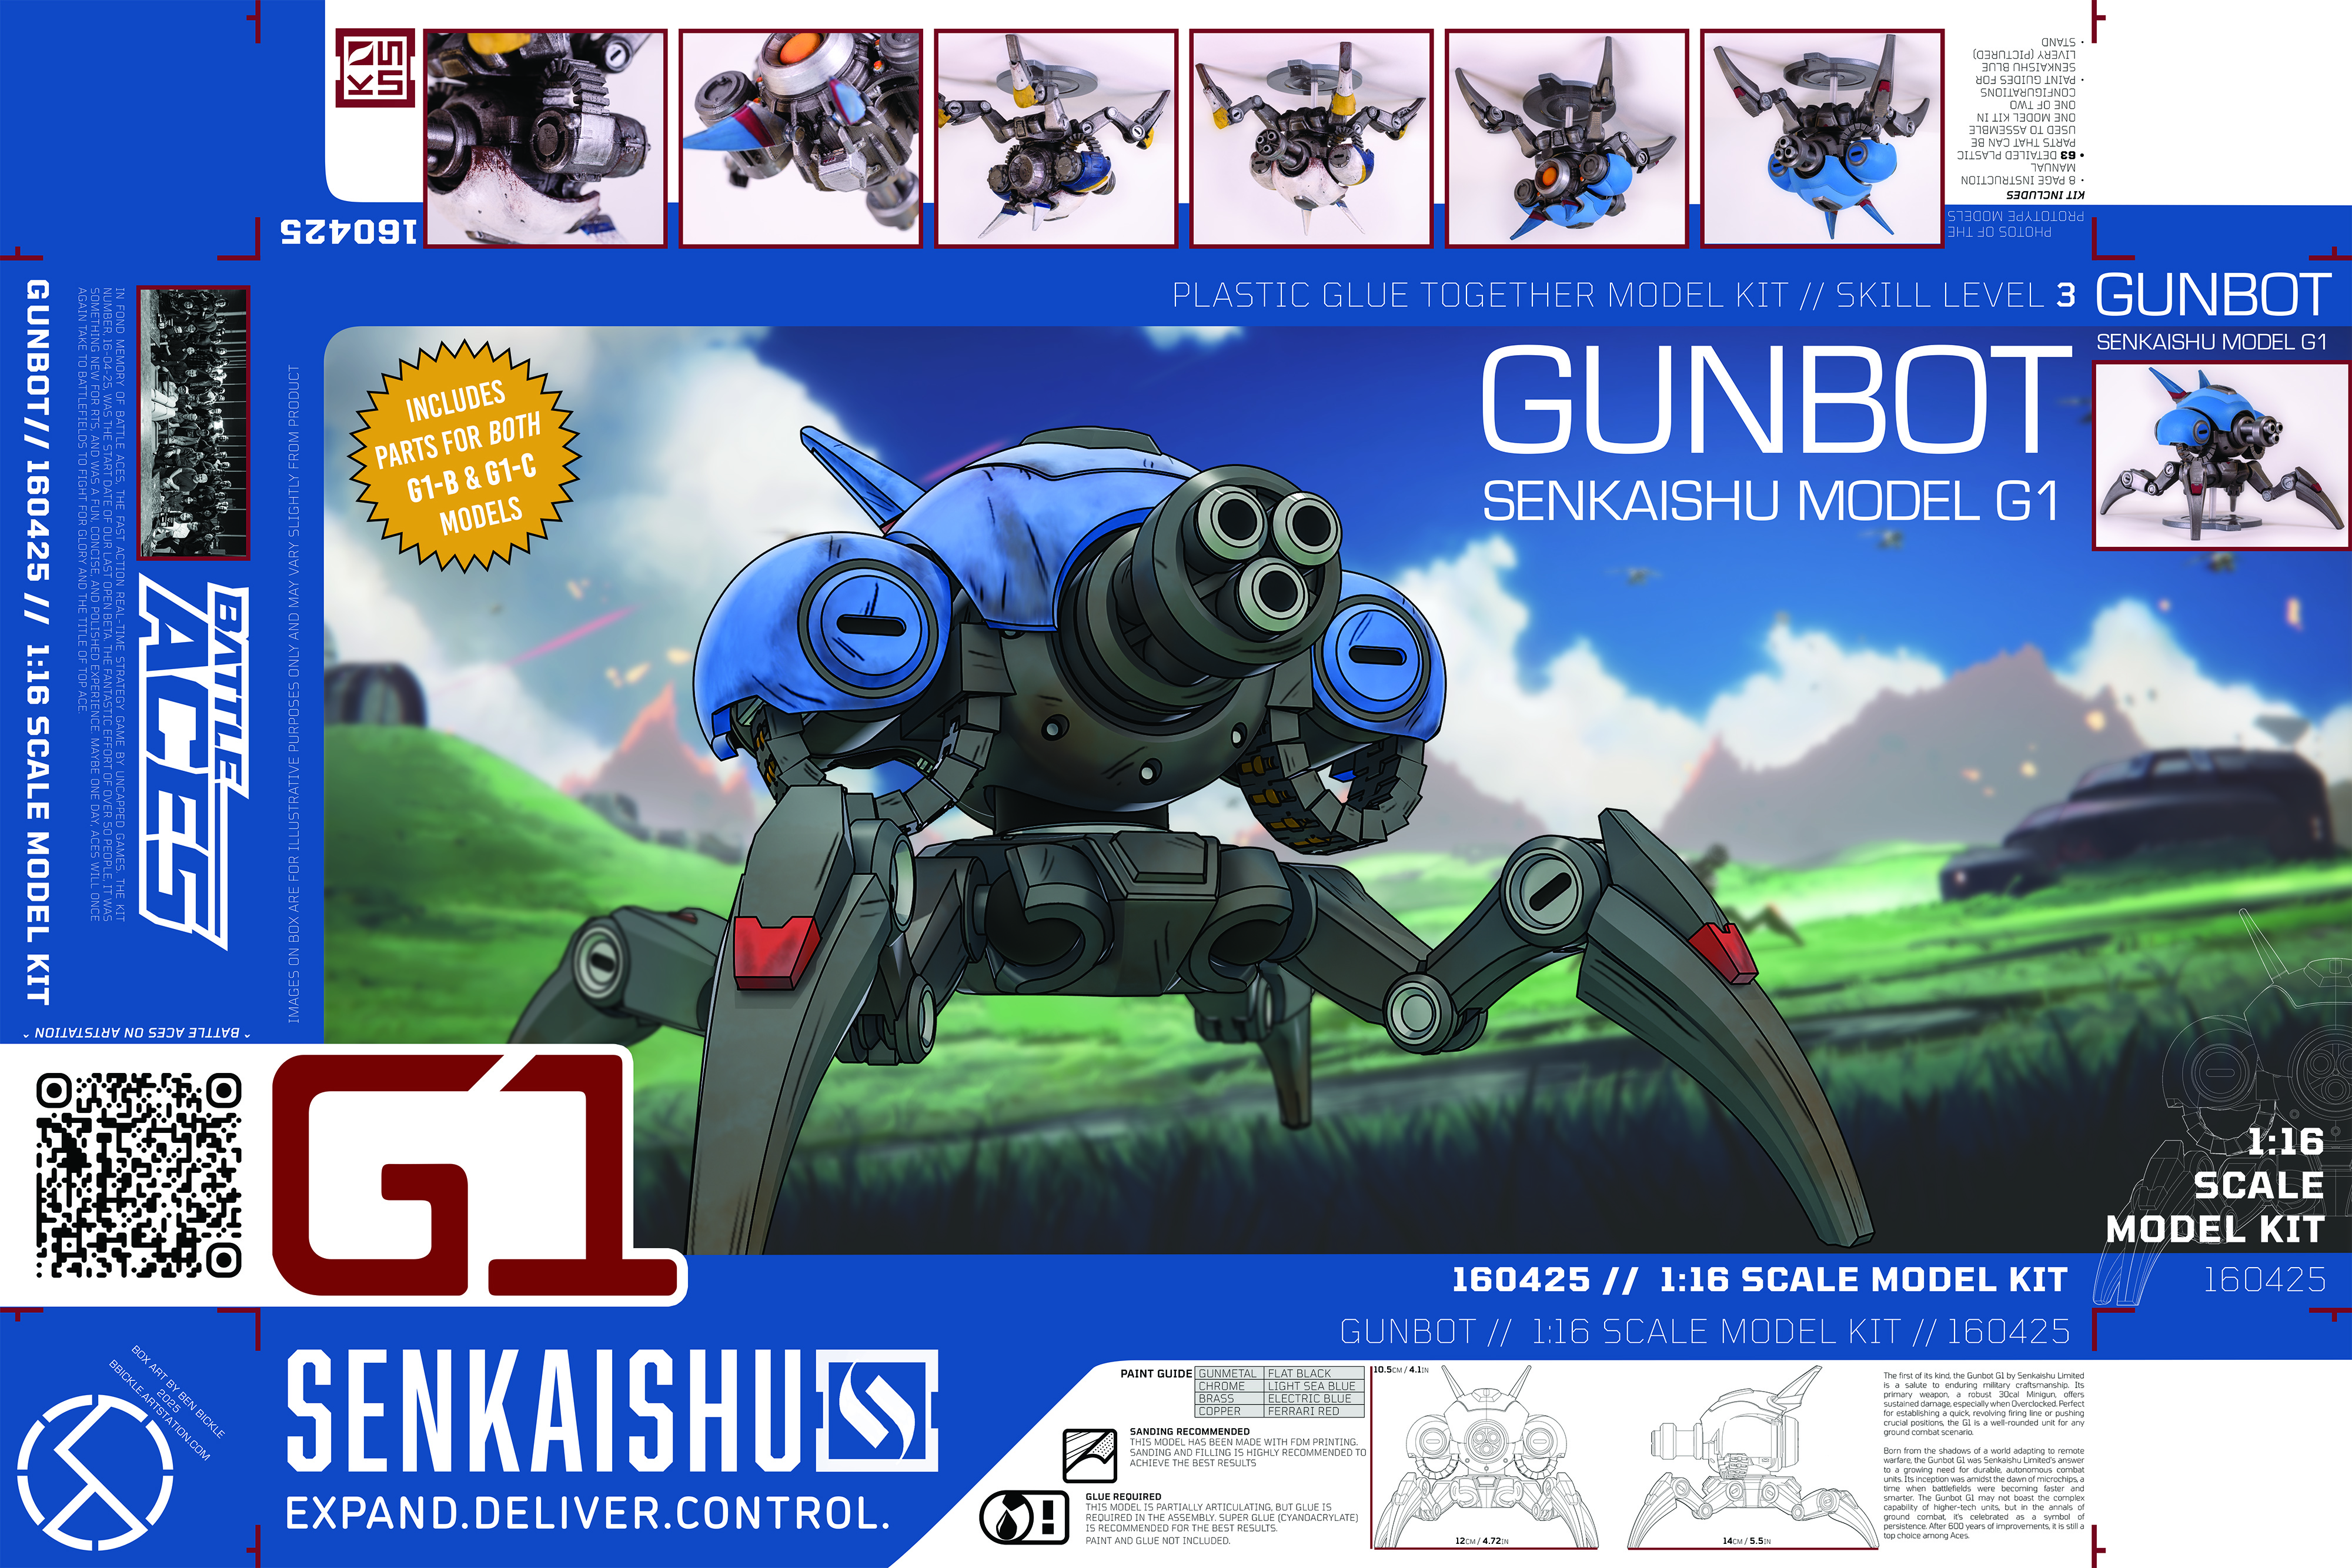
As planned, I kept things ‘in-universe’ like the instruction manual, save for the left fold, where I wrote my one tribute to the game the team behind it.
And with all that, it’s done! All that’s left is to write up a few words… apparently around 6000 of them… but let’s just appreciate the final project!


Wrapping up
It’s good to have hobbies. This one might have gone a bit overboard, but I’m quite proud of the result. If you’re scrolling to the bottom here, let’s hit the takeaways by fishing out the goals from somewhere in the mess above us and see where it all landed.
What have I done [insert prequel meme]
- Things I considered ‘must do’
- Not forgetting how to model
- Yep. I can still model things, check.
- Plasticity skill development
- Between this and a lot of other work on Battle Aces after I started, yep, I’m now very familiar with it.
- Articulation
- It kind of works. We’ll touch on this in a sec.
- Getting better at modeling for 3d printing
- Yeah, definitely. While I don’t feel like a subject matter expert, I now know my printer pretty well and have even made a few functional prints using this pipeline since.
- Not forgetting how to model
- Things that would be nice to do
- Doing another cool Gunbot for the team
- Well, not quite in the way I expected, I ended up able to give out what I could to my now former teammates, either physical or digital.
- Iterating on the design from a mechanically functional approach
- I’m happy with the look of the model compared to the in-game and cinematic designs. There are some artistic liberties, but it is true to the look of the model as presented in those mediums.
- Getting something that I modeled physically in my hands
- This is very true, and now a lasting memory of 3 years of work on a project I put a lot of my passion and creativity into.
- Improving my painting skills. My physical ones, not digital.
- Yeah! The Youtube algorithm now knows I own a 3d printer and thinks I print and paint miniatures, which is its own rabbit hole, but I’m starting to learn new techniques that could fill up years of time to practice.
- Doing another cool Gunbot for the team
- Stretch goals
- Recreating the nostalgic feeling of making a model kit
- Yep, mission accomplished, and a lot more. Didn’t put it on trees, but I’ll take the heat sealed bags. Maybe if I get a garage I’ll get a C&C and design some injection molds in aluminum. As if I haven’t gone far enough off the deep end.
- Interchangeable parts and exploring the already growing collection of variants of this design, possibly in a clever way.
- 80% there, the parts that matter, at least.
- Recreating the nostalgic feeling of making a model kit
What Didn’t Work
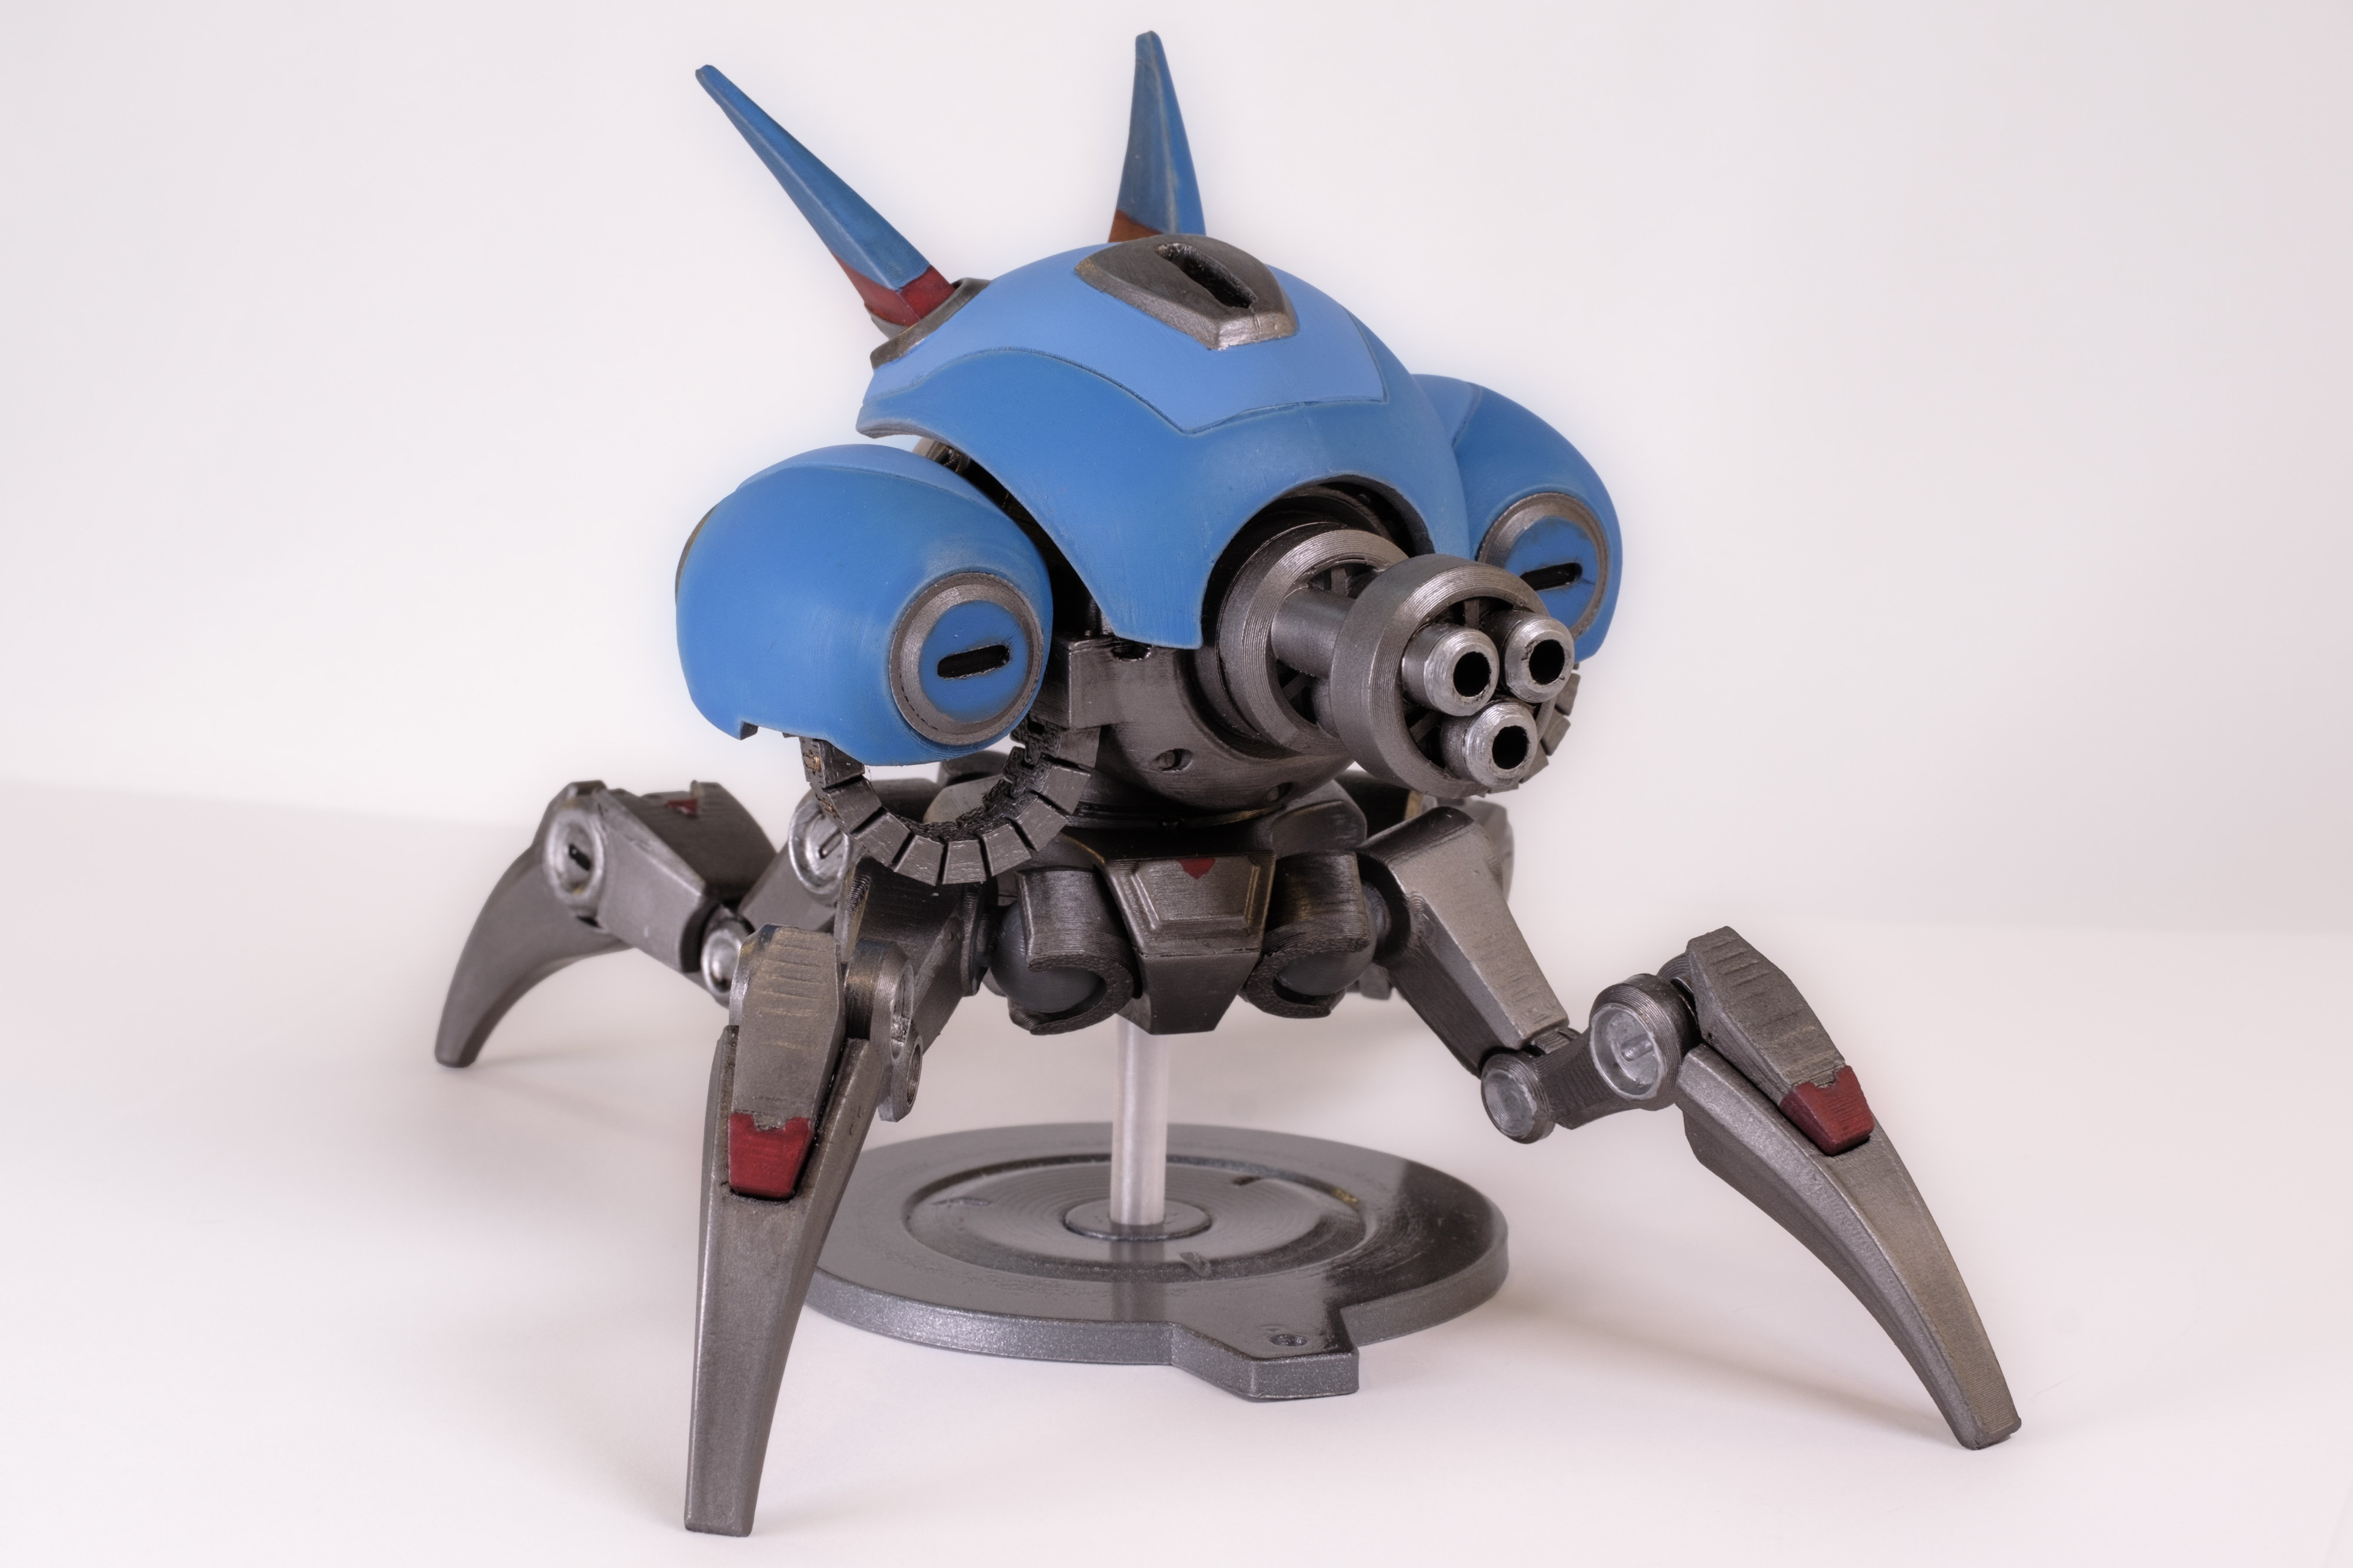
The structural stability of the model wasn’t great. Unlike the Dummy 13, the top half was heavy enough to weigh down the very small leg connections i had in place – the second joint in particular was prone to coming undone or completely snapping on first assembly.
The ball joints also were prone to slipping if left unpainted, and often printed poorly. I ultimately designed a stand for the model to guarantee it’d survive long term under its own weight, but it felt like a step back from the first version.

The gun barrel rotating was a fun gimmick, but I accidentally glued one of them down and nothing of real value was lost. The leg articulation was also not wide enough to really pose the model, although breaking it out did allow for easier painting and manipulation.
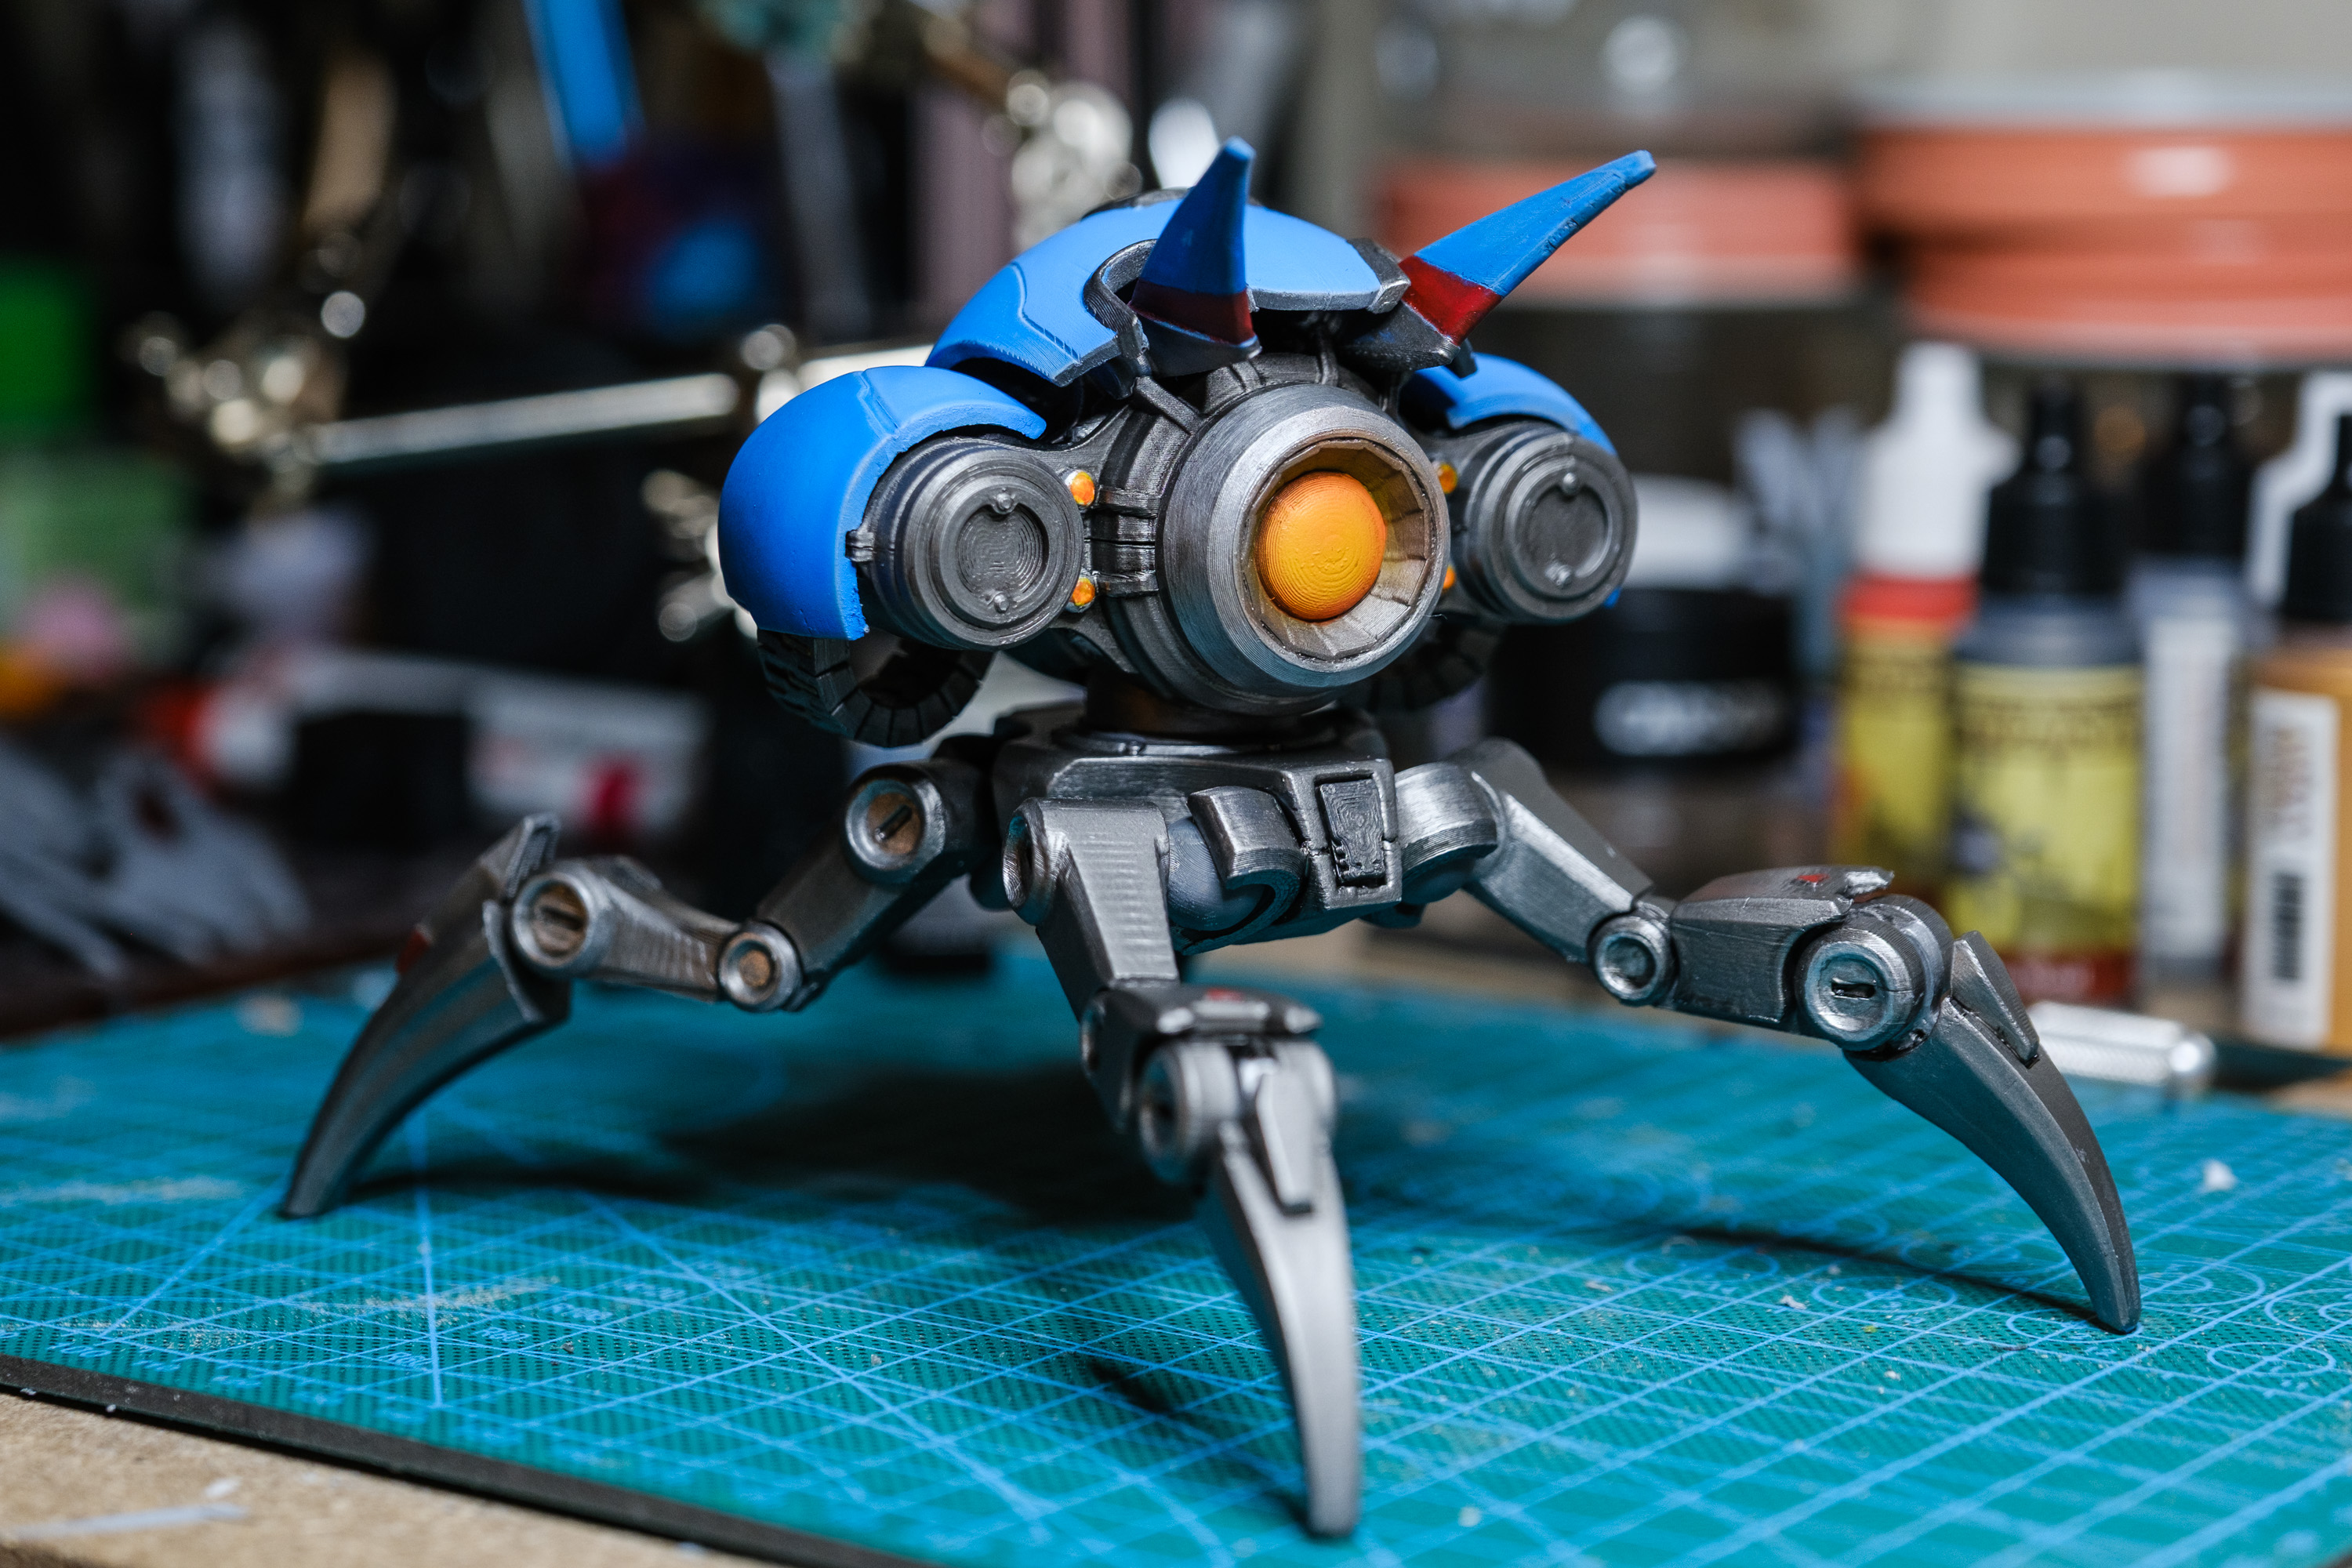
Torso rotation and shell removal are the big ‘wow’ elements, and being able to rotate the antennas are kinda neat – doing it again, I’d likely do more fixed keyed connections for the legs to get a more consistent pose, but keep the general number of parts the same since this approach did make painting easier.
I left holes the size of filament in the top/bottom halves that needed to be glued together, this proved to be more trouble then it was worth for the most part. I think a real solution could have been breaking out the ammo pods in such a way to force the body to align properly – I used the exhaust cap and ammo pod caps to do this already, but I could have removed more seam lines and gone more down this route if I had added two more pieces.
The pelvis was also a challenging piece to assemble and was also highly susceptible to warping. Like the body, I think the key in a next revision would be keyed and separated elements that force proper construction.
I’d really like to try and print this thing in resin again, but not near enough to warrant buying a printer or making an order for it. If I hypothetically wanted to do a run, I’d look into a resin master that I could get a casting from because 20 hours per bot with a ton of sanding is not scalable. An injection mold would also feel more true to the intent of the project.
Another takeaway from the resin legs was that I was way over-complicating it out the gate. Breaking down a lot of 3D models for FDM printing, they’re actually exceedingly simple shapes and the slicer handles voids and gaps and fill patterns – work with the slicer, don’t fight it or think you know better then it.

Final Thoughts
You know, despite the above, I’m still quite happy with the results. If time and patience were infinite, I could just keep redoing this model until I have something close to what you’d be able to buy in a store, but for one guy doing this in his spare time, I’m happy with the final quality!
This is generally the kind of project that, as a creative, you always kind of picture in your head as doing but never actually get around to completing. I’m still borderline shocked it made it out of the work in progress bin. If that describes something you have on your desk, don’t feel bad, just put a bit into here and there, find those small wins and short term goals to achieve – any progress is forward progress, even if it’s identifying that it’s time to throw out some or all of what you’ve done and begin again but wiser.
Normally, this is the part where I’d have the STL’s available for download, but it’s still a bit too recent – and I’m a little too close – for that right now. This blog post serves as the closest to what I can give to a sendoff for Battle Aces, and is my personal closure for the project.
The post does have full resolution images of everything, and if you want to find a print shop that does 12×18″ posters, here’s the PDF for the box cover at 600ppi CYMK. If you find a better vendor then Staples, you might end up with a better print then what I have. Pair that with Brown Kraft Paper in the same size and fold/cut at 2″ to make a box bottom and you too can have a box, with instruction manual – Here’s the PDF for that, too!
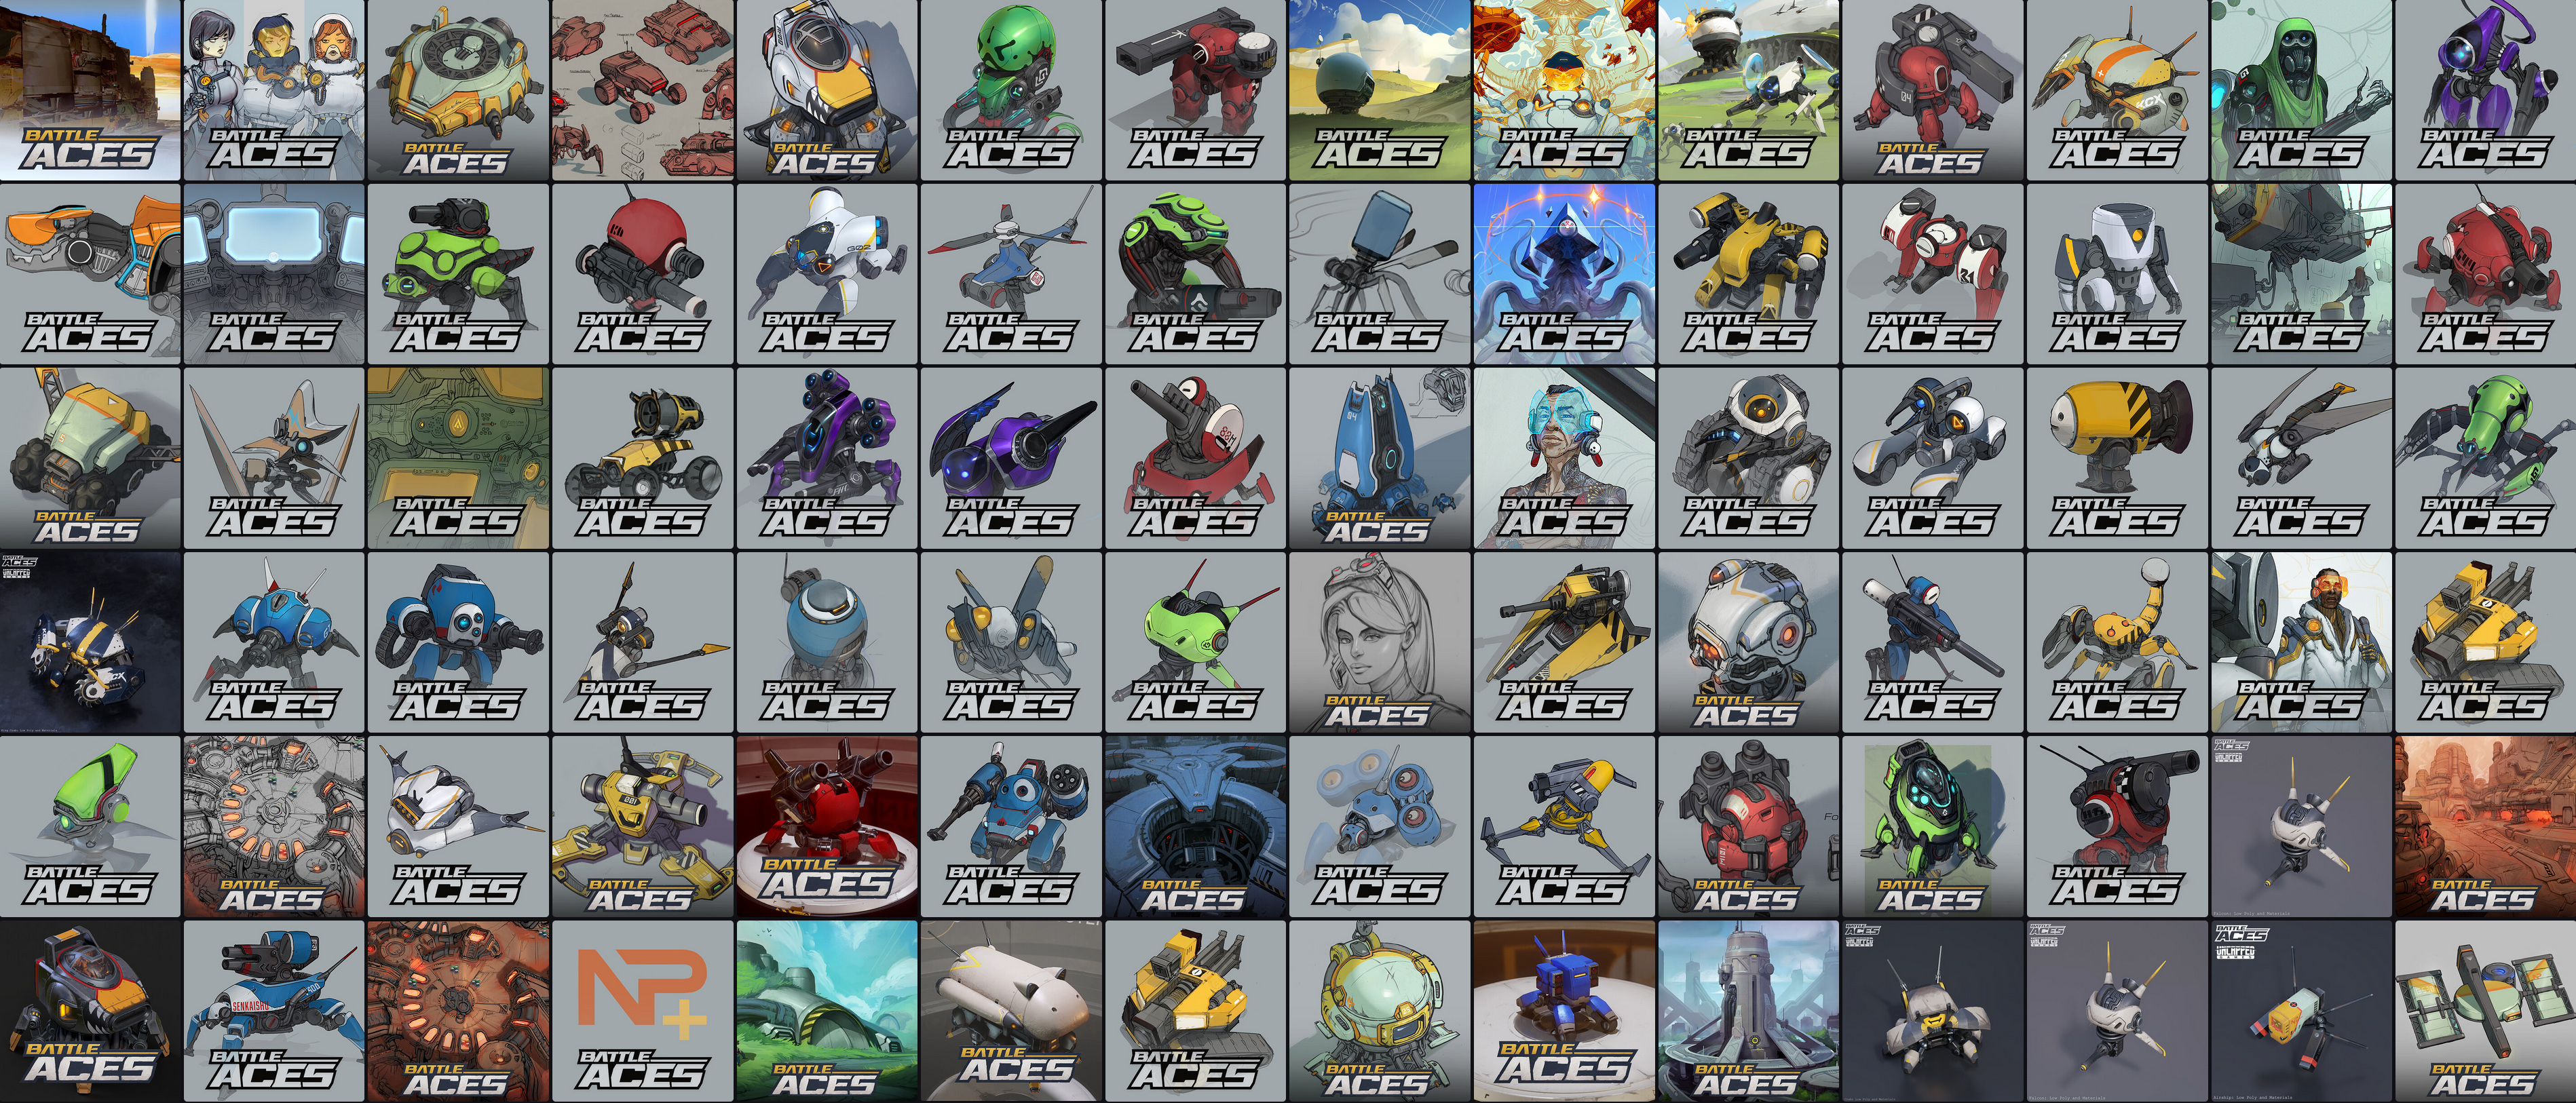
If you’re looking for more or want to help out with numbers, take a look at the post about this project on my ArtStation, or just check out all the Battle Aces art there. If you’re into socials, I’ve got a Twitter and just spun up a BlueSky.
Since you made it to the end, here’s a bonus: a low poly/low rez version I did in late 2023!

Leave a comment